
Glossary- Letter P
Small technical details can have a big impact on the finished result.
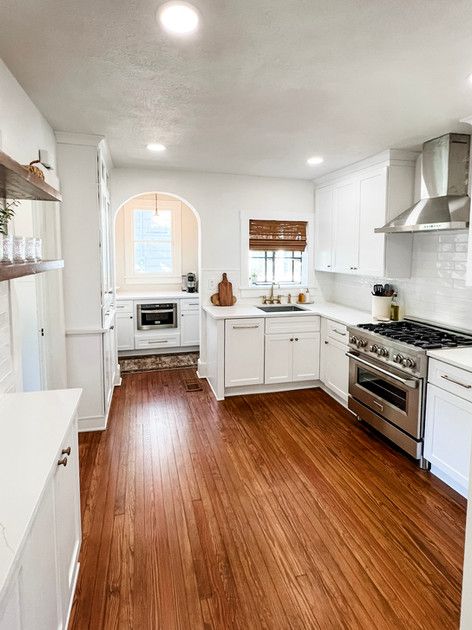
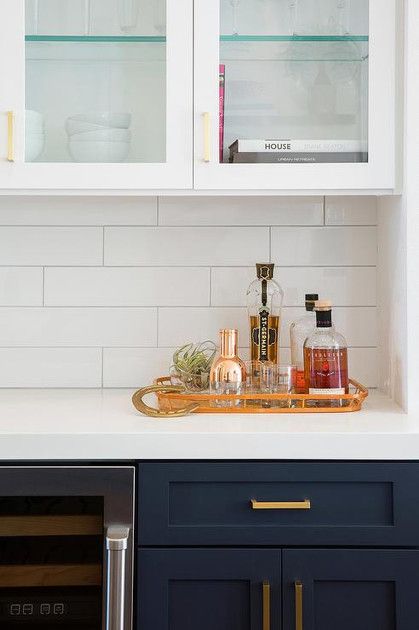
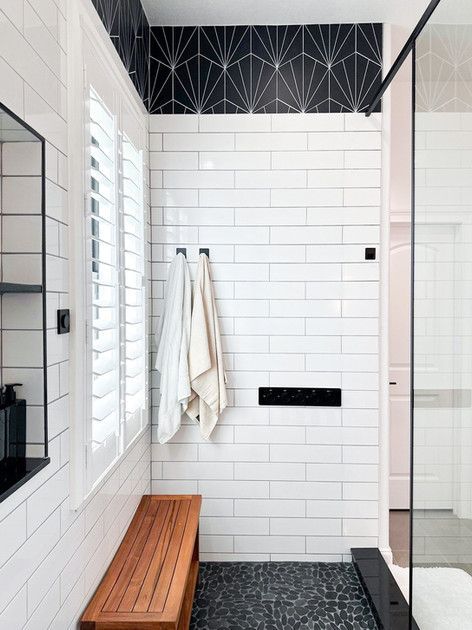
Letter P explores terminology related to edge profiles, engineered materials, and installation details that influence both appearance and performance.
-
Paint Sheen
Paint Sheen
Definition
Paint sheen refers to the amount of light a dried paint surface reflects. It affects not only how a color appears, but also how durable, washable, and moisture-resistant the finished surface will be. Common sheen levels range from flat or matte, which reflects very little light, to high-gloss, which creates a highly reflective finish.
In kitchen, bathroom, cabinetry, and whole-home remodeling, sheen selection is an important design and performance decision. Lower-sheen paints help disguise minor wall imperfections and create a soft, sophisticated appearance, while higher-sheen paints are easier to clean and often perform better on trim, doors, cabinets, and other frequently touched surfaces.
The exact appearance of a sheen varies by manufacturer, paint line, color, lighting, and application method. A satin finish from one product line may appear closer to eggshell or semi-gloss in another, so samples should be evaluated in the actual room whenever possible.
Common Applications
Interior walls
Bathroom walls and ceilings
Kitchen walls
Cabinet doors and drawer fronts
Baseboards and crown molding
Interior doors
Exterior siding and trim
Laundry rooms
Commercial corridors
Built-in shelving and millwork
Common Types
Flat
Matte
Eggshell
Satin
Pearl
Semi-Gloss
Gloss
High-Gloss
Advantages
Allows durability to be matched to the room
Higher sheens are easier to wipe clean
Lower sheens soften glare and hide imperfections
Can highlight architectural trim and millwork
Helps create visual contrast even within one color
Moisture-resistant options are available
Supports both traditional and modern design styles
Disadvantages
Higher sheens can reveal dents, waves, and poor surface preparation
Lower sheens may be harder to clean
Touch-ups may flash or appear uneven
Color can look lighter or darker depending on sheen
Glossy finishes require careful application
Product terminology varies between manufacturers
When to Choose Paint Sheen
Paint Sheen may be an excellent choice when:
Flat or matte for low-traffic ceilings and walls where a soft appearance is desired
Eggshell or satin for living areas, kitchens, bathrooms, and frequently used rooms
Semi-gloss for trim, doors, and moisture-prone surfaces
Gloss or high-gloss for specialty millwork, furniture-style cabinetry, or dramatic accents
Pristine Pro Tip 💡
Do not select sheen from a tiny paper chip alone. Apply a real paint sample to the wall or a large sample board and view it during the day and at night. Natural light, recessed lighting, and undercabinet lighting can each change how reflective the finish appears.
Common Mistake ❌
A common mistake is assuming that a shinier finish is always more durable and therefore always better. Excessive sheen can make drywall imperfections, patching, roller marks, and uneven texture far more visible. Another mistake is using ordinary flat wall paint in a high-humidity bathroom instead of a washable, moisture-resistant product designed for that environment.
Designer Insight 🎨
Using different sheens in the same color can create understated depth. For example, matte walls paired with satin trim or semi-gloss cabinetry create contrast without introducing another color. In luxury interiors, this approach produces a layered, intentional appearance while maintaining a restrained palette.
Florida Rating 🌴
⭐⭐⭐⭐⭐ Excellent
In Florida, washable and moisture-resistant sheens are especially valuable in kitchens, bathrooms, laundry rooms, and exterior applications. High humidity and frequent air-conditioning can expose surfaces to condensation and repeated cleaning, so product quality and proper ventilation matter as much as sheen selection.
Maintenance Level
⭐⭐ Easy
Dust painted surfaces regularly and clean with a soft cloth or non-abrasive sponge. Use mild soap and water when permitted by the manufacturer. Avoid aggressive scrubbing on flat finishes, and keep leftover labeled paint for future touch-ups.
Related Terms
Interior Painting
Exterior Painting
Primer
Paint Grade Cabinet
Painted Cabinet
Cabinet Painting
Drywall Finish
Trim
Crown Molding
Moisture-Resistant Paint
-
Painted Cabinet
Painted Cabinet
Definition
A painted cabinet is a cabinet finished with an opaque coating that covers the natural color and most of the grain pattern of the underlying wood or engineered material. Painted cabinetry is one of the most popular choices in kitchen, bathroom, laundry room, mudroom, and built-in storage design because it offers a clean, customizable appearance.
Painted cabinets may be manufactured with solid hardwood frames, hardwood doors, medium-density fiberboard (MDF) center panels, plywood cabinet boxes, furniture board components, or a combination of materials. Maple, poplar, and paint-grade hardwoods are commonly used because they provide a relatively smooth surface, while MDF is often selected for painted door panels because it remains stable and does not display wood grain through the finish.
A quality painted cabinet finish typically involves careful sanding, priming, multiple finish coats, and controlled curing. Factory-applied finishes are often sprayed and cured under controlled conditions, while on-site cabinet painting requires extensive preparation, masking, cleaning, and product selection to achieve a durable result.
Common Applications
Kitchen cabinetry
Bathroom vanities
Laundry room cabinets
Mudroom storage
Built-in bookcases
Home offices
Wet bars
Entertainment centers
Pantry cabinetry
Commercial millwork
Common Types
Factory-finished painted cabinet
Custom shop-finished cabinet
Site-painted new cabinet
Professionally refinished existing cabinet
Paint-grade cabinet
Two-tone painted cabinet
Glazed painted cabinet
High-gloss painted cabinet
Advantages
Available in nearly unlimited colors
Creates a clean and cohesive appearance
Works with traditional, transitional, coastal, and modern styles
Can visually brighten a room
Allows older cabinetry to be updated when structurally suitable
Pairs well with wood accents and stone countertops
Minor color changes can transform the entire space
Disadvantages
Chips and wear can be more visible than on stained wood
Hairline movement may appear at wood joints
Grease and hand oils show on some colors
Poor preparation can lead to peeling or adhesion failure
Touch-up color and sheen may not match perfectly
Dark painted finishes can show dust and fingerprints
When to Choose Painted Cabinet
Painted Cabinet may be an excellent choice when:
A light, consistent color is preferred
The design calls for white, cream, gray, green, blue, or another opaque finish
Existing cabinet boxes are sound enough for professional refinishing
A two-tone kitchen is desired
Wood grain would compete with other finishes in the room
Pristine Pro Tip 💡
For new painted cabinetry, ask what materials are used in the doors, frames, panels, and boxes—not just what color is shown on the sample. A well-built cabinet with a properly cured finish will outperform a lower-quality cabinet even when both look similar in a showroom.
Common Mistake ❌
The biggest mistake is painting cabinets as though they were ordinary walls. Cabinet surfaces collect grease, cleaning residue, wax, and hand oils. Skipping degreasing, sanding, adhesion primer, or proper curing can cause peeling and premature wear. Another mistake is reinstalling doors and hardware before the finish has hardened sufficiently.
Designer Insight 🎨
Painted cabinetry provides an ideal foundation for layered finishes. Warm white perimeter cabinets can be paired with a natural wood island, while deep green or navy cabinetry can be balanced with light countertops and brushed brass hardware. The undertone of the paint should coordinate with flooring, countertops, backsplash, and lighting.
Florida Rating 🌴
⭐⭐⭐⭐ Very Good
Painted cabinets perform well in Florida homes when humidity is controlled and the finish is properly applied. Air-conditioning, ventilation, and prompt repair of plumbing leaks help limit swelling, joint movement, and finish deterioration. Moisture-resistant materials are especially important near sinks, dishwashers, and bathroom vanities.
Maintenance Level
⭐⭐⭐ Moderate
Wipe spills promptly with a soft damp cloth, use mild non-abrasive cleaners, and avoid soaking cabinet edges. Periodically tighten hardware and touch up chips with the approved product. Avoid hanging wet towels over doors or allowing steam to collect on cabinet surfaces.
Related Terms
Cabinet Painting
Paint Grade Cabinet
Cabinet Door
Cabinet Box
MDF
Plywood Cabinet Box
Shaker Cabinet
Stained Cabinet
Cabinet Refacing
Soft-Close Hinge
-
Panel-Ready Appliance
Panel-Ready Appliance
Definition
A panel-ready appliance is designed to accept a custom cabinet panel on its front so the appliance visually blends with surrounding cabinetry. Instead of displaying a standard stainless steel, black, or white appliance face, the visible front is finished with a panel that matches the cabinet door style, color, and hardware.
Panel-ready options are commonly available for refrigerators, freezers, dishwashers, beverage centers, wine refrigerators, refrigerator drawers, freezer drawers, and occasionally specialty ventilation or coffee appliances. They are especially popular in luxury kitchens, sculleries, butler's pantries, wet bars, and open-concept homes where homeowners want appliances to recede visually.
Successful installation requires close coordination between appliance specifications, cabinet design, panel thickness, hinge clearances, ventilation requirements, electrical or plumbing connections, and hardware placement. Panel-ready does not mean that the decorative panel is included; the matching panel is normally produced by the cabinet manufacturer or custom millwork shop.
Common Applications
Built-in refrigerators
Column refrigerators and freezers
Dishwashers
Beverage centers
Wine refrigerators
Refrigerator drawers
Freezer drawers
Ice makers
Butler's pantries
Luxury kitchen remodels
Common Types
Fully integrated refrigerator
Panel-ready dishwasher
Refrigerator column
Freezer column
Undercounter beverage unit
Panel-ready ice maker
Integrated refrigerator drawer
Overlay panel appliance
Advantages
Creates a seamless custom appearance
Reduces visual clutter
Allows appliances to blend into cabinetry
Works well in open-concept homes
Supports furniture-style kitchen design
Can make smaller kitchens feel calmer and more cohesive
Offers flexibility in cabinet color and door style
Disadvantages
Usually costs more than standard appliances
Requires custom panels and precise installation
Replacement models may not match existing openings
Door panels add weight and must meet specifications
Ventilation clearances are critical
Appliances can be less obvious to guests
Long lead times may affect the project schedule
When to Choose Panel-Ready Appliance
Panel-Ready Appliance may be an excellent choice when:
A fully integrated or luxury kitchen appearance is desired
The kitchen is visible from major living spaces
Cabinetry is custom or semi-custom and can supply matching panels
The homeowner prefers minimal stainless steel
A scullery or pantry is designed to look like built-in furniture
Pristine Pro Tip 💡
Select the exact appliance model before cabinet drawings are finalized. The cabinet designer needs the manufacturer's current installation specifications, including panel dimensions, toe-kick requirements, hinge swing, handle clearances, ventilation, and utility locations.
Common Mistake ❌
A common mistake is assuming all panel-ready appliances use the same panel size or installation method. Even models with similar dimensions can require different reveals, hinge allowances, ventilation paths, and mounting hardware. Ordering cabinetry before confirming the final appliance model can result in costly field modifications.
Designer Insight 🎨
Panel-ready appliances are most convincing when panel proportions align with the surrounding cabinet doors and drawers. On tall refrigerator columns, designers may divide the visual paneling to echo adjacent cabinetry while still following the appliance manufacturer's structural requirements.
Florida Rating 🌴
⭐⭐⭐⭐⭐ Excellent
Panel-ready appliances work well in Florida homes, especially in open-concept kitchens and luxury entertaining spaces. Proper ventilation and air-conditioning remain essential because integrated appliances are enclosed more tightly than freestanding models and must dissipate heat according to manufacturer requirements.
Maintenance Level
⭐⭐⭐ Moderate
Clean the cabinet panel according to the cabinetry manufacturer's instructions and maintain the appliance according to its manual. Inspect door alignment, hinges, ventilation openings, water lines, filters, and seals. Service access should remain unobstructed.
Related Terms
Built-In Refrigerator
Appliance Panel
Custom Cabinetry
Refrigerator Column
Freezer Column
Dishwasher
Beverage Center
Cabinet End Panel
Overlay Cabinet
Integrated Appliance
-
Pantry Cabinet
Pantry Cabinet
Definition
A pantry cabinet is a tall storage cabinet designed to hold food, small appliances, cookware, serving pieces, cleaning supplies, or other household items. Unlike a walk-in pantry, a pantry cabinet is incorporated directly into the kitchen or adjacent cabinetry and typically extends from the floor toward the ceiling.
Pantry cabinets are available in many widths, depths, heights, and internal configurations. They may contain fixed shelves, adjustable shelves, roll-out trays, drawers, door-mounted racks, appliance shelves, broom storage, or specialized pull-out mechanisms. Tall pantry cabinets can be used individually or grouped into a full storage wall.
Because a pantry cabinet uses vertical space efficiently, it is especially valuable in kitchens without a dedicated pantry room. Careful interior planning is essential so frequently used items remain reachable and deep shelves do not become cluttered or inaccessible.
Common Applications
Food storage
Small appliance storage
Baking supplies
Bulk household goods
Cleaning supply storage
Broom and utility storage
Cookware and serving pieces
Coffee station storage
Laundry room storage
Kitchen storage walls
Common Types
Single-door pantry cabinet
Double-door pantry cabinet
Utility pantry
Oven and pantry combination
Pantry with roll-out trays
Pantry pull-out
Appliance pantry
Broom pantry
Floor-to-ceiling pantry
Shallow pantry cabinet
Advantages
Maximizes vertical storage
Can replace the need for a separate pantry room
Keeps food and appliances concealed
Available with highly customizable interiors
Creates a built-in finished appearance
Can be located close to food-preparation zones
Works in both small and large kitchens
Disadvantages
Deep shelves can make items difficult to reach
Tall doors may require careful alignment
Can reduce countertop space if poorly located
Interior accessories increase cost
Heavy pull-outs require quality hardware
May feel bulky in a narrow kitchen
Upper shelves can be difficult to access
When to Choose Pantry Cabinet
Pantry Cabinet may be an excellent choice when:
The home lacks a walk-in pantry
A full-height storage wall is planned
Food storage needs to remain within the kitchen
Small appliances need to be concealed
Vertical space is available but floor space is limited
Pristine Pro Tip 💡
Plan the pantry interior around what your household actually stores. Measure cereal boxes, countertop appliances, bulk containers, pet-food bins, paper goods, and serving pieces before selecting shelf spacing or pull-out accessories.
Common Mistake ❌
A common mistake is ordering a deep pantry with only fixed shelves. Items placed at the back quickly become forgotten, and the cabinet becomes difficult to organize. Adjustable shelves, interior drawers, or roll-out trays usually improve access and make the storage more useful.
Designer Insight 🎨
A pantry cabinet can become part of an elegant storage wall by aligning it with refrigerator panels, wall ovens, or integrated appliances. Matching end panels, crown molding, and toe kicks help the tall units read as intentional architecture rather than separate boxes.
Florida Rating 🌴
⭐⭐⭐⭐⭐ Excellent
Pantry cabinets are ideal for Florida homes because they keep dry goods protected within conditioned living space. In humid climates, food should still be stored in sealed containers, and cabinetry should be kept away from plumbing leaks, exterior moisture, and poorly ventilated garages.
Maintenance Level
⭐⭐ Easy
Wipe shelves periodically, discard expired food, and inspect for spills or pests. Avoid overloading roll-out hardware, keep wet items out of the cabinet, and adjust hinges or slides when necessary.
Related Terms
Pantry Pull-Out
Pull-Out Shelves
Tall Cabinet
Appliance Garage
Butler's Pantry
Walk-In Pantry
Custom Cabinetry
Roll-Out Tray
Broom Cabinet
Kitchen Storage
-
Pantry Pull-Out
Pantry Pull-Out
Definition
A pantry pull-out is a tall storage system that slides forward from a cabinet, allowing the user to view and access stored items from one or both sides. It may be a complete narrow cabinet mechanism, a series of independently sliding trays, or an interior frame attached to the cabinet door.
Pantry pull-outs are commonly used for canned goods, spices, condiments, baking ingredients, snacks, and other dry food. Because the contents move outward rather than remaining hidden at the back of a deep cabinet, a pull-out can make narrow spaces far more functional.
The performance of a pantry pull-out depends heavily on the quality of the slides, weight capacity, cabinet construction, installation accuracy, and the way stored weight is distributed. Full-extension, soft-close hardware is preferred for most modern remodeling projects.
Common Applications
Narrow pantry cabinets
Food storage
Spice storage
Canned goods
Baking supplies
Snack storage
Condiments and oils
Small kitchen layouts
Cabinet filler conversions
Custom storage walls
Common Types
Full-height pull-out pantry
Door-mounted pull-out pantry
Individual roll-out trays
Wire basket pantry pull-out
Wood tray pull-out
Soft-close pantry mechanism
Tandem pantry system
Narrow filler pull-out
Advantages
Provides full visibility of stored items
Uses narrow cabinet space efficiently
Reduces forgotten items at the back
Improves organization
Can be accessed from both sides on some models
Supports soft-close operation
Creates a clean concealed storage solution
Disadvantages
Quality mechanisms can be expensive
Weight capacity must be respected
Tall units can feel heavy when fully loaded
Low-quality hardware may rack or bind
Requires precise cabinet installation
Interior width is reduced by the mechanism
Repairs may require specialty replacement parts
When to Choose Pantry Pull-Out
Pantry Pull-Out may be an excellent choice when:
A narrow full-height space needs useful storage
Deep fixed pantry shelves are difficult to access
The homeowner wants organized food storage
A cabinet filler area can be converted into functional storage
A compact kitchen needs maximum efficiency
Pristine Pro Tip 💡
Choose the pull-out mechanism before the cabinet is ordered. Cabinet dimensions, door attachment, clear opening width, hinge requirements, and weight capacity must all match the selected hardware.
Common Mistake ❌
A common mistake is loading heavy bottles and canned goods unevenly or exceeding the manufacturer's weight rating. This can cause sagging, difficult operation, premature slide failure, or cabinet damage. Heavy items should be distributed low and evenly.
Designer Insight 🎨
A narrow pantry pull-out can visually match surrounding cabinet doors while providing highly specialized storage. When placed beside a refrigerator or tall oven cabinet, it can also help balance the elevation and make otherwise unusable filler space productive.
Florida Rating 🌴
⭐⭐⭐⭐⭐ Excellent
Pantry pull-outs perform well in Florida's conditioned interiors. Because humidity can affect food packaging and cabinet materials, dry goods should be sealed and spills should be cleaned promptly. Quality coated metal or finished wood components resist everyday kitchen moisture.
Maintenance Level
⭐⭐ Easy
Keep tracks free of crumbs, wipe trays with a mild cleaner, avoid forcing the unit, and periodically check mounting screws. Do not lubricate slides unless the hardware manufacturer specifically recommends it.
Related Terms
Pantry Cabinet
Pull-Out Shelves
Roll-Out Tray
Cabinet Organizer
Full-Extension Drawer Slide
Soft-Close Hardware
Spice Rack
Tall Cabinet
Cabinet Filler
Kitchen Storage
-
Peninsula Kitchen
Peninsula Kitchen
Definition
A peninsula kitchen includes a countertop and cabinet section that extends from a wall or existing cabinet run while remaining connected on one end. It provides many of the functional benefits of a kitchen island but does not require open floor space on all four sides.
Peninsulas can add seating, storage, countertop workspace, a sink, a cooktop, electrical outlets, or a visual boundary between the kitchen and adjacent living or dining areas. They are frequently used in U-shaped, L-shaped, galley, and open-concept layouts.
A well-designed peninsula must maintain comfortable circulation and avoid creating a narrow bottleneck at the kitchen entrance. Countertop overhangs, appliance doors, seating clearances, and work-triangle relationships should all be evaluated before finalizing the design.
Common Applications
Small and medium kitchens
Open-concept layouts
Kitchen seating
Breakfast bars
Additional storage
Sink locations
Cooktop locations
Room separation
Condo kitchens
Kitchen renovations without island space
Common Types
Seating peninsula
Storage peninsula
Waterfall peninsula
Raised-bar peninsula
Single-level peninsula
Appliance peninsula
Prep peninsula
Decorative room-divider peninsula
Advantages
Adds workspace and storage
Requires less open floor area than an island
Can provide casual seating
Helps define the kitchen zone
May reuse existing utility locations
Works well in compact layouts
Can create a serving or entertaining surface
Disadvantages
Can create a traffic bottleneck
May make the kitchen feel enclosed
Corner cabinets can be difficult to access
Seating clearances may conflict with walkways
Less flexible than a freestanding island
Poorly proportioned peninsulas can interrupt the work flow
May limit future layout changes
When to Choose Peninsula Kitchen
Peninsula Kitchen may be an excellent choice when:
There is not enough clearance for a true island
Additional counter space is needed
The kitchen benefits from separation without a full wall
Existing plumbing or electrical connections can be incorporated
A casual seating area is desired
Pristine Pro Tip 💡
Before committing to a peninsula, mark its full footprint and seating overhang on the floor with painter's tape. Open nearby appliance doors and walk through the space to confirm that circulation remains comfortable.
Common Mistake ❌
A common mistake is making the peninsula too long or too deep for the available room. This can narrow the entry, trap users inside the work area, and create conflicts with refrigerators, dishwashers, or seating. More countertop is not beneficial when it compromises movement.
Designer Insight 🎨
Single-level peninsulas usually look more current and provide a larger uninterrupted work surface than older raised-bar designs. Waterfall ends, decorative panels, furniture-style legs, or contrasting cabinet colors can give the peninsula a finished focal-point appearance.
Florida Rating 🌴
⭐⭐⭐⭐⭐ Excellent
Peninsula kitchens are practical in Florida homes, condominiums, and townhomes where open floor plans are common but room dimensions may not support a large island. Durable countertop materials and moisture-resistant cabinetry are important near sinks and exterior doors.
Maintenance Level
⭐⭐ Easy
Maintain the countertop, cabinetry, seating hardware, outlets, plumbing fixtures, and appliances according to their individual requirements. Avoid using unsupported overhangs as seating or placing excessive weight on decorative panels.
Related Terms
Kitchen Island
L-Shaped Kitchen
U-Shaped Kitchen
Galley Kitchen
Countertop Overhang
Waterfall Edge
Breakfast Bar
Open Concept
Base Cabinet
Kitchen Work Triangle
-
Pendant Lighting
Pendant Lighting
Definition
Pendant lighting consists of one or more light fixtures suspended from the ceiling by a cord, stem, rod, chain, or cable. Pendants provide focused illumination and decorative impact, making them especially popular above kitchen islands, peninsulas, sinks, dining tables, vanities, and bar areas.
Pendant fixtures range from small minimalist cylinders to oversized sculptural designs. They may provide direct task lighting, diffused ambient lighting, or primarily decorative illumination depending on the shade, bulb, placement, and light distribution.
Proper pendant selection requires attention to fixture scale, ceiling height, spacing, hanging height, brightness, color temperature, dimming compatibility, sight lines, and coordination with other lighting layers. Electrical box locations should be planned before drywall and ceiling finishes are completed whenever possible.
Common Applications
Kitchen islands
Kitchen peninsulas
Dining tables
Breakfast nooks
Bathroom vanities
Bar areas
Kitchen sinks
Stairwells
Entry foyers
Commercial reception areas
Common Types
Mini pendant
Multi-light pendant
Linear pendant
Globe pendant
Dome pendant
Lantern pendant
Drum pendant
Cluster pendant
Integrated LED pendant
Adjustable pendant
Advantages
Provides task and decorative lighting
Creates a strong design focal point
Available in many sizes and styles
Can visually define an island or dining area
Dimmable options support multiple moods
Helps layer lighting throughout the room
Fixtures can coordinate with hardware and plumbing finishes
Disadvantages
Incorrect scale can overwhelm or underwhelm the room
Poor placement can obstruct views
Some fixtures create glare
Decorative shades may reduce usable light
High ceilings may require custom extensions
Cleaning can be difficult over tall islands
Electrical relocation may require ceiling repair
When to Choose Pendant Lighting
Pendant Lighting may be an excellent choice when:
A kitchen island or peninsula needs focused illumination
The room needs a decorative statement
A dining or bar area should be visually defined
Layered lighting is part of the design plan
Ceiling height and sight lines support suspended fixtures
Pristine Pro Tip 💡
Choose pendants based on the entire island and room—not only the fixture's individual diameter. Two larger pendants may look more balanced than three small fixtures, while a single linear pendant can create a cleaner modern composition.
Common Mistake ❌
A common mistake is hanging pendants too low, too high, or too close together. Fixtures should illuminate the surface without blocking conversation or views across the room. Another mistake is using decorative pendants as the kitchen's only source of light.
Designer Insight 🎨
Pendant lighting is an opportunity to repeat or intentionally contrast finishes. Brushed brass can warm white cabinetry, matte black can add graphic definition, and glass pendants can preserve open sight lines. The fixture's shape should complement—not compete with—cabinet lines and architectural details.
Florida Rating 🌴
⭐⭐⭐⭐⭐ Excellent
Pendant lighting is well suited for Florida homes, where open-concept kitchens and bright natural light are common. Dimming allows fixtures to transition from daytime task lighting to evening entertaining. In coastal environments, use finishes and components appropriate for the installation location.
Maintenance Level
⭐⭐ Easy
Dust shades and bulbs regularly, turn off power before deeper cleaning, and follow the manufacturer's instructions for glass, metal, fabric, or natural materials. Replace lamps with the correct wattage and type, and verify dimmer compatibility.
Related Terms
Kitchen Island
Perimeter Lighting
Recessed Lighting
Task Lighting
Ambient Lighting
Accent Lighting
Chandelier
Color Temperature
Dimmer Switch
Electrical Rough-In
-
Penny Tile
Penny Tile
Definition
Penny tile is a small round mosaic tile traditionally measuring approximately three-quarters of an inch to one inch in diameter, although modern versions are available in larger sizes and related shapes. Individual pieces are mounted on mesh-backed sheets to simplify installation.
Penny tile may be manufactured from porcelain, ceramic, glass, marble, metal, or other materials. It is commonly used on shower floors, bathroom floors, backsplashes, niches, feature walls, laundry rooms, and commercial spaces. The many grout joints create texture and can provide useful slip resistance on wet floors when the tile is properly selected.
Because penny tile contains numerous small pieces and grout lines, substrate preparation and sheet alignment are critical. Irregular spacing, visible sheet lines, inconsistent grout depth, or poorly centered layouts can be especially noticeable after installation.
Common Applications
Shower floors
Bathroom floors
Kitchen backsplashes
Shower niches
Feature walls
Laundry rooms
Powder rooms
Pool waterlines
Commercial restrooms
Curved surfaces
Common Types
Porcelain penny tile
Ceramic penny tile
Glass penny tile
Marble penny tile
Metal penny tile
Matte penny tile
Glossy penny tile
Unglazed penny mosaic
Large penny round
Mixed-color penny mosaic
Advantages
Conforms well to sloped or curved surfaces
Many grout joints can improve traction
Available in many colors and materials
Creates a classic or playful design detail
Works in small spaces
Can be used for patterns and borders
Mesh sheets simplify handling
Disadvantages
Large amount of grout requires more cleaning
Sheet lines may show if installation is poor
Natural stone versions may require sealing
Small pieces demand a very flat substrate
Labor can be higher than for larger tile
Glossy versions may be slippery
Busy patterns can overwhelm a small room
When to Choose Penny Tile
Penny Tile may be an excellent choice when:
A shower floor needs tile that follows multiple slopes
A vintage, transitional, or graphic look is desired
A small area needs visual texture
A niche or backsplash needs a detailed accent
Curved surfaces make large-format tile impractical
Pristine Pro Tip 💡
Dry-lay several sheets before installation and stagger or interlock sheet edges when the product allows. The installer should adjust individual pieces where needed so the finished surface does not reveal obvious square sheet outlines.
Common Mistake ❌
A common mistake is choosing penny tile solely for appearance without confirming that it is approved for the intended floor or wet-area application. Another mistake is using a grout color with too much contrast when sheet spacing is inconsistent, which can make every alignment issue more visible.
Designer Insight 🎨
Penny tile can feel timeless in white, black, soft gray, or marble, while saturated colors create a stronger statement. Grout color dramatically changes the effect: matching grout creates a calmer field, while contrasting grout emphasizes the circular pattern.
Florida Rating 🌴
⭐⭐⭐⭐⭐ Excellent
Porcelain penny tile is an excellent choice for Florida bathrooms and showers because it resists moisture and accommodates shower-floor slopes. Proper waterproofing, drainage, grout selection, and ventilation remain essential in the state's humid climate.
Maintenance Level
⭐⭐⭐ Moderate
Sweep or rinse regularly and clean grout with non-abrasive, manufacturer-approved products. Seal cementitious grout or natural stone when required. Inspect wet-area grout and perimeter caulk periodically and repair deterioration promptly.
Related Terms
Mosaic Tile
Porcelain Tile
Ceramic Tile
Shower Floor
Grout
Epoxy Grout
Waterproofing Membrane
Tile Sheet
Slip Resistance
Shower Niche
-
Perimeter Countertop
Perimeter Countertop
Definition
A perimeter countertop is the countertop installed along the walls of a kitchen or other room, typically resting on base cabinets around the outer edge of the space. The term distinguishes these surfaces from an island, peninsula, bar, or freestanding worktable countertop.
Perimeter countertops commonly include the sink, cooktop, small-appliance zone, food-preparation areas, and backsplash transition. They may be fabricated from quartz, granite, quartzite, porcelain, solid surface, laminate, butcher block, marble, or other approved materials.
In many designs, the perimeter countertop matches the island. In others, the two surfaces intentionally contrast in color, pattern, thickness, or material. Accurate templating, seam planning, wall preparation, cabinet leveling, appliance clearances, and backsplash coordination are essential for a clean installation.
Common Applications
Kitchen base cabinets
Bathroom vanities
Laundry rooms
Wet bars
Butler's pantries
Home offices
Craft rooms
Commercial break rooms
Utility rooms
Built-in storage
Common Types
Quartz perimeter countertop
Granite perimeter countertop
Quartzite perimeter countertop
Porcelain perimeter countertop
Solid-surface countertop
Laminate countertop
Butcher-block countertop
Marble countertop
Mitered-edge countertop
Standard-thickness countertop
Advantages
Provides continuous wall-side workspace
Supports sinks and cooktops
Can coordinate with backsplash materials
Offers extensive storage below
Available in many materials and price points
Can contrast with an island for visual interest
Creates a finished transition between cabinets and walls
Disadvantages
Walls are rarely perfectly straight
Seams may be required
Appliance and sink cutouts reduce strength
Heavy materials require proper cabinet support
Water can damage vulnerable cabinet areas
Natural stone may require sealing
Replacement often affects backsplash and plumbing
When to Choose Perimeter Countertop
Perimeter Countertop may be an excellent choice when:
Base cabinets are installed along one or more walls
A durable work surface is required around sinks and appliances
The design includes both perimeter and island surfaces
A backsplash will terminate at the countertop
Existing countertop replacement is part of a remodel
Pristine Pro Tip 💡
Finalize the sink, faucet, cooktop, range, wall condition, edge profile, backsplash thickness, and overhangs before templating. Small changes after fabrication can affect cutouts, seams, clearances, and installation.
Common Mistake ❌
A common mistake is selecting the countertop independently from the backsplash and cabinet undertones. Another is assuming walls are straight enough for a perfectly uniform backsplash joint. Professional templating and careful scribing help accommodate real-world conditions.
Designer Insight 🎨
Using a quieter perimeter countertop with a more dramatic island can create balance. The perimeter often contains numerous appliances, outlets, and backsplash details, so a restrained pattern may keep the room from feeling visually crowded.
Florida Rating 🌴
⭐⭐⭐⭐⭐ Excellent
Quartz, granite, quartzite, and porcelain are popular perimeter countertop choices in Florida because they tolerate frequent use and conditioned indoor humidity. Proper sink sealing and prompt attention to plumbing leaks are especially important for protecting cabinetry below.
Maintenance Level
⭐⭐ Easy to Moderate
Care depends on the material. Clean spills promptly, use cutting boards and trivets, maintain caulk at walls and sinks, and reseal porous stone when required. Inspect plumbing connections and sink attachments periodically.
Related Terms
Kitchen Island
Countertop
Backsplash
Countertop Seam
Countertop Edge
Quartz Countertop
Granite Countertop
Porcelain Countertop
Sink Cutout
Countertop Template
-
Perimeter Lighting
Perimeter Lighting
Definition
Perimeter lighting is illumination positioned around the outer edges of a room, ceiling, cabinet layout, mirror, architectural feature, or outdoor area. In kitchen and bathroom remodeling, the term often refers to recessed lights near walls and cabinets, undercabinet lighting along the room's perimeter, cove lighting, toe-kick lighting, or concealed LED channels that outline a space.
Perimeter lighting helps reduce dark edges, improve visibility at countertops and walls, emphasize architectural lines, and create a more balanced layer of illumination. It is typically used with central fixtures, pendants, vanity lights, and task lighting rather than as the only light source.
Successful design depends on fixture placement, beam spread, ceiling height, cabinet depth, reflective surfaces, color temperature, dimming, and coordination with framing, ductwork, plumbing, and electrical rough-ins.
Common Applications
Kitchen ceiling layouts
Undercabinet lighting
Bathroom ceilings
Cove lighting
Toe-kick lighting
Mirror backlighting
Tray ceilings
Hallways
Outdoor lanais
Commercial display areas
Common Types
Perimeter recessed lighting
LED tape lighting
Cove lighting
Undercabinet lighting
Toe-kick lighting
Wall-wash lighting
Linear channel lighting
Perimeter accent lighting
Advantages
Reduces dark edges and shadows
Improves countertop visibility
Highlights architecture and cabinetry
Supports layered lighting design
Can make rooms feel larger
Dimmable systems create multiple moods
Concealed LED systems provide a clean appearance
Disadvantages
Poor spacing can create bright spots or scalloping
Requires careful rough-in planning
Low-quality LEDs may have inconsistent color
Drivers and transformers need accessible locations
Glare can occur on polished surfaces
Too many fixtures can make a ceiling feel cluttered
Retrofitting may require drywall repair
When to Choose Perimeter Lighting
Perimeter Lighting may be an excellent choice when:
The room needs more even light distribution
Cabinet runs create shadowed work surfaces
Architectural features should be emphasized
A layered lighting plan is desired
Indirect evening lighting would improve comfort
Pristine Pro Tip 💡
Plan lighting from the work surfaces upward. Recessed fixtures should illuminate countertops rather than the tops of users' heads, and undercabinet lights should be placed toward the front of the cabinet to reduce glare on reflective backsplashes.
Common Mistake ❌
A common mistake is laying out recessed lights in a visually perfect ceiling grid without considering cabinets, counters, mirrors, and tasks below. Another mistake is mixing color temperatures that make one area appear yellow and another blue.
Designer Insight 🎨
Perimeter lighting can visually float cabinetry, outline tray ceilings, or wash textured tile with light. The most successful installations conceal the source and reveal the material, allowing illumination to support the design without drawing attention to individual diodes or fixtures.
Florida Rating 🌴
⭐⭐⭐⭐⭐ Excellent
Perimeter lighting is especially useful in Florida's open-plan homes, where one room must transition between bright daytime use and softer evening entertaining. For exterior or damp locations, fixtures, channels, and electrical components must be rated for the environment.
Maintenance Level
⭐⭐ Easy
Dust lenses and channels, replace compatible lamps or LED components when needed, and keep drivers accessible. Avoid painting over fixtures. For integrated systems, retain product information so replacement parts can be matched later.
Related Terms
Recessed Lighting
Undercabinet Lighting
Task Lighting
Ambient Lighting
Accent Lighting
LED Tape Light
Cove Lighting
Pendant Lighting
Dimmer Switch
Color Temperature
-
Permits
Permits
Definition
Permits are official authorizations issued by a local building department or other governing authority before certain construction, remodeling, electrical, plumbing, mechanical, structural, or site work may legally begin. The permit process is intended to confirm that regulated work is reviewed and inspected for compliance with applicable codes and local requirements.
Whether a remodeling project requires a permit depends on the location, scope of work, property type, and authority having jurisdiction. Cosmetic work such as painting or replacing certain finishes may not require a permit, while structural changes, new circuits, plumbing relocations, window or door replacements, and mechanical work frequently do.
Permit requirements can also be affected by condominiums, homeowners associations, historic districts, flood zones, product approvals, and licensed-trade requirements. Because rules vary and can change, the correct determination should come from the local building department and appropriately licensed professionals—not assumptions based on another city or project.
Common Applications
Structural alterations
Electrical work
Plumbing changes
Mechanical or HVAC work
Window and exterior door replacement
Water-heater replacement
Major kitchen remodeling
Major bathroom remodeling
Commercial tenant improvements
Work affecting life-safety systems
Common Types
Building permit
Electrical permit
Plumbing permit
Mechanical permit
Demolition permit
Right-of-way permit
Roofing permit
Window and door permit
Owner-builder permit
Commercial alteration permit
Advantages
Provides documented code review
Creates an inspection record
Helps protect health and safety
May support insurance and resale documentation
Reduces risk of unapproved work
Clarifies contractor and trade responsibilities
Can identify hidden compliance issues before completion
Disadvantages
Adds fees and administrative steps
Reviews and inspections can affect scheduling
Plans or engineering may be required
Corrections may be necessary
Requirements vary by jurisdiction
Unpermitted existing work can complicate a project
Approval does not guarantee workmanship quality
When to Choose Permits
Permits may be an excellent choice when:
The scope includes structural, electrical, plumbing, mechanical, or exterior-envelope work
Local rules specifically require authorization
A licensed trade will perform regulated work
The property is commercial, multifamily, or governed by special requirements
There is any uncertainty about whether the work is exempt
Pristine Pro Tip 💡
Confirm permit requirements during planning—not after demolition begins. Obtain the determination from the authority having jurisdiction, and make sure the project schedule accounts for plan review, product documents, inspections, and possible corrections.
Common Mistake ❌
A common mistake is assuming that a small project never needs a permit or that a contractor's license automatically replaces the permit process. Another mistake is allowing work to proceed under the wrong permit type or without required inspections.
Designer Insight 🎨
Permitting can influence design. Structural openings, window sizes, ventilation, electrical spacing, accessibility, and plumbing locations may be limited or shaped by code requirements. Addressing these conditions early allows the design to remain beautiful while also being buildable and compliant.
Florida Rating 🌴
⭐⭐⭐⭐⭐ Essential When Required
Florida remodeling projects may involve state building-code provisions, local amendments, product approvals, wind-resistance requirements, flood-zone considerations, condominium rules, and licensed-trade requirements. Exact obligations vary by jurisdiction and project scope, so local verification is essential.
Maintenance Level
⭐ Documentation Only
Keep final permits, approved plans, inspection records, notices, product approvals, and closeout documents with the home's permanent records. Confirm that required inspections are completed and that the permit is properly closed.
Related Terms
Building Permit
Building Code
Inspection
Notice of Commencement
Change Order
Electrical Rough-In
Plumbing Rough-In
Structural Engineering
Licensed Contractor
Product Approval
-
Picture Window
Picture Window
Definition
A picture window is a large fixed window designed to provide an expansive view and admit natural light without opening for ventilation. Because it contains no operable sash, a picture window can offer broad uninterrupted glass, clean sight lines, and strong energy performance when properly specified and installed.
Picture windows are commonly used in living rooms, dining rooms, kitchens, stairwells, primary suites, and rooms overlooking lakes, gardens, pools, or other attractive views. They may be installed alone or combined with casement, awning, double-hung, or sliding windows to add ventilation.
Window size, glass type, frame material, solar heat gain, safety glazing, impact requirements, structural opening, water management, and exterior exposure must all be considered. In remodeling, replacement may involve permitting, product approvals, flashing, trim repairs, and interior finish work.
Common Applications
Lake and garden views
Living rooms
Dining rooms
Kitchen breakfast areas
Stairwells
Primary bedrooms
High walls
Contemporary elevations
Window walls
Commercial reception spaces
Common Types
Single picture window
Mulled picture-window unit
Clerestory picture window
Corner picture window
Impact-rated picture window
Low-E picture window
Architectural fixed window
Transom-style fixed window
Advantages
Provides expansive views
Admits abundant natural light
No moving parts to maintain
Can offer strong air and water resistance
Clean modern appearance
Works in large custom sizes
Can be paired with operable windows
Disadvantages
Does not provide ventilation
Large glass areas can increase heat gain
Exterior cleaning may be difficult
Replacement can be costly
Privacy may be limited
Glare can affect screens and finishes
Emergency egress requirements may limit use in some locations
When to Choose Picture Window
Picture Window may be an excellent choice when:
The view is a primary design feature
Ventilation is provided elsewhere
A clean fixed-glass appearance is desired
Natural light is needed high on a wall
Energy-efficient glazing can be selected for the exposure
Pristine Pro Tip 💡
Evaluate the exact orientation of the window. A large west-facing picture window can introduce significant afternoon heat and glare, so glass performance, shading, tint, landscaping, and window treatments should be planned together.
Common Mistake ❌
A common mistake is selecting a picture window based only on size and appearance without evaluating solar heat gain, impact requirements, water management, or cleaning access. Another mistake is replacing an operable bedroom window with fixed glass when egress requirements apply.
Designer Insight 🎨
Picture windows can act like framed artwork. Aligning the glass with a specific outdoor feature—such as a lake, mature tree, courtyard, or pool—creates a deliberate focal point. Minimal trim and large panes suit modern interiors, while divided-light combinations can support traditional architecture.
Florida Rating 🌴
⭐⭐⭐⭐ Very Good
Picture windows can be beautiful in Florida homes, particularly on lakefront and garden-facing properties. Correct glass selection, impact or wind-borne-debris compliance where applicable, flashing, sealants, drainage, and solar control are critical in the state's heat, rain, and severe-weather conditions.
Maintenance Level
⭐⭐ Easy to Moderate
Clean glass and frames with approved products, inspect exterior sealants and drainage paths, and watch for condensation, fogging, leaks, or frame deterioration. Large exterior panes may require professional cleaning.
Related Terms
Casement Window
Awning Window
Impact Window
Low-E Glass
Safety Glass
Transom Window
Window Flashing
Window Replacement
Privacy Glass
Clerestory Window
-
Plywood Cabinet Box
Plywood Cabinet Box
Definition
A plywood cabinet box is a cabinet carcass constructed primarily from layered wood veneer panels bonded with adhesive. The cabinet box forms the structural body of the cabinet and includes the sides, bottom, top or stretchers, back, and internal partitions that support shelves, drawers, doors, countertops, and hardware.
Cabinet-grade plywood is valued for strength, screw-holding ability, dimensional stability, and resistance to sagging. Common thicknesses vary by manufacturer and component, and the visible interior may be finished with wood veneer, laminate, melamine, or a clear protective coating.
The phrase plywood box does not by itself guarantee premium quality. Veneer grade, core construction, panel thickness, joinery, back-panel design, edge treatment, finish quality, and hardware attachment all influence performance. Some well-engineered furniture-board cabinets can perform satisfactorily, while poorly constructed plywood cabinets may still have weak joints or thin backs.
Common Applications
Kitchen cabinets
Bathroom vanities
Laundry room cabinets
Pantry cabinets
Built-in storage
Commercial casework
Island cabinets
Tall utility cabinets
Garage cabinetry
Custom millwork
Common Types
Veneer-core plywood box
Multi-ply cabinet box
Prefinished plywood interior
Maple-veneer plywood box
Birch plywood box
Painted plywood cabinet
Marine-grade specialty plywood
Combination plywood and hardwood cabinet
Advantages
Strong screw-holding ability
Good resistance to sagging
Often lighter than dense furniture board
Performs well for wall cabinets
Can tolerate brief moisture exposure better than many particle products
Supports durable joinery
Available with attractive finished interiors
Disadvantages
Usually costs more than furniture board
Veneer edges require finishing
Quality varies considerably
Can warp if poorly manufactured or stored
Voids may exist in lower-grade cores
Not waterproof
Marketing may overstate minimal plywood content
When to Choose Plywood Cabinet Box
Plywood Cabinet Box may be an excellent choice when:
Long-term durability is a priority
Heavy countertops or storage loads are planned
Cabinets will be frequently used
Wall cabinets need secure fastening
A premium or custom cabinet specification is desired
Pristine Pro Tip 💡
Ask for a written cabinet construction specification. Confirm the material and thickness of the sides, shelves, backs, drawer boxes, and toe-kick components rather than relying only on the phrase all-plywood construction.
Common Mistake ❌
A common mistake is assuming plywood cannot be damaged by water. It is more tolerant than many wood-composite panels, but prolonged leaks can still cause delamination, staining, swelling, mold, and finish failure.
Designer Insight 🎨
Plywood interiors can be finished in maple, birch, walnut, or another veneer to create a refined appearance behind glass doors or inside open cabinets. Edge details and interior color should coordinate with drawer boxes, shelving, and visible hardware.
Florida Rating 🌴
⭐⭐⭐⭐⭐ Excellent
Quality plywood cabinet boxes are a strong choice for Florida kitchens and bathrooms because they provide good structural stability in conditioned interiors. They still require protection from plumbing leaks, standing water, and uncontrolled humidity.
Maintenance Level
⭐⭐ Easy
Keep interiors dry, wipe spills promptly, avoid overloading shelves, and inspect sink bases and dishwasher areas for leaks. Tighten loose hardware and repair damaged finishes before moisture reaches exposed wood layers.
Cabinet Box
Furniture Board
MDF
Cabinet-Grade Plywood
Drawer Box
Cabinet Back
Custom Cabinetry
Paint Grade Cabinet
Plywood
Base Cabinet
-
Pocket Door
Pocket Door
Definition
A pocket door is a sliding door that disappears into a framed compartment, or pocket, inside the wall when opened. It saves floor area because it does not require the swing clearance of a hinged door, making it useful in bathrooms, closets, pantries, laundry rooms, offices, and tight circulation areas.
A pocket-door assembly includes the door slab, track, rollers, hangers, guides, stops, jamb components, and wall framing or a prefabricated frame kit. Soft-close hardware, synchronized double doors, concealed pulls, and improved heavy-duty tracks are available for higher-end installations.
Pocket doors require careful planning because the wall cavity cannot contain ordinary plumbing, electrical boxes, ductwork, or structural elements that interfere with the pocket. Wall thickness, door weight, hardware access, privacy, sound control, and future maintenance should be considered before installation.
Common Applications
Bathrooms
Water closets
Walk-in closets
Pantries
Laundry rooms
Home offices
Dining rooms
Primary suites
Accessible layouts
Small hallways
Common Types
Single pocket door
Double pocket door
Soft-close pocket door
Glass pocket door
Solid-core pocket door
Pocket door with privacy lock
Synchronized pocket doors
Heavy-duty pocket door
Advantages
Saves door-swing space
Improves circulation in small rooms
Creates a clean unobtrusive opening
Can widen usable wall area
Works with many door styles
Useful for flexible room separation
Can support accessible layouts when properly designed
Disadvantages
More difficult to install than a hinged door
Wall cavity limits utilities
Sound and privacy may be reduced
Low-quality hardware can derail or rattle
Repairs can require trim or wall access
Door pulls and locks are more specialized
Wall may not support heavy mounted items
When to Choose Pocket Door
Pocket Door may be an excellent choice when:
A hinged door conflicts with fixtures or circulation
Floor area is limited
The door will remain open much of the time
A flexible connection between rooms is desired
The wall can accommodate the pocket without critical utilities
Pristine Pro Tip 💡
Use a quality track and roller system sized for the actual door weight. A solid-core door feels more substantial and can improve privacy, but it requires stronger hardware than a lightweight hollow-core slab.
Common Mistake ❌
A common mistake is installing plumbing, blocking, electrical boxes, or long fasteners into the pocket area. Screws used for trim, towel bars, or wall accessories can scratch or stop the hidden door.
Designer Insight 🎨
Pocket doors can disappear visually when painted to match the wall, or become a feature with glass, fluted panels, wood veneer, or decorative hardware. For bathrooms, privacy hardware and appropriate glass opacity should be selected during design.
Florida Rating 🌴
⭐⭐⭐⭐⭐ Excellent
Pocket doors are valuable in Florida homes and condominiums where bathrooms, laundry areas, and closets may be compact. Interior humidity control and stable door materials help limit swelling or warping. Exterior pocket systems require specialized engineering and weather protection.
Maintenance Level
⭐⭐ Easy to Moderate
Keep the floor guide and track area clean, avoid slamming, and adjust rollers or stops when the door becomes misaligned. Do not force a dragging door. Hardware access panels should remain reachable when provided.
Related Terms
Barn Door
Sliding Door
Door Jamb
Solid-Core Door
Privacy Lock
Wall Framing
Soft-Close Hardware
Cased Opening
Accessible Design
Interior Door
-
Pocket Screw
Pocket Screw
Definition
A pocket screw is a specialized screw driven at an angle through a predrilled pocket hole to join two pieces of wood. The pocket hole is typically created with a jig that guides the drill bit to the correct angle and depth, allowing the screw head to seat inside a concealed recess.
Pocket-screw joinery is widely used in cabinetry, face frames, furniture, built-ins, trim assemblies, shelving, and light carpentry. It provides fast mechanical clamping and can create strong joints when the correct screw type, length, thread pattern, spacing, and material thickness are used.
Coarse-thread screws are commonly selected for softer woods and sheet goods, while fine-thread screws may be used for dense hardwoods. Outdoor or moisture-prone projects require appropriately corrosion-resistant screws. Pocket screws should not automatically replace engineered structural connectors or joinery where loads, movement, or code requirements demand another method.
Common Applications
Cabinet face frames
Cabinet boxes
Built-in shelving
Furniture construction
Trim assemblies
Table aprons
Panel frames
Repairs
Jigs and shop fixtures
Light carpentry
Common Types
Coarse-thread pocket screw
Fine-thread pocket screw
Washer-head pocket screw
Pan-head pocket screw
Zinc-coated screw
Stainless-steel pocket screw
Exterior-rated pocket screw
Self-tapping pocket screw
Advantages
Fast and efficient joinery
Joint can often be assembled without visible fasteners
Provides built-in clamping action
Requires relatively simple tools
Useful for face frames and cabinetry
Can be disassembled in some applications
Works well for shop-built components
Disadvantages
Pocket holes may remain visible on unfinished backs
Incorrect screw length can penetrate the face
Overtightening can strip the joint
Not appropriate for every structural application
End-grain connections may be weaker
Material can split near edges
Low-quality screws may break
When to Choose Pocket Screw
Pocket Screw may be an excellent choice when:
Cabinet frames or built-ins need efficient concealed joinery
The back or underside of the work can hide the pocket holes
Material thickness allows correct screw engagement
The joint is appropriately designed for pocket-screw loads
Fast shop assembly is beneficial
Pristine Pro Tip 💡
Set the jig, drill-stop collar, and screw length for the exact material thickness. Test the setup on scrap before drilling finished components, especially when joining thin panels or hardwood.
Common Mistake ❌
A common mistake is using ordinary drywall or deck screws in pocket holes. Pocket screws have a head shape and shank design intended to seat correctly without splitting the pocket. Another mistake is driving the screw too aggressively and stripping the receiving material.
Designer Insight 🎨
Pocket screws are primarily a fabrication method rather than a visible design feature. Their value is that they allow clean face frames, floating-looking built-ins, and assembled millwork with minimal exposed fasteners.
Florida Rating 🌴
⭐⭐⭐⭐ Very Good
Pocket screws perform well in conditioned Florida interiors. Exterior, garage, laundry, or other humid applications require corrosion-resistant fasteners and materials appropriate for moisture exposure. The joint should not trap water.
Maintenance Level
⭐ None
Properly installed pocket screws require no routine maintenance. If a joint loosens, determine whether the screw stripped, the material moved, or the assembly lacks adequate support before simply tightening it further.
Related Terms
Pocket Hole
Cabinet Face Frame
Biscuit Joint
Dowel Joint
Butt Joint
Wood Screw
Cabinet Box
Joinery
Carpentry
Fastener
-
Polished Finish
Polished Finish
Definition
A polished finish is a smooth, reflective surface produced by grinding, honing, buffing, or mechanically refining a material until it develops a glossy appearance. Polished finishes are common on natural stone, engineered stone, porcelain, ceramic tile, metals, concrete, glass, and some wood or painted surfaces.
On countertops and wall tile, polishing intensifies color and pattern while making the surface feel sleek and luxurious. On floors, the reflective finish can brighten a room but may also reveal footprints, water spots, scratches, lippage, and surface irregularities more readily than a matte or honed finish.
Performance varies by material. A polished porcelain tile is different from polished marble, and a polished quartz countertop behaves differently from either. Slip resistance, etching, sealing, cleaning products, and application suitability must be evaluated for the specific product.
Common Applications
Quartz countertops
Granite countertops
Marble surfaces
Porcelain tile
Porcelain slabs
Backsplashes
Shower walls
Vanity tops
Decorative metal
Polished concrete floors
Common Types
Polished natural stone
Polished quartz
Polished porcelain
Polished ceramic
Polished concrete
Polished metal
High-polish lacquer
Mirror-polished finish
Advantages
Enhances color and veining
Reflects light and can brighten rooms
Creates a refined luxury appearance
Often easy to wipe clean
Highlights premium materials
Pairs well with matte cabinetry and textured finishes
Available in many materials
Disadvantages
Can show fingerprints and water spots
May be slippery when wet
Scratches and etching may be more visible
Glare can be strong in bright rooms
Requires careful surface preparation
Some polished stone needs sealing
Not all polished products are suitable for floors
When to Choose Polished Finish
Polished Finish may be an excellent choice when:
A luminous high-end appearance is desired
The surface is primarily vertical or a countertop
Natural light should be reflected
The material is approved for the intended use
The homeowner accepts the required cleaning and care
Pristine Pro Tip 💡
View a full-size sample under the room's actual lighting. Highly polished surfaces can reflect windows, fixtures, and undercabinet LEDs in unexpected ways, and patterned materials may appear more dramatic than they do on a small sample.
Common Mistake ❌
A common mistake is using polished tile on a wet floor without checking the product's slip-resistance rating. Another is cleaning polished natural stone with acidic or abrasive products, which can dull, etch, or scratch the surface.
Designer Insight 🎨
Polished finishes are most effective when balanced with quieter textures. A polished stone countertop can be paired with matte cabinets, brushed hardware, and a softly textured backsplash so the room feels layered rather than overly reflective.
Florida Rating 🌴
⭐⭐⭐⭐ Very Good
Polished surfaces work beautifully in Florida's bright interiors, but strong sunlight can increase glare and make water spots more visible. In bathrooms and pool-adjacent spaces, slip resistance and product suitability must be prioritized over appearance.
Maintenance Level
⭐⭐⭐ Moderate
Use pH-neutral and material-approved cleaners, wipe water promptly, avoid abrasives, and seal porous stone when required. Protect countertops from heat, cutting, and acidic spills according to the material's care instructions.
Related Terms
Honed Finish
Matte Finish
Leathered Finish
Quartz Countertop
Granite
Marble
Porcelain Tile
Porcelain Slab
Slip Resistance
Stone Sealer
-
Porcelain Countertop
Porcelain Countertop
Definition
A porcelain countertop is a work surface fabricated from large-format porcelain panels or slabs made from refined clay, mineral pigments, and other natural materials fired at very high temperatures. The process creates a dense, non-porous surface that is highly resistant to heat, ultraviolet exposure, staining, and everyday moisture.
Porcelain countertops can reproduce the appearance of marble, concrete, metal, limestone, terrazzo, and other materials with high-resolution printing. Because the design is typically concentrated near the surface, edge fabrication and exposed cuts require thoughtful detailing, especially when the printed pattern does not continue fully through the slab.
Porcelain is relatively thin and rigid compared with many stone slabs. Fabrication, transport, cutouts, substrate support, edge construction, and installation should be completed by professionals experienced with the specific product.
Common Applications
Kitchen countertops
Bathroom vanity tops
Waterfall islands
Outdoor kitchens
Backsplashes
Integrated wall cladding
Shower benches
Laundry room counters
Commercial counters
Tabletops
Common Types
Large-format porcelain slab
Sintered porcelain surface
Marble-look porcelain
Concrete-look porcelain
Matte porcelain countertop
Polished porcelain countertop
Textured porcelain surface
Mitered-edge porcelain countertop
Advantages
Non-porous and stain resistant
Excellent heat resistance
UV stable for many outdoor applications
Available in realistic printed designs
Low routine maintenance
Resists household chemicals
Can create thin modern profiles
Works as both countertop and wall cladding
Disadvantages
Edges can chip if impacted
Fabrication requires specialized expertise
Surface pattern may not run through the body
Repairs can be difficult
Thin slabs require proper support
Complex cutouts may increase risk and cost
Limited fabricator availability in some markets
When to Choose Porcelain Countertop
Porcelain Countertop may be an excellent choice when:
A low-maintenance non-porous surface is desired
The design calls for marble, concrete, or metal appearance without the same maintenance
An outdoor countertop needs UV-resistant material
A thin or mitered modern edge is preferred
Matching countertop and backsplash slabs are planned
Pristine Pro Tip 💡
Ask to see finished edge samples, not just the face of the slab. The treatment of mitered edges, exposed cuts, sink openings, and seams determines whether a porcelain countertop looks refined and intentional.
Common Mistake ❌
A common mistake is treating porcelain exactly like quartz or granite during fabrication and installation. Its thin, rigid structure requires different handling, cutting, support, and edge methods. Another mistake is striking exposed edges with heavy cookware.
Designer Insight 🎨
Porcelain allows dramatic marble-like veining with minimal maintenance and can continue from countertop to full-height backsplash for a monolithic look. Careful slab layout and vein alignment are important because printed patterns can be highly directional.
Florida Rating 🌴
⭐⭐⭐⭐⭐ Excellent
Porcelain countertops are especially well suited for Florida because they resist humidity, moisture, stains, heat, and UV exposure. Product-specific outdoor approval, proper substrate design, wind considerations, and correct installation remain important for exterior kitchens.
Maintenance Level
⭐⭐ Very Easy
Clean with mild soap, water, or manufacturer-approved cleaners. Use cutting boards to protect knives and the surface, avoid heavy impacts on edges, and maintain sealant at sinks, backsplashes, and transitions.
Related Terms
Porcelain Slab
Porcelain Tile
Quartz Countertop
Sintered Stone
Waterfall Edge
Mitered Edge
Full-Height Backsplash
Outdoor Kitchen
Countertop Fabrication
Polished Finish
-
Porcelain Slab
Porcelain Slab
Definition
A porcelain slab is a large, thin panel manufactured from refined clay and mineral materials that are compressed and fired at very high temperatures. Unlike traditional small-format tile, porcelain slabs can cover large wall, floor, countertop, fireplace, shower, or exterior areas with very few grout joints.
Slabs are produced in a wide range of sizes, thicknesses, textures, and printed designs. Many imitate marble, limestone, concrete, wood, metal, or terrazzo, while others feature solid colors or contemporary patterns. Their low porosity makes them resistant to moisture and staining.
Large-format porcelain slab installation requires specialized handling frames, cutting equipment, adhesives, substrate preparation, movement-joint planning, and trained installers. The material is strong after proper installation but can be fragile during transport and fabrication because of its size and thinness.
Common Applications
Shower walls
Bathroom feature walls
Kitchen backsplashes
Countertops
Fireplace surrounds
Large-format flooring
Exterior cladding
Elevator interiors
Commercial lobbies
Furniture surfaces
Common Types
Thin porcelain panel
Countertop-thickness porcelain slab
Polished porcelain slab
Matte porcelain slab
Textured porcelain slab
Marble-look slab
Concrete-look slab
Bookmatched porcelain slab
Advantages
Creates very few grout joints
Non-porous and moisture resistant
Available in large dramatic patterns
Low maintenance
Suitable for many interior and exterior uses
Lightweight relative to similar-size stone
Can create continuous countertop and wall designs
Disadvantages
Requires highly specialized installation
Large panels are difficult to transport
Edges and corners can chip
Substrates must be very flat
Repairs are difficult
Material and labor can be expensive
Access limitations may prevent oversized panels from reaching the room
When to Choose Porcelain Slab
Porcelain Slab may be an excellent choice when:
A seamless or minimal-grout appearance is desired
Large shower walls are being remodeled
The design calls for dramatic full-height surfaces
A non-porous material is preferred
Qualified fabricators and installers are available
Pristine Pro Tip 💡
Confirm the path from delivery truck to installation area before ordering. Door openings, elevators, stair turns, ceiling heights, and bathroom access can determine whether a full slab can be safely moved into position.
Common Mistake ❌
A common mistake is assuming a large slab can bridge an uneven wall. Thin porcelain requires a flat, stable, properly prepared substrate and full adhesive coverage. Voids, movement, or poor handling can lead to cracking.
Designer Insight 🎨
Porcelain slabs create a luxurious architectural effect when veins or patterns are carefully oriented across adjacent panels. In showers, matching the main wall, niche backing, and bench creates continuity while minimizing visual interruption from grout.
Florida Rating 🌴
⭐⭐⭐⭐⭐ Excellent
Porcelain slabs are excellent for Florida bathrooms, kitchens, and exterior-rated applications because they resist moisture, heat, humidity, and UV exposure. Waterproofing behind shower slabs and appropriate movement joints remain essential.
Maintenance Level
⭐⭐ Very Easy
Clean with non-abrasive, manufacturer-approved products and maintain sealant joints at corners, penetrations, and transitions. Grout maintenance is reduced, but the underlying assembly and perimeter joints still require inspection.
Related Terms
Porcelain Countertop
Porcelain Tile
Large-Format Tile
Full-Height Backsplash
Shower Wall
Bookmatched Stone
Thinset Mortar
Tile Lippage
Movement Joint
Waterproofing Membrane
-
Porcelain Tile
Porcelain Tile
Definition
Porcelain tile is a dense ceramic tile manufactured from refined clay and fired at very high temperatures. It has a low water-absorption rate and is widely used for floors, walls, showers, backsplashes, countertops, patios, and commercial spaces because of its durability, moisture resistance, and design versatility.
Porcelain tile may be glazed or unglazed, through-body or color-body, polished or matte, textured or smooth, and produced in formats ranging from tiny mosaics to very large panels. Modern digital printing allows porcelain to reproduce the appearance of marble, limestone, concrete, wood, terrazzo, and other materials.
Not every porcelain tile is suitable for every application. Floor rating, slip resistance, edge type, thickness, size, warpage tolerance, exterior approval, and manufacturer instructions should be reviewed. Installation quality—including substrate preparation, mortar selection, coverage, movement accommodation, grout, and waterproofing—has a major effect on performance.
Common Applications
Kitchen floors
Bathroom floors
Shower walls
Shower floors
Backsplashes
Laundry rooms
Entryways
Outdoor patios
Pool areas
Commercial flooring
Common Types
Glazed porcelain tile
Unglazed porcelain tile
Through-body porcelain
Color-body porcelain
Polished porcelain
Matte porcelain
Textured porcelain
Wood-look porcelain
Marble-look porcelain
Large-format porcelain
Advantages
Very low water absorption
Excellent durability
Available in many sizes and designs
Resists staining and household moisture
Suitable for floors and walls
Options are available for interior and exterior use
Lower maintenance than many natural stones
Can provide consistent color and pattern
Disadvantages
Hard and cold underfoot
Can chip at edges
Requires appropriate cutting tools
Large formats demand flat substrates
Polished surfaces may be slippery
Grout still requires maintenance
Poor installation can lead to lippage or hollow spots
Material quality varies
When to Choose Porcelain Tile
Porcelain Tile may be an excellent choice when:
A durable moisture-resistant surface is needed
The homeowner wants the look of stone or wood with easier care
Bathrooms, kitchens, or laundry rooms are being remodeled
A continuous floor material is desired
Exterior-rated tile is needed for approved outdoor areas
Pristine Pro Tip 💡
Select tile and grout together, then view multiple pieces from several cartons. Printed porcelain often includes intentional variation, and the final appearance depends on how those patterns are mixed, oriented, and laid out across the room.
Common Mistake ❌
A common mistake is assuming porcelain tile is waterproof as an entire installation. The tile itself absorbs very little water, but grout joints, penetrations, corners, and the substrate still require appropriate waterproofing and detailing in showers and other wet areas.
Designer Insight 🎨
Large-format porcelain can make rooms feel more expansive by reducing grout lines, while mosaics add texture and scale to niches or shower floors. The most convincing stone-look installations use varied faces and avoid repeating identical printed patterns too closely.
Florida Rating 🌴
⭐⭐⭐⭐⭐ Excellent
Porcelain tile is one of the best-performing finishes for Florida homes because it resists moisture, humidity, insects, stains, and heavy wear. It is especially practical over concrete slabs, but substrate cracks, movement, moisture conditions, and exterior exposure must be addressed with the correct installation system.
Maintenance Level
⭐⭐ Easy
Sweep or vacuum grit regularly, damp mop with an approved cleaner, and maintain grout and perimeter sealant. Avoid waxes that create buildup or slipperiness. Seal cementitious grout when recommended, and replace cracked grout or caulk promptly.
Related Terms
Ceramic Tile
Large-Format Tile
Penny Tile
Thinset Mortar
Grout
Epoxy Grout
Tile Lippage
Tile Warpage
Crack Isolation Membrane
Waterproofing Membrane
-
Pot Filler
Pot Filler
Definition
A pot filler is a wall-mounted faucet installed near a cooktop or range to provide a convenient source of water for filling stockpots, pasta pots, kettles, and other large cookware. Most pot fillers feature one or two articulated arms that fold flat against the wall when not in use and extend over multiple burners when needed. Unlike a standard kitchen faucet, a pot filler normally supplies cold water only and does not include a drain beneath it.
Pot fillers are often selected for custom kitchens, luxury renovations, high-use family kitchens, and homes where large-volume cooking is common. They can reduce the need to carry a heavy pot from the sink to the range, but they do not eliminate the need to carry the pot back to the sink after cooking. Because the fixture is installed above a finished cooking surface without a drain, careful product selection, secure plumbing connections, and precise placement are essential.
Common Applications
Custom kitchen remodels
Luxury kitchens
Large family kitchens
Homes used for frequent entertaining
Ranges with multiple burners
Professional-style cooktops
Kitchens with distant or secondary sinks
Aging-in-place and convenience-focused designs
Common Types and Features
Single-joint folding arm
Double-joint folding arm
Traditional cross-handle design
Modern lever-handle design
Wall-mounted cold-water connection
Single shutoff valve
Dual shutoff valves for added control
Flow-rate-limited models
Fixtures in polished chrome, brushed nickel, matte black, brass, bronze, and specialty finishes
Advantages
Reduces the need to carry a full pot from the sink to the range
Adds convenience for pasta, soups, stocks, and canning
Creates a distinctive high-end kitchen feature
Folding arms keep the fixture compact when not in use
Available in finishes that coordinate with faucets and cabinet hardware
Useful when the primary sink is far from the cooking zone
Can support universal-design goals by reducing lifting and carrying
Disadvantages
There is no drain below the fixture if a leak or accidental activation occurs
Requires a dedicated water line inside the wall
Placement errors can interfere with cookware, backsplashes, or range controls
Adds plumbing and installation cost
Still requires carrying hot or dirty cookware back to the sink
Infrequently used water lines may hold stagnant water
Moving joints and valves may eventually require service
When to Choose Pot Filler
The homeowner frequently prepares meals in large pots
The range is located far from the main sink
A kitchen is being opened to the walls and plumbing can be installed efficiently
The design includes a durable, easy-to-clean backsplash
The fixture can be positioned safely above the cooking surface
The homeowner values convenience and understands that the pot filler has no drain
Pristine Pro Tip 💡
Plan the pot filler before backsplash installation and before the range is finalized. The valve height and horizontal location should be based on the actual appliance, burner layout, tallest cookware, backsplash pattern, and the fixture's folded and extended dimensions. We also recommend selecting a model with two shutoff points so the water can be controlled both at the wall and at the outlet.
Common Mistake ❌
A common mistake is centering the pot filler visually on the backsplash without checking whether the arm can reach the burners or clear tall cookware. Another mistake is assuming every decorative pot filler is suitable for the home's water pressure or local plumbing requirements. The rough-in must follow the manufacturer's specifications, and the connection should be pressure-tested before the wall and backsplash are closed.
Designer Insight 🎨
A pot filler works best when it looks intentionally integrated rather than added as an afterthought. Aligning it with the range, hood, backsplash focal point, and nearby metal finishes creates a balanced composition. In highly patterned stone or tile, a simpler fixture may keep the wall from feeling visually crowded.
Florida Rating 🌴
⭐⭐⭐⭐ Very Good
Pot fillers perform well in Florida homes, but water quality and long periods of nonuse should be considered. In homes with hard water, mineral buildup can affect the aerator and moving joints. Coastal homeowners should choose a quality finish and follow the manufacturer's cleaning instructions to reduce spotting and corrosion.
Maintenance Level
⭐⭐ Easy
Wipe the fixture dry after use to reduce spotting.
Clean the aerator periodically if flow decreases.
Operate both shutoff valves regularly so they do not become stiff.
Inspect joints and the wall connection for moisture.
Avoid abrasive cleaners that can damage the finish.
Have any drip repaired promptly because there is no drain below the fixture.
Related Terms
Kitchen Faucet
Plumbing Rough-In
Range
Cooktop
Backsplash
Shutoff Valve
Prep Sink
Professional-Style Range
Universal Design
Water Pressure
-
Powder Bathroom
Powder Bathroom
Definition
A powder bathroom, commonly called a powder room or half bathroom, is a compact bathroom that typically contains a toilet and a sink but no bathtub or shower. It is usually located near the main living or entertaining areas of a home so guests can use it without entering private bedroom or bathing spaces.
Because a powder bathroom has fewer fixtures and less moisture exposure than a full bathroom, it offers an excellent opportunity for bold design choices. Homeowners often use dramatic wallpaper, statement lighting, decorative mirrors, vessel sinks, furniture-style vanities, specialty tile, or rich paint colors that might feel overwhelming in a larger room. Although small, a powder bathroom still requires thoughtful planning for clearances, ventilation, lighting, plumbing, storage, and accessibility.
Common Applications
Guest-use bathrooms
Homes with open entertaining areas
First-floor bathroom additions
Luxury home renovations
Compact urban homes and condominiums
Commercial reception or office areas
Pool-adjacent interior spaces when a shower is not required
Whole-home remodeling projects
Common Design Elements
Pedestal sink
Floating vanity
Furniture-style vanity
Wall-mounted faucet
Vessel sink
Decorative wallpaper
Statement mirror
Sconce lighting
Accent tile or full-height wall treatment
Compact or wall-hung toilet
Pocket door where appropriate
Recessed storage or a small medicine cabinet
Advantages
Provides a convenient bathroom for guests
Keeps private bathrooms separate from entertaining areas
Requires less floor area than a full bathroom
Offers strong design impact in a small space
Generally costs less to remodel than a full bathroom
No shower means fewer waterproofing and moisture-management concerns
Can improve the function and marketability of a home
Disadvantages
Limited storage and counter space
Small dimensions can make layout changes difficult
Door swings and fixture clearances require careful planning
Bold finishes can date quickly if chosen only for a trend
Poor ventilation may allow odors and humidity to linger
Adding a new powder room may require significant plumbing work
Not a substitute for a full bathroom
When to Choose Powder Bathroom
Guests currently need to use a private primary or hallway bathroom
The home has adequate space near common areas
A first floor lacks a convenient bathroom
The homeowner wants a high-impact design feature without remodeling a large room
A full bathroom is unnecessary for the intended location
Plumbing and ventilation can be added without compromising nearby rooms
Pristine Pro Tip 💡
In a small powder bathroom, every inch matters. Before selecting a vanity or toilet, verify the finished room dimensions, door swing, required clearances, plumbing locations, and how far cabinet doors or drawers project. A beautiful vanity that is only a few inches too deep can make the entire room feel cramped.
Common Mistake ❌
A common mistake is treating the powder bathroom as too small to require a full lighting and ventilation plan. One ceiling light can create harsh shadows, while inadequate ventilation can make the room uncomfortable. Another mistake is choosing a door that swings into a fixture or blocks circulation.
Designer Insight 🎨
Powder bathrooms are ideal places to take a calculated design risk. A saturated wall color, patterned wallpaper, sculptural mirror, or distinctive stone vanity can create a memorable guest experience. Repeating one finish or color from nearby rooms keeps the powder bathroom connected to the rest of the home.
Florida Rating 🌴
⭐⭐⭐⭐⭐ Excellent
Powder bathrooms are particularly practical in Florida homes used for entertaining. Since they do not contain a shower or tub, they experience less moisture than full bathrooms; however, air conditioning, ventilation, and moisture-resistant finishes remain important in the state's humid climate.
Maintenance Level
⭐⭐ Easy
Clean the toilet, sink, faucet, mirror, and floor routinely.
Run the exhaust fan as needed and keep the grille free of dust.
Inspect the faucet, supply lines, shutoff valves, and P-trap for leaks.
Use wallpaper and paint products appropriate for bathroom conditions.
Avoid overfilling the room with decorative accessories that make cleaning difficult.
Related Terms
Half Bathroom
Vanity
Pedestal Sink
Vessel Sink
Wall-Hung Toilet
Exhaust Fan
Bathroom Lighting
Wallpaper
Pocket Door
Plumbing Rough-In
-
Power Vent Water Heater
Power Vent Water Heater
Definition
A power vent water heater is a fuel-fired water heater that uses an electrically powered fan or blower to move combustion gases through a vent pipe and discharge them outdoors. Unlike a conventional atmospheric-vent water heater, which relies on natural draft and a vertical chimney or flue, a power vent model can often vent horizontally through an exterior wall using a manufacturer-approved venting system.
Power vent water heaters are commonly used when the equipment is located far from an existing chimney, when a vertical vent route is impractical, or when a remodel changes the mechanical-room layout. The fan requires electricity, so the heater generally cannot vent or operate normally during a power outage. Proper combustion air, vent sizing, termination location, condensate management when applicable, gas supply, electrical service, and manufacturer clearances are critical to safe installation.
Common Applications
Gas water heater replacement
Mechanical-room relocations
Garages and utility rooms
Homes without a usable chimney
Horizontal sidewall venting
Remodels that alter existing vent paths
Basements where permitted and properly designed
High-demand residential hot-water systems
Common Configurations
Natural-gas power vent water heater
Propane power vent water heater
Standard-efficiency power vent model
High-efficiency condensing power vent model
Tank-style unit
Direct power vent configuration, depending on model
Sidewall vent termination
Roof vent termination where approved
Advantages
Greater flexibility in equipment placement
Can often vent horizontally
Does not depend solely on natural chimney draft
Useful when an existing flue is unavailable or unsuitable
Powered exhaust can provide consistent venting when properly installed
Available in multiple tank sizes and efficiency levels
May simplify certain remodeling layouts
Disadvantages
Higher purchase cost than many atmospheric-vent models
Requires electricity for the blower and controls
Produces fan noise during operation
Will generally not operate normally during a power outage
Venting materials and termination rules are model-specific
More mechanical components can mean additional service needs
Poorly planned terminations can affect windows, doors, soffits, or outdoor living areas
When to Choose Power Vent Water Heater
A gas water heater cannot be located near a suitable vertical flue
A sidewall vent route is shorter or more practical
The existing venting system is being removed during renovation
The homeowner wants to retain a tank-style gas water heater
A licensed professional confirms the gas, electrical, combustion-air, and venting requirements can be met
The proposed termination location complies with the appliance instructions and applicable code
Pristine Pro Tip 💡
Choose the exact water-heater model before rough plumbing, electrical work, and wall penetrations are finalized. Vent pipe material, maximum equivalent length, number of elbows, pipe diameter, termination clearances, drain requirements, and electrical needs vary by manufacturer and model. Substituting a different unit later can force expensive changes.
Common Mistake ❌
A common mistake is assuming any PVC pipe or any exterior-wall location is acceptable. Venting systems must use the materials and layout approved by the manufacturer, and the termination must be kept away from openings and other restricted areas. Another mistake is overlooking blower noise when placing the unit near bedrooms or living spaces.
Designer Insight 🎨
Water-heater selection can influence floor plans, storage, cabinetry, and utility-room appearance. When relocating mechanical equipment, designers and trades should coordinate access panels, service clearances, drain pans, doors, shelving, and acoustic separation early rather than trying to conceal the unit after installation.
Florida Rating 🌴
⭐⭐⭐⭐ Very Good
Power vent water heaters can be effective in Florida homes, especially where sidewall venting solves a difficult layout. Garage installations, high outdoor humidity, wind exposure, corrosion resistance, flood considerations, and termination placement should be evaluated carefully. Local requirements and manufacturer instructions always control the installation.
Maintenance Level
⭐⭐⭐ Moderate
Schedule periodic inspection and service by a qualified professional.
Keep the blower intake and vent termination free of debris.
Inspect vent joints and supports for damage or separation.
Flush the tank as recommended to reduce sediment buildup.
Test the temperature-and-pressure relief valve according to manufacturer guidance.
Inspect the drain pan, shutoff valve, and nearby plumbing for leaks.
Replace the anode rod when appropriate to extend tank life.
Related Terms
Water Heater
Direct Vent Water Heater
Tankless Water Heater
Gas Line
Combustion Air
Vent Pipe
Drain Pan
Temperature-and-Pressure Relief Valve
Utility Room
Plumbing Rough-In
-
Prep Kitchen
Prep Kitchen
Definition
A prep kitchen is a secondary kitchen or concealed work area designed to support the main kitchen by handling food preparation, cleanup, appliance storage, catering, and other behind-the-scenes tasks. It may also be called a back kitchen, working pantry, scullery, catering kitchen, or dirty kitchen, although those terms can describe slightly different layouts and levels of equipment.
Prep kitchens are increasingly included in luxury homes and large-scale remodels where the main kitchen is intended to remain visually clean during entertaining. A well-designed prep kitchen may include a sink, dishwasher, refrigerator, freezer, microwave, wall oven, cooktop, coffee station, pantry storage, countertop appliances, trash and recycling, and extensive cabinetry. The space should be planned as a functional kitchen, not merely a pantry with extra counters.
Common Applications
Luxury kitchen remodeling
Homes designed for frequent entertaining
Large or multigenerational households
Kosher or specialized food-preparation needs
Catering support
Concealed small-appliance storage
Coffee and beverage stations
Homes with open-concept show kitchens
Common Features
Prep sink or full-size sink
Dishwasher or dishwasher drawer
Secondary refrigerator or freezer
Microwave or speed oven
Wall oven
Induction or electric cooktop where appropriate
Ventilation for cooking appliances
Food pantry storage
Countertop appliance garage
Pull-out trash and recycling
Open shelving or full-height cabinetry
Pocket, swing, or concealed entry door
Advantages
Keeps the main kitchen cleaner during entertaining
Provides additional prep and cleanup space
Hides countertop appliances and visual clutter
Adds food, dish, and serving storage
Supports multiple cooks
Can separate allergen, dietary, or cultural food preparation
Improves organization for large households
Creates a dedicated location for catering or party setup
Disadvantages
Requires substantial floor area
Adds cabinetry, countertop, plumbing, electrical, appliance, and ventilation costs
Can duplicate appliances and increase maintenance
Poor layouts may isolate the cook from family and guests
Requires strong lighting and ventilation
May reduce space available for a walk-in pantry or other rooms
Can become a cluttered storage room if workflow is not planned
When to Choose Prep Kitchen
The main kitchen is highly visible from living and dining areas
The household entertains frequently
Multiple people cook at the same time
The homeowner needs extensive pantry and appliance storage
The floor plan can support a second work zone without compromising circulation
The budget supports the utilities, cabinetry, surfaces, and appliances needed to make the space functional
Pristine Pro Tip 💡
Decide exactly what work will happen in the prep kitchen before designing it. A space intended only for coffee and appliance storage needs a different layout than one used for raw food preparation, dishwashing, baking, or full cooking. List the appliances, cookware, food categories, serving pieces, and cleanup tasks first; then design storage and utilities around that workflow.
Common Mistake ❌
A common mistake is creating a narrow room lined with deep cabinets on both sides without enough aisle space. Another is omitting ventilation or sufficient electrical circuits because the room is labeled a pantry. Once sinks, dishwashers, ovens, or cooking appliances are added, the space must be coordinated as a true working kitchen.
Designer Insight 🎨
The best prep kitchens feel connected to the main kitchen while remaining visually quieter. Repeating cabinet colors, hardware, or countertop materials creates continuity, while using more durable or economical finishes in the prep space can control cost. A glazed or concealed door can provide either openness or privacy depending on the event.
Florida Rating 🌴
⭐⭐⭐⭐⭐ Excellent
Prep kitchens are valuable in Florida homes built for indoor-outdoor entertaining, large gatherings, and multigenerational living. Because the climate increases cooling and humidity-control demands, the room should be included in the home's conditioned-air and ventilation planning, especially when it contains refrigeration or cooking appliances.
Maintenance Level
⭐⭐⭐ Moderate
Clean counters, sinks, floors, and appliances after use.
Keep pantry storage organized and rotate food supplies.
Inspect plumbing fixtures, supply lines, and drains for leaks.
Clean ventilation filters as recommended.
Avoid overloading appliance circuits.
Maintain adequate airflow around refrigerators and freezers.
Review rarely used items periodically so the room does not become overcrowded.
Related Terms
Butler's Pantry
Walk-In Pantry
Scullery
Prep Sink
Appliance Garage
Dishwasher Drawer
Kitchen Work Triangle
Pantry Cabinet
Beverage Center
Secondary Refrigerator
-
Prep Sink
Prep Sink
Definition
A prep sink is a secondary sink used for food preparation, beverage service, handwashing, or light cleanup. It is typically smaller than the main kitchen sink and may be installed in an island, prep kitchen, wet bar, butler's pantry, coffee station, or outdoor-adjacent entertaining area.
A well-placed prep sink can create a second work zone and reduce congestion around the primary sink. It may be used for rinsing produce, filling pots, preparing drinks, washing hands, or allowing a second person to work independently. Although compact, it still requires coordinated plumbing, drainage, ventilation of the drain system, countertop space, cabinet space, faucet clearance, and access for future service.
Common Applications
Kitchen islands
Prep kitchens
Butler's pantries
Wet bars
Coffee and beverage stations
Large kitchens with multiple work zones
Entertaining areas
Multigenerational or high-use kitchens
Common Sink Styles
Small undermount sink
Bar sink
Round or square sink
Single-bowl stainless-steel sink
Composite granite sink
Copper or specialty metal sink
Workstation-style compact sink
Drop-in sink
Integrated solid-surface sink
Sink with filtered-water or instant-hot-water faucet
Advantages
Creates a second kitchen work zone
Reduces traffic at the main sink
Convenient for rinsing produce and preparing beverages
Useful on a large island
Supports entertaining and multiple cooks
Can be paired with a small dishwasher or beverage center
Available in many compact sizes and materials
Disadvantages
Adds plumbing and countertop cost
Uses valuable cabinet and counter space
Small bowls may splash or feel restrictive
Requires a drain route and properly planned venting
Can become an unnecessary feature if poorly located
Adds another faucet, drain, and supply lines to maintain
May interrupt a large, uninterrupted island surface
When to Choose Prep Sink
The kitchen is large enough to support two work zones
Multiple people cook or entertain regularly
The island is far from the main sink
A prep kitchen, bar, or beverage area needs water
The homeowner frequently rinses produce or prepares drinks
Plumbing can be routed without compromising cabinetry or structure
Pristine Pro Tip 💡
Place a prep sink where it supports a specific task rather than simply where plumbing is easiest. Leave usable landing space on at least one side, confirm that the faucet will not conflict with pendants or pass-through views, and plan the cabinet interior around the sink bowl, drain, disposal if used, filtration equipment, and shutoff valves.
Common Mistake ❌
A common mistake is choosing a sink that is too small to be useful or placing it directly in the center of the only uninterrupted prep surface. Another is forgetting that an island sink requires a carefully designed drain and vent solution. The plumbing should be planned before cabinets, flooring, and slab penetrations are finalized.
Designer Insight 🎨
A prep sink can either disappear into the design or become a feature. A low-profile undermount sink keeps a stone island visually clean, while a specialty metal or workstation sink can add character. Matching the faucet finish to nearby fixtures helps the second sink feel intentional.
Florida Rating 🌴
⭐⭐⭐⭐⭐ Excellent
Prep sinks are highly practical in Florida homes used for entertaining and indoor-outdoor living. Moisture-resistant cabinet construction, sealed countertop cutouts, dependable shutoff valves, and prompt leak repair are especially important in humid conditions.
Maintenance Level
⭐⭐ Easy
Rinse and wipe the bowl after use.
Clean the drain and strainer regularly.
Inspect the faucet, supply lines, shutoff valves, and P-trap for leaks.
Use cleaners approved for the sink material.
Maintain any filtration or instant-hot-water equipment.
Avoid allowing a rarely used drain trap to dry out and release odors.
Related Terms
Kitchen Sink
Bar Sink
Undermount Sink
Workstation Sink
Kitchen Island
Prep Kitchen
P-Trap
Faucet
Garbage Disposal
Plumbing Vent
-
Pressure Balance Valve
Pressure Balance Valve
Definition
A pressure balance valve is a shower or tub-shower mixing valve designed to reduce sudden changes in outlet temperature when water pressure changes in the hot or cold supply lines. Inside the valve, a pressure-sensitive mechanism shifts to maintain a more consistent balance between hot and cold water when another fixture is used, a toilet is flushed, or an appliance draws water.
Pressure balance valves are widely used because they provide an important anti-scald function. Most control temperature with a single handle, although trim designs vary. The valve balances pressure rather than directly measuring water temperature, so the actual outlet temperature may still change gradually if the water heater temperature or incoming water conditions change.
Common Applications
Tub-shower combinations
Walk-in showers
Guest bathrooms
Children's bathrooms
Primary bathrooms
Bathroom remodels
Rental properties
Homes with fluctuating water pressure
Common Valve Configurations
Single-handle pressure balance valve
Tub-and-shower valve with diverter spout
Shower-only valve
Integrated diverter valve
Valve with separate volume control, depending on manufacturer
Universal rough-in valve body
Serviceable pressure-balancing cartridge
Trim kits in multiple decorative finishes
Advantages
Helps reduce sudden hot or cold temperature shocks
Provides anti-scald protection when properly installed and adjusted
Simple one-handle operation
Commonly available from major plumbing manufacturers
Usually less expensive than a thermostatic shower system
Suitable for many standard showers and tub-shower combinations
Replaceable cartridges can simplify future service
Disadvantages
Balances pressure but does not precisely regulate temperature
Flow may decrease when supply pressure drops
A worn or mineral-clogged cartridge can affect performance
Temperature and volume are often controlled by the same handle
May not provide the luxury control of a thermostatic system
Rough-in depth and trim compatibility are manufacturer-specific
Hard water can shorten cartridge life
When to Choose Pressure Balance Valve
A standard shower or tub-shower needs anti-scald protection
The homeowner wants reliable performance at a moderate cost
A single-handle control is preferred
The plumbing system experiences routine pressure changes
A thermostatic system is not necessary for the desired design
The selected valve and trim meet project requirements and applicable standards
Pristine Pro Tip 💡
Select the complete valve system—not just the decorative trim—before rough plumbing begins. Confirm the valve body, cartridge, trim, tub spout, showerhead, diverter, wall thickness, and finished-depth requirements are compatible. Keep the manufacturer's plaster guard and installation instructions available until tile and trim installation are complete.
Common Mistake ❌
A common mistake is setting the rough-in valve too deep or too shallow for the finished wall assembly. Tile thickness, backer board, waterproofing, and decorative panels all affect the final depth. Another mistake is failing to adjust the rotational limit stop, which helps limit the maximum hot-water setting.
Designer Insight 🎨
Pressure balance valves are available in styles ranging from traditional to minimal modern. For a cohesive bathroom, coordinate the trim with the showerhead, hand shower, tub spout, accessories, and cabinet hardware. Behind the wall, prioritize a dependable valve platform with readily available replacement parts.
Florida Rating 🌴
⭐⭐⭐⭐⭐ Excellent
Pressure balance valves are an excellent choice for Florida homes, where showers are used frequently and plumbing pressure may change as appliances or irrigation systems operate. Homes with hard water may need periodic cartridge cleaning or replacement.
Maintenance Level
⭐⭐ Easy
Clean exterior trim with a non-abrasive product.
Operate the valve regularly.
Address dripping, stiffness, or temperature fluctuations promptly.
Service or replace the cartridge when needed.
Clean inlet screens if included and accessible.
Check the maximum temperature limit after water-heater adjustments or valve service.
Related Terms
Thermostatic Valve
Shower Valve
Mixing Valve
Anti-Scald Valve
Diverter Valve
Shower Trim
Hand Shower
Tub Spout
Plumbing Rough-In
Water Pressure
-
Pressure Treated Lumber
Pressure Treated Lumber
Definition
Pressure treated lumber is wood that has been infused with chemical preservatives under pressure to improve resistance to decay, fungal growth, termites, and other wood-destroying organisms. The treatment penetrates more deeply than a surface coating, making the material suitable for many locations where ordinary untreated lumber would deteriorate quickly.
In remodeling, pressure treated lumber is commonly used where wood contacts concrete, masonry, soil, exterior weather, or other moisture-prone conditions. It is available in different treatment categories and retention levels, so material intended for above-ground use is not automatically suitable for ground contact, freshwater exposure, or severe conditions. The identification tag or end stamp should be reviewed before installation.
Common Applications
Deck framing
Exterior stairs and landings
Fence posts and rails
Sill plates on concrete or masonry
Outdoor structures
Exterior blocking and framing
Ground-contact framing where rated
Repairs in moisture-prone locations
Landscape structures
Certain coastal or high-exposure applications when specifically rated
Common Treatment Categories
Above-ground treated lumber
Ground-contact treated lumber
Freshwater-contact material
Borate-treated interior framing for protected applications
Micronized copper preservative systems
Copper-based preservative systems
Kiln-dried-after-treatment lumber
Treated plywood
Severe-weather or specialty-rated products
Advantages
Improved resistance to rot and decay
Better protection from termites and insects
Longer service life in exposed conditions
Widely available in common framing sizes
Appropriate for many concrete-contact and exterior uses
Can be cut and assembled with standard carpentry tools
More economical than many naturally rot-resistant species
Disadvantages
Often contains substantial moisture when purchased and may shrink or twist while drying
Requires compatible corrosion-resistant fasteners and connectors
Cut ends and field notches may require preservative treatment
Heavier than comparable dry untreated lumber
Surface checking and warping can occur
Not every treatment level is suitable for every exposure
Requires safe handling and proper disposal practices
When to Choose Pressure Treated Lumber
Wood will contact concrete, masonry, soil, or persistent moisture
Exterior framing needs improved decay resistance
Termite exposure is a concern
A deck, fence, stair, or outdoor structure is being built
Project specifications or applicable requirements call for treated material
The correct treatment category and compatible hardware are available
Pristine Pro Tip 💡
Read the end tag before installation. It identifies the intended exposure category and often lists the preservative system. Use fasteners, anchors, joist hangers, and flashing materials approved for contact with the treatment. Seal field-cut ends when required, and allow wet lumber to dry appropriately before applying sensitive finishes.
Common Mistake ❌
A common mistake is using above-ground treated lumber in ground-contact conditions. Another is fastening treated lumber with unapproved hardware, which can corrode prematurely. Builders should also avoid enclosing very wet lumber in a way that traps moisture and encourages movement or mold.
Designer Insight 🎨
Pressure treated lumber is usually structural rather than decorative. For visible decks, porches, and exterior features, it can be wrapped, stained, or paired with composite decking, PVC trim, or naturally durable finish materials. The design should allow drainage, ventilation, and inspection rather than hiding moisture-sensitive connections.
Florida Rating 🌴
⭐⭐⭐⭐⭐ Excellent
Pressure treated lumber is extremely important in Florida because heat, humidity, frequent rain, termites, and storm exposure accelerate wood deterioration. Correct treatment level, drainage, flashing, fasteners, and maintenance are essential, especially near grade, pools, coastal air, and exterior masonry.
Maintenance Level
⭐⭐⭐ Moderate
Inspect annually for checking, splitting, decay, insect activity, and loose fasteners.
Keep soil, mulch, and debris away unless the material is rated for ground contact.
Maintain drainage and airflow around the assembly.
Reapply stain or water-repellent finish as needed.
Treat exposed field cuts when required.
Replace severely warped, damaged, or decayed boards.
Do not burn treated lumber; follow local disposal rules.
Related Terms
Deck Framing
Wood Rot
Termite Damage
Sill Plate
Joist Hanger
Flashing
PVC Trim
Composite Decking
Exterior Carpentry
Ground Contact
-
Primary Bathroom
Primary Bathroom
Definition
A primary bathroom is the main bathroom associated with the home's primary bedroom. It is typically designed for the daily use of the homeowners and often includes more space, storage, privacy, and upgraded finishes than guest or secondary bathrooms. The term “primary bathroom” is now commonly used in place of the older term “master bathroom.”
Depending on the home's size and budget, a primary bathroom may include a double vanity, walk-in shower, freestanding tub, private toilet compartment, linen storage, makeup station, heated flooring, specialty lighting, multiple shower outlets, and custom cabinetry. Because it is used every day, successful design must balance appearance with ergonomics, cleaning, ventilation, water management, storage, and long-term accessibility.
Common Applications
Primary suite renovations
Luxury bathroom remodeling
Whole-home remodeling
Aging-in-place improvements
Bathroom expansions
Closet and bathroom reconfiguration
High-end condominium renovations
Custom home interiors
Common Features
Double vanity
Walk-in or curbless shower
Freestanding or built-in tub
Private water closet
Linen cabinetry
Makeup vanity
Shower bench and niche
Hand shower and rain shower
Thermostatic shower controls
Heated floor
Layered lighting
Integrated primary closet connection
Advantages
Creates a private, comfortable daily retreat
Can significantly improve storage and organization
Supports two users with separate sink and grooming zones
Offers opportunities for accessibility and aging-in-place planning
Can improve home marketability
Allows premium materials and customized features
May improve circulation between bedroom, closet, and bathroom
Disadvantages
Usually one of the most expensive rooms to remodel
Layout changes may require extensive plumbing and electrical work
Luxury features increase maintenance and cleaning
Large showers and tubs can consume substantial floor area
Poor ventilation can damage finishes
Trend-driven choices may date quickly
Construction can temporarily disrupt the homeowners' daily routine
When to Choose Primary Bathroom
The existing bathroom lacks storage, function, or privacy
Two users need a more efficient layout
The shower or tub no longer fits the homeowners' lifestyle
The primary suite is being expanded or reorganized
Accessibility improvements are desired
The homeowner plans to remain in the home long enough to benefit from a customized space
Pristine Pro Tip 💡
Design the primary bathroom around daily routines before selecting finishes. Identify who uses each sink, where towels and toiletries are stored, whether a tub is truly used, how the shower controls are reached, and how the bathroom connects to the closet. Good planning prevents beautiful features from becoming daily inconveniences.
Common Mistake ❌
A common mistake is removing storage to create a larger open room without planning where everyday items will go. Another is building an oversized shower that feels cold, is difficult to clean, or leaves no room for cabinetry. Waterproofing, ventilation, lighting, and access for plumbing service should never be sacrificed for appearance.
Designer Insight 🎨
A primary bathroom should feel connected to the bedroom without matching it literally. Repeating wood tones, metal finishes, or a restrained color palette creates continuity. Layered lighting, warm materials, large-format tile, natural textures, and carefully framed focal points can make the space luxurious while remaining timeless.
Florida Rating 🌴
⭐⭐⭐⭐⭐ Excellent
A well-designed primary bathroom adds comfort and value in Florida's humid climate. High-capacity ventilation, moisture-resistant cabinetry, dependable waterproofing, slip-resistant floors, and materials that tolerate frequent use are especially important. Curbless showers and wider clearances can also support long-term living in place.
Maintenance Level
⭐⭐⭐ Moderate
Run the exhaust fan during bathing and afterward.
Squeegee shower glass and wipe standing water.
Clean grout, caulk, drains, and fixtures with approved products.
Inspect sealant joints and repair failures promptly.
Maintain natural stone or specialty finishes as recommended.
Keep vanity plumbing and toilet connections accessible for inspection.
Clean ventilation grilles and showerheads periodically.
Related Terms
Primary Suite
Double Vanity
Walk-In Shower
Curbless Shower
Freestanding Tub
Water Closet
Bathroom Ventilation
Heated Floor
Shower Niche
Universal Design
-
Primary Suite
Primary Suite
Definition
A primary suite is the home's principal private sleeping area and generally includes a primary bedroom connected to a dedicated bathroom. Many primary suites also incorporate one or more walk-in closets, a dressing area, sitting area, laundry access, coffee bar, private patio, or other amenities designed specifically for the homeowners.
In remodeling, a primary suite may be improved within its existing footprint or created by combining rooms, relocating walls, converting underused space, or reconfiguring the relationship between the bedroom, bathroom, and closets. Successful planning considers privacy, circulation, sound control, natural light, furniture placement, storage, mechanical systems, and how one partner can use the bathroom or closet without disturbing the other.
Common Applications
Whole-home renovations
Bedroom and bathroom expansions
Closet additions
Aging-in-place projects
Multigenerational homes
Luxury remodeling
First-floor bedroom conversions
Reconfiguration of underused adjoining rooms
Common Components
Primary bedroom
En-suite primary bathroom
Walk-in closet
Dual closets
Dressing area
Sitting area
Private water closet
Laundry connection
Coffee or beverage station
Private exterior access
Built-in storage
Accessibility features
Advantages
Creates a private and highly functional homeowner retreat
Improves storage and organization
Can reduce traffic through shared areas
Supports customized daily routines
Offers opportunities for accessibility and first-floor living
May improve home value and buyer appeal
Allows coordinated bedroom, bathroom, and closet design
Disadvantages
May require major structural, plumbing, electrical, and HVAC changes
Can reduce the size or number of other rooms
Large suites can feel inefficient if space is poorly allocated
Luxury amenities increase cost and maintenance
Open bathroom concepts may reduce privacy and sound control
Additions or major alterations may require design and permitting services
Construction can be disruptive
When to Choose Primary Suite
The existing bedroom, bathroom, or closet no longer functions well
The homeowners want greater privacy or storage
A first-floor suite is needed for long-term accessibility
Adjacent underused space can be reconfigured
The home lacks a true en-suite primary bathroom
A whole-home remodel creates an opportunity to improve circulation
Pristine Pro Tip 💡
Map both partners' morning and evening routines. Consider who wakes first, where clothes are stored, how bathroom light and sound travel, and whether the closet should be accessed through the bedroom or bathroom. Small circulation decisions can have a greater daily impact than expensive decorative upgrades.
Common Mistake ❌
A common mistake is creating a very large bedroom while leaving the bathroom and closet undersized. Another is using the bathroom as the only path to the closet, which may create humidity and privacy concerns. HVAC capacity, return-air paths, sound insulation, door locations, and furniture clearances should be resolved early.
Designer Insight 🎨
The most successful primary suites use a consistent material story while giving each area its own identity. Bedroom textiles, bathroom stone or tile, cabinetry, lighting, and hardware should feel related. Transitional spaces such as a dressing vestibule or short gallery can make the suite feel organized and intentional.
Florida Rating 🌴
⭐⭐⭐⭐⭐ Excellent
Primary suites are highly desirable in Florida, especially first-floor suites that support aging in place and avoid stairs. Exterior heat gain, humidity control, hurricane-rated openings when applicable, bathroom ventilation, and access to lanais or pools should be incorporated into the design rather than addressed later.
Maintenance Level
⭐⭐⭐ Moderate
Maintain HVAC filters, supply registers, and return-air paths.
Control bathroom humidity with effective ventilation.
Inspect windows, exterior doors, and sealants.
Keep closet ventilation and storage organized.
Maintain plumbing fixtures and waterproofed areas.
Review smoke and carbon-monoxide alarm placement as applicable.
Use furniture and rugs that do not obstruct circulation.
Related Terms
Primary Bedroom
Primary Bathroom
En-Suite Bathroom
Walk-In Closet
Dressing Room
Aging-in-Place
Universal Design
Laundry Room
Sitting Area
Space Planning
-
Primer
Primer
Definition
Primer is a preparatory coating applied before paint, stain, adhesive, or another finish to improve adhesion, create a more uniform surface, block stains, seal porous materials, and help the final coating perform as intended. Primers are formulated for specific substrates and problems, including new drywall, bare wood, masonry, metal, glossy finishes, water stains, smoke damage, tannin bleed, and high-moisture environments.
Primer is not simply inexpensive paint. Its resins and additives are designed to bond to the substrate and provide a suitable surface for the finish coat. Some projects require a dedicated primer, while certain previously painted surfaces in good condition may only need cleaning, sanding, and a compatible paint system. Product selection should be based on the surface, existing coating, exposure, and the problem being solved.
Common Applications
New drywall and joint compound
Bare wood and trim
Cabinet painting
Masonry and stucco
Metal surfaces
Previously glossy paint
Water- or smoke-stained areas
Color changes
Exterior painting
Patch repairs
Tile or laminate bonding systems when specifically approved
Moisture-prone rooms
Common Types of Primer
Drywall primer-sealer
Bonding primer
Stain-blocking primer
Shellac-based primer
Oil-based primer
Water-based acrylic primer
Masonry primer
Metal primer
Rust-inhibitive primer
High-build primer
Tannin-blocking wood primer
Moisture-resistant or mildew-resistant primer
Advantages
Improves finish-coat adhesion
Seals porous or uneven surfaces
Helps block stains and odors
Promotes more uniform sheen and color
Can reduce the number of finish coats needed
Supports durable cabinet and trim finishes
Provides specialized protection for masonry or metal
Helps reveal surface defects before final painting
Disadvantages
Adds labor, material, and drying time
The wrong primer can cause adhesion or compatibility problems
Some stain-blocking products have strong odors or higher VOCs
Primer does not correct structural moisture problems
Poor preparation can cause failure even with a premium primer
Some products require sanding before topcoating
Long delays beyond the recoat window may require additional preparation
When to Choose Primer
Painting new or repaired drywall
Coating bare wood, metal, masonry, or other unpainted materials
Changing from a dark color to a light color or vice versa
Painting cabinets or glossy surfaces
Covering stains, smoke residue, or tannin bleed
Switching between potentially incompatible coating types
The finish-coat manufacturer specifies a primer
Pristine Pro Tip 💡
Choose primer by problem, not by habit. A drywall primer, bonding primer, stain blocker, and masonry primer perform different jobs. Before priming, identify the substrate, existing coating, moisture condition, stain source, and planned topcoat. Test questionable surfaces in a small area and follow the full coating system from one manufacturer when possible.
Common Mistake ❌
A common mistake is priming over grease, dust, soap residue, mildew, loose paint, or active water damage. Primer cannot bond reliably to contamination or stop a leak. Another mistake is assuming a paint-and-primer product replaces every dedicated primer; severe stains, bare substrates, cabinets, and difficult glossy surfaces often need specialized preparation.
Designer Insight 🎨
Primer contributes to the final appearance even though it is never seen. Uniform porosity helps prevent flashing, uneven sheen, and color variation. Tinted primer can improve coverage under deep colors, while a light primer can support clean whites and pale finishes.
Florida Rating 🌴
⭐⭐⭐⭐⭐ Excellent
Primer is especially important in Florida because intense sun, humidity, rain, salt air, mildew pressure, and masonry surfaces create demanding coating conditions. Exterior and bathroom products should be selected for the specific substrate and exposure, but moisture sources must be corrected before coating.
Maintenance Level
⭐ None After Topcoating
Primer itself requires no maintenance once properly topcoated.
Maintain the finish coat according to the manufacturer's instructions.
Repair leaks and moisture intrusion promptly.
Address peeling or bubbling by identifying the underlying cause.
Use compatible primers when making future repairs.
Do not leave primers exposed longer than recommended if they are not designed as finish coats.
Related Terms
Paint
Bonding Primer
Stain-Blocking Primer
Cabinet Painting
Drywall Primer
Masonry Paint
Surface Preparation
Topcoat
Caulk
Joint Compound
-
Privacy Glass
Privacy Glass
Definition
Privacy glass is glass designed to obscure or distort the view through it while still allowing some level of light transmission. It is used in bathrooms, entry doors, windows, shower enclosures, interior partitions, and other locations where natural light is desired but a clear view would reduce privacy.
Privacy can be created through etched, frosted, patterned, textured, tinted, laminated, filmed, or electronically switchable glass. The level of privacy varies significantly by product. Some glass obscures shapes during the day but becomes more transparent when a bright interior is viewed from a darker exterior at night. Product samples should be evaluated under realistic lighting conditions.
Common Applications
Bathroom windows
Shower enclosures
Entry doors and sidelights
Interior office partitions
Closet doors
Laundry rooms
Pool bathrooms
Transom windows
Room dividers
Street-facing windows
Common Types of Privacy Glass
Frosted glass
Acid-etched glass
Sandblasted glass
Patterned or rolled glass
Reeded glass
Rain glass
Obscure glass
Tinted glass
Laminated decorative glass
Applied privacy film
Switchable smart glass
Integral blinds or shades within insulated glass
Advantages
Allows natural light while limiting visibility
Reduces the need for fabric window coverings in wet areas
Available in many patterns and privacy levels
Can become a strong decorative feature
Easy-to-clean options are available
Suitable for modern and traditional designs
Can improve privacy without making a small room feel enclosed
Disadvantages
Not every product provides complete privacy at night
Textured surfaces may be harder to clean
Custom or smart-glass options can be expensive
Applied films may bubble, peel, or discolor over time
Some patterns distort light or views more than expected
Replacement can be difficult if a specialty pattern is discontinued
Tint alone may not provide sufficient privacy
When to Choose Privacy Glass
A bathroom needs daylight without a clear exterior view
A shower enclosure requires partial screening
An entry door needs privacy while retaining light
Window coverings would be impractical in a wet location
An interior partition should transmit light
The selected glass provides the required safety rating and privacy level
Pristine Pro Tip 💡
View a full-size sample from both sides with daylight behind it and again with the room illuminated at night. Privacy ratings can be misleading, and a pattern that looks opaque in a showroom may reveal silhouettes when lighting conditions reverse. Confirm whether tempered or laminated safety glass is required for the location.
Common Mistake ❌
A common mistake is assuming frosted or tinted glass guarantees complete privacy. Another is installing the textured side where soap residue and water spots are hardest to remove. In showers, the orientation of the smooth and textured faces should follow the manufacturer's recommendations and cleaning considerations.
Designer Insight 🎨
Reeded, fluted, and softly etched glass can filter light while adding architectural texture. Use the pattern deliberately: vertical lines can make a room feel taller, while a subtle matte finish creates a quieter look. Coordinate the glass with nearby tile, mirrors, and metal framing so the room does not become overly busy.
Florida Rating 🌴
⭐⭐⭐⭐⭐ Excellent
Privacy glass is excellent for Florida bathrooms and entryways because it preserves daylight while limiting views from nearby homes, pools, patios, and streets. Glass exposed to strong sun should be selected with heat, fading, insulated performance, and hurricane-protection requirements in mind where applicable.
Maintenance Level
⭐⭐ Easy
Clean with products approved for the glass and any applied coating.
Use a squeegee on shower glass.
Avoid abrasive tools on etched surfaces or films.
Inspect applied film edges for lifting.
Clean textured glass with a soft brush if residue collects in the pattern.
Maintain window and shower-frame sealants.
Related Terms
Frosted Glass
Reeded Glass
Tempered Glass
Laminated Glass
Shower Glass
Window Film
Smart Glass
Bathroom Window
Obscure Glass
Glass Partition
-
Pull-Out Trash Cabinet
Pull-Out Trash Cabinet
Definition
A pull-out trash cabinet is a base cabinet fitted with sliding hardware that conceals one or more waste bins behind a cabinet door. The door may attach directly to the pull-out frame or open separately before the bins slide forward. Many units include two containers for trash and recycling, while others are designed for a single large bin, compost, or specialty sorting.
Pull-out trash cabinets improve kitchen appearance by removing freestanding waste cans from view. Their performance depends on cabinet width, bin capacity, hardware quality, door alignment, clearances, and location within the work zone. Because the cabinet contains food waste and moisture, durable finishes and easy cleaning are important.
Common Applications
Kitchen base cabinets
Prep kitchens
Butler's pantries
Laundry rooms
Outdoor-adjacent serving areas
Recycling stations
Coffee bars
Commercial break rooms with residential-style cabinetry
Common Configurations
Single-bin pull-out
Double-bin trash and recycling pull-out
Top-mount pull-out frame
Bottom-mount pull-out frame
Door-mounted pull-out
Soft-close pull-out
Full-extension slides
Touch-to-open system
Integrated odor-control lid
Narrow pull-out for compact kitchens
Advantages
Keeps waste containers out of sight
Creates a cleaner, more organized kitchen
Can combine trash and recycling in one cabinet
Full-extension slides improve access
Eliminates a freestanding can from the floor plan
Can be positioned close to food preparation and cleanup zones
Bins are removable for cleaning
Disadvantages
Uses an entire base cabinet
Food spills and odors can collect inside the cabinet
Low-quality slides may sag or fail
Large bins may not fit narrow cabinet openings
The door can become misaligned with heavy use
Not ideal beside heat-producing appliances
Requires regular cleaning and trash removal
When to Choose Pull-Out Trash Cabinet
The homeowner wants concealed waste storage
A base cabinet can be dedicated to trash and recycling
The location is close to the sink, dishwasher, or main prep area
The chosen bins meet the household's capacity needs
High-quality full-extension hardware fits the cabinet
The cabinet can be cleaned easily
Pristine Pro Tip 💡
Select the actual pull-out system before ordering the cabinet. Confirm the required interior width, depth, height, hinge clearance, door attachment method, bin capacity, and whether plumbing or an outlet occupies the cabinet. For most households, a slightly wider unit with two practical bins is easier to use than a narrow system with undersized containers.
Common Mistake ❌
A common mistake is locating the trash pull-out where it blocks a busy aisle, dishwasher, or adjacent drawer when open. Another is placing it too far from the sink and prep area. Cheap hardware often becomes frustrating quickly because waste bins are heavy and used repeatedly every day.
Designer Insight 🎨
A pull-out trash cabinet should visually disappear into the cabinet run. Matching door proportions and aligning rails with adjacent drawers creates a clean appearance. In large kitchens, a second smaller pull-out in the prep kitchen or island may improve workflow.
Florida Rating 🌴
⭐⭐⭐⭐⭐ Excellent
Concealed trash storage works well in Florida, but warm temperatures make prompt waste removal and regular cleaning especially important. Moisture-resistant cabinet interiors, sealed edges, washable bins, and good household pest control help protect the cabinet.
Maintenance Level
⭐⭐⭐ Moderate
Empty bins frequently.
Wash and dry bins regularly.
Wipe cabinet walls, floor, door, and hardware.
Tighten door and slide adjustments when needed.
Avoid overloading the bins or forcing the pull-out closed.
Use liners that fit securely.
Address leaks or food spills immediately.
Related Terms
Base Cabinet
Recycling Center
Cabinet Hardware
Full-Extension Slides
Soft-Close Hardware
Prep Kitchen
Kitchen Island
Waste Sorting
Compost Bin
Cabinet Organizer
-
Pull-Out Spice Rack
Pull-Out Spice Rack
Definition
A pull-out spice rack is a narrow cabinet organizer that slides forward to provide access to spices, oils, condiments, or other small cooking items. It is commonly installed in a narrow base cabinet near a range or preparation area, although taller pantry versions and upper-cabinet pull-outs are also available.
Unlike a fixed narrow cabinet, a pull-out presents stored items from the side, making small containers easier to see and reach. Quality systems use full-extension slides, adjustable shelves or rails, and stable hardware that prevents bottles from tipping. Placement should balance cooking convenience with protection from heat, steam, and direct sunlight.
Common Applications
Narrow spaces beside cabinet runs
Cooking zones
Prep kitchens
Pantry cabinets
Baking centers
Coffee stations
Small kitchens
Custom cabinetry
Common Configurations
Base-cabinet spice pull-out
Tall pantry pull-out
Upper-cabinet pull-out
Single-sided organizer
Double-sided organizer
Adjustable-shelf pull-out
Wire-basket pull-out
Wood organizer with retaining rails
Soft-close full-extension unit
Integrated utensil and spice organizer
Advantages
Uses narrow cabinet space efficiently
Keeps spices visible and organized
Provides full access without reaching into a deep cabinet
Can store oils, sauces, and small containers
Supports workflow near the cooking area
Available in custom and retrofit sizes
Creates a cleaner countertop
Disadvantages
Narrow units offer limited capacity
Heat beside a range can degrade spices and oils
Bottles may tip if rails are poorly designed
Low-quality hardware can wobble
Uses cabinet space that might serve another purpose
Very small labels may still be difficult to read
Requires organization to prevent duplicate or expired products
When to Choose Pull-Out Spice Rack
A narrow cabinet opening needs a useful purpose
The homeowner wants spices near the prep or cooking zone
Items can be protected from excessive heat
The system provides adjustable, stable storage
The household uses enough spices or bottles to justify dedicated storage
The pull-out will not conflict with appliance doors or handles
Pristine Pro Tip 💡
Do not automatically place a spice pull-out directly against the range. Check appliance-side clearances and heat exposure, and consider using a filler or insulated panel where required. Measure the tallest bottles and the actual clear interior width before choosing a system.
Common Mistake ❌
A common mistake is selecting a rack from the nominal cabinet width rather than the true interior opening. Face frames, hinges, door thickness, and hardware reduce usable space. Another is storing cooking oils or delicate spices in a location exposed to sustained heat or sunlight.
Designer Insight 🎨
A spice pull-out is most successful when its door matches the surrounding cabinetry and the internal organization is adjustable. In a symmetrical kitchen, matching narrow pull-outs on both sides of a range can create balance, but the contents should justify the space.
Florida Rating 🌴
⭐⭐⭐⭐ Very Good
Pull-out spice racks perform well in Florida kitchens, but spices and oils should be kept away from heat, humidity, and direct sun. Air-conditioned interior storage and tightly sealed containers help preserve freshness.
Maintenance Level
⭐⭐ Easy
Wipe shelves and rails regularly.
Remove expired products.
Clean spills immediately, especially oils and sauces.
Check slide and door alignment.
Avoid exceeding the hardware's weight rating.
Use uniform, well-sealed containers where practical.
Related Terms
Cabinet Organizer
Base Cabinet
Pantry Pull-Out
Full-Extension Slides
Range
Filler Panel
Appliance Clearance
Soft-Close Hardware
Prep Kitchen
Kitchen Storage
-
Pull-Out Shelves
Pull-Out Shelves
Definition
Pull-out shelves are sliding cabinet shelves that extend toward the user, making stored items easier to see and reach. They are often called roll-out trays, slide-out shelves, or cabinet drawers. Pull-out shelves can be factory-installed in new cabinetry or added to many existing cabinets as a retrofit.
They are especially useful in deep base cabinets, pantries, vanities, and utility cabinets where fixed shelves force users to bend, kneel, or remove items from the front to reach the back. Pull-out shelves should be sized for the cabinet opening and supported by hardware rated for the expected load.
Common Applications
Kitchen base cabinets
Pantry cabinets
Bathroom vanities
Laundry cabinets
Linen storage
Pots and pans storage
Small-appliance storage
Cleaning-supply cabinets
Aging-in-place upgrades
Existing cabinet retrofits
Common Types
Wood roll-out tray
Wire pull-out basket
Full-extension shelf
Soft-close pull-out shelf
Heavy-duty appliance shelf
Low-profile tray
High-sided drawer-style shelf
Retrofit shelf mounted to existing cabinet floor
Pull-out shelf behind doors
Individually adjustable pantry roll-out
Advantages
Improves access to the back of deep cabinets
Reduces bending and reaching
Keeps stored items visible
Supports aging-in-place and universal design
Can be retrofitted in many cabinets
Available in multiple load ratings and materials
Makes inventory and cleaning easier
Disadvantages
Hardware and shelf sides reduce usable interior width
Shelves must be pulled out one at a time behind hinged doors
Door hinges or center stiles may interfere
Low-quality slides can sag or bind
Tall items may tip without adequate sides
Adds cost compared with fixed shelves
Improperly loaded shelves can damage hardware
When to Choose Pull-Out Shelves
Deep cabinets are difficult to access
The homeowner wants to reduce bending or kneeling
Heavy cookware or appliances need organized storage
A pantry needs better visibility
Existing cabinet boxes are strong and square enough for a retrofit
The selected hardware supports the anticipated weight
Pristine Pro Tip 💡
Measure the narrowest clear opening, not just the cabinet-box width. Hinges, face frames, doors, plumbing, and center stiles can interfere. For heavy mixers, cookware, or canned goods, choose full-extension slides with a generous load rating and mount them into solid cabinet material.
Common Mistake ❌
A common mistake is installing a wide pull-out that cannot clear the open cabinet doors or hinges. Another is using lightweight hardware for heavy items. In sink bases, plumbing, disposals, filtration systems, and shutoff valves must remain accessible and cannot be blocked by the shelf.
Designer Insight 🎨
Pull-out shelves are largely hidden, but their finish and construction influence how luxurious the cabinetry feels. Dovetailed wood trays, matching edge details, and soft-close slides create a more refined experience. In highly used cabinets, function is often more valuable than decorative interior accessories.
Florida Rating 🌴
⭐⭐⭐⭐⭐ Excellent
Pull-out shelves are excellent for Florida homes and support aging in place, downsizing, and multigenerational living. In humid areas, use sealed wood or corrosion-resistant wire systems and repair plumbing leaks promptly.
Maintenance Level
⭐⭐ Easy
Wipe shelves and slides regularly.
Avoid exceeding the rated load.
Distribute heavy items evenly.
Tighten mounting screws and adjust doors as needed.
Keep crumbs and debris out of slide mechanisms.
Inspect sink-base units for moisture or corrosion.
Related Terms
Roll-Out Tray
Cabinet Drawer
Full-Extension Slides
Soft-Close Hardware
Pantry Cabinet
Base Cabinet
Universal Design
Cabinet Retrofit
Appliance Lift
Blind Corner Cabinet
-
P-Trap
P-Trap
Definition
A P-trap is a curved plumbing fitting installed in a fixture drain line to retain a small amount of water. This standing water creates a seal that helps prevent sewer gases, odors, and pests from traveling through the drainage system and entering the building. The fitting resembles the letter P when viewed from the side with its connecting drain arm.
P-traps are used beneath sinks and at many other plumbing fixtures, although some traps are concealed within fixture assemblies or floors. A properly installed trap must be correctly sized, connected to an adequately vented drainage system, accessible where required, and configured so it is not siphoned dry.
Common Applications
Kitchen sinks
Bathroom sinks
Prep sinks
Bar sinks
Laundry sinks
Utility sinks
Certain appliance drains when designed appropriately
Commercial lavatories
Plumbing fixture replacements
Remodeling rough-ins
Common Materials and Configurations
PVC P-trap
ABS P-trap
Chrome-plated brass P-trap
Solid brass decorative trap
Tubular plastic trap
Solvent-weld trap
Slip-joint trap
Adjustable trap assembly
Deep-seal trap where specifically required
Decorative exposed trap for wall-mounted sinks
Advantages
Blocks sewer gases and odors
Simple, passive design with no moving parts
Provides access for cleaning many sink drains
Can catch small objects dropped into a sink
Available in multiple materials and sizes
Relatively inexpensive to replace
Essential to a sanitary drainage system
Disadvantages
Can clog with grease, hair, soap, or debris
May leak at slip joints or corroded connections
Can dry out in rarely used fixtures
Improper installation can cause siphoning or poor drainage
Occupies storage space beneath a sink
Decorative metal traps may corrode or show water spots
Incorrect configurations can create code and performance problems
When to Choose P-Trap
Installing or replacing a sink or other trapped fixture
Relocating a drain during remodeling
Correcting sewer odors caused by a missing or failed trap
Updating corroded or leaking drain piping
Creating an exposed plumbing design with an approved decorative trap
The trap size and configuration match the fixture and drainage system
Pristine Pro Tip 💡
Keep the trap accessible and install it directly below the fixture outlet using the simplest approved route. Avoid unnecessary extensions, flexible accordion-style drain pieces, and multiple traps. Before closing a vanity or cabinet installation, fill and drain the sink several times while checking every connection for leaks.
Common Mistake ❌
A common mistake is creating an S-trap by routing the drain downward before it reaches a properly vented trap arm. This can siphon water from the trap and allow sewer gas into the room. Another mistake is overtightening plastic slip-joint nuts, which can distort washers and cause leaks.
Designer Insight 🎨
For most vanities, the P-trap should be concealed while preserving useful storage. Floating or open-console sinks may expose the plumbing, making a clean brass or color-coordinated trap part of the design. The decorative choice should never compromise serviceability or proper drainage.
Florida Rating 🌴
⭐⭐⭐⭐⭐ Excellent
P-traps are essential in every climate. In Florida's warm conditions, sewer odors can become noticeable quickly if a rarely used trap dries out. Guest bathrooms, pool baths, and seasonal homes should have water added to unused fixtures periodically.
Maintenance Level
⭐⭐ Easy
Run water periodically in rarely used sinks.
Clean the trap when drainage slows.
Inspect slip joints and metal components for leaks or corrosion.
Avoid pouring grease or unsuitable chemicals down drains.
Use a container beneath the trap before disassembly.
Replace damaged washers or fittings rather than relying on excess sealant.
Related Terms
Drain
Plumbing Vent
Trap Arm
S-Trap
Sink Drain
Tailpiece
Cleanout
Air Admittance Valve
Plumbing Rough-In
Sewer Gas
-
Puck Lighting
Puck Lighting
Definition
Puck lighting consists of small, round, low-profile light fixtures named for their resemblance to a hockey puck. They are commonly installed under cabinets, inside glass-front cabinets, in display shelves, closets, niches, toe kicks, and other compact locations where focused accent or task lighting is desired.
Modern puck lights are usually LED and may be surface-mounted or recessed. They can be hardwired, plug-in, battery-powered, or part of a low-voltage system with a remote driver. Light output, beam spread, color temperature, color rendering, dimming compatibility, heat management, wiring access, and fixture spacing should be considered before installation.
Common Applications
Under-cabinet lighting
Glass-front cabinets
Open shelving
Display niches
Closets
Built-in furniture
Toe-kick accents
Bar and beverage cabinets
Bookcases
Task lighting over small work areas
Common Types
Surface-mounted LED puck
Recessed LED puck
Hardwired puck light
Plug-in puck light
Battery-powered puck light
Low-voltage puck system
Dimmable puck light
Color-selectable or tunable-white puck
RGB decorative puck
Integrated cabinet-lighting system
Advantages
Compact size
Focused light for tasks or displays
Easy to conceal beneath many cabinets
Available in recessed and surface-mounted styles
LED models use little energy
Can be dimmed when compatible
Useful in locations where linear fixtures do not fit
Available in many finishes and color temperatures
Disadvantages
May create visible circles or hot spots on counters
Poor spacing can produce uneven light
Individual fixtures require multiple wiring points
Battery models require replacement or charging
Some inexpensive LEDs have poor color quality
Drivers and transformers need accessible locations
Fixtures may become dated or difficult to match later
When to Choose Puck Lighting
Focused accent light is preferred over continuous linear light
A cabinet or shelf has limited mounting space
Glassware, art, or decorative objects need illumination
A recessed fixture can be planned during cabinet fabrication
The homeowner accepts the more concentrated light pattern
The fixture has suitable dimming, color quality, and service access
Pristine Pro Tip 💡
Mock up fixture spacing before drilling cabinets. Shine sample lights onto the actual countertop or display surface to evaluate hot spots, reflections, and shadows. For food-preparation areas, high color-rendering LEDs and consistent color temperature are more important than maximum brightness.
Common Mistake ❌
A common mistake is spacing pucks too far apart, which creates alternating bright and dark circles. Another is recessing fixtures into cabinetry without confirming the required depth, ventilation, and driver location. Mixing different LED color temperatures can make cabinetry and countertops look mismatched.
Designer Insight 🎨
Puck lights work best as intentional accent points. In long under-cabinet runs, a continuous LED strip often creates smoother task lighting, while pucks can highlight glass cabinets, niches, or architectural details. Dimming allows the same fixtures to shift from task lighting to evening ambiance.
Florida Rating 🌴
⭐⭐⭐⭐⭐ Excellent
LED puck lighting is well suited to Florida because it produces less heat than older halogen fixtures and adds little load to air-conditioned spaces. Fixtures used near sinks, outdoor-adjacent areas, or humid locations should have the appropriate rating.
Maintenance Level
⭐ Very Easy
Dust fixture lenses and nearby surfaces.
Replace or recharge batteries in wireless models.
Keep drivers and ventilation openings unobstructed.
Use compatible dimmers.
Replace failed fixtures with matching color temperature and output.
Avoid painting over trim rings or blocking recessed fixtures.
Related Terms
Under-Cabinet Lighting
LED Strip Lighting
Task Lighting
Accent Lighting
Color Temperature
Color Rendering Index
Dimmer
Low-Voltage Lighting
Cabinet Lighting
Lighting Driver
-
PVC Trim
PVC Trim
Definition
PVC trim is a cellular polyvinyl chloride building material manufactured in boards, sheets, moldings, and decorative profiles that resemble painted wood trim. Because it does not absorb water like wood, PVC trim is widely used for exterior and moisture-prone applications such as fascia, soffits, window surrounds, door trim, columns, skirt boards, and decorative details.
PVC trim can be cut, routed, drilled, and fastened with common woodworking tools, but it expands and contracts more with temperature changes than wood. Successful installation requires proper fastening, joint planning, adhesive selection, allowances for movement, and coatings compatible with PVC when painting is desired.
Common Applications
Exterior window and door trim
Fascia and rake boards
Soffit details
Column wraps
Porch trim
Skirt boards
Garage-door surrounds
Coastal exterior details
Bathroom or laundry trim where appropriate
Decorative exterior moldings
Common Forms
Cellular PVC boards
PVC sheets
One-piece corner boards
Column-wrap kits
Beadboard panels
Crown and decorative molding
Sill and brickmold profiles
Fascia boards
Tongue-and-groove PVC
Prefinished or woodgrain-textured PVC
Advantages
Does not rot or absorb water like wood
Resistant to termites and many insects
Excellent for humid and coastal environments
Can be painted with compatible coatings
Available in many standard trim profiles
Machines with common carpentry tools
Low ongoing maintenance
Provides a clean, uniform appearance
Disadvantages
Expands and contracts with temperature changes
Can cost more than common wood trim
Dark paint colors may create excessive heat unless specifically approved
Requires compatible adhesives and fasteners
May dent or deform under impact or heat
Long runs need careful joint planning
Some homeowners prefer the character of natural wood
When to Choose PVC Trim
Exterior trim is exposed to frequent moisture
Rot or termite damage has affected wood trim
A coastal or high-humidity home needs durable details
Low maintenance is a priority
The installer can follow movement and fastening requirements
The chosen paint color and coating are approved for PVC
Pristine Pro Tip 💡
Plan for thermal movement. Follow the manufacturer's instructions for fastening spacing, joint gaps, scarf joints, adhesives, and paint colors. On long runs, avoid trapping the material tightly between fixed surfaces. Use plugs or concealed fastening systems where a refined painted finish is desired.
Common Mistake ❌
A common mistake is installing PVC exactly like wood with tight joints and too few fasteners. Seasonal movement can open joints or cause buckling. Another is painting PVC a very dark color with an unapproved coating, which can increase heat absorption and lead to distortion.
Designer Insight 🎨
PVC trim can create crisp, traditional architectural detail without the maintenance burden of wood. Use consistent reveals, properly proportioned window casings, layered fascia, and well-resolved corners. After painting, high-quality PVC can visually blend with wood while performing better in wet locations.
Florida Rating 🌴
⭐⭐⭐⭐⭐ Excellent
PVC trim is exceptionally well suited to Florida because it resists rain, humidity, termites, and rot. It is especially valuable around rooflines, windows, doors, porches, pools, and coastal exposures. Thermal movement, wind-rated attachment, and compatible exterior coatings still require careful installation.
Maintenance Level
⭐ Very Easy
Wash dirt and mildew with an approved mild cleaner.
Inspect joints, caulk, paint, and fasteners annually.
Touch up compatible paint as needed.
Avoid harsh solvents that can damage the surface.
Keep gutters and drainage systems functioning so water does not concentrate behind trim.
Repair impact damage and open joints promptly.
Related Terms
Exterior Trim
Fascia
Soffit
Column Wrap
Cellular PVC
Composite Trim
Wood Rot
Exterior Paint
Caulk
Flashing
-
PVC Pipe
PVC Pipe
Definition
PVC pipe is rigid plastic piping made from polyvinyl chloride. It is widely used in residential and commercial construction for drainage, waste, vent, irrigation, condensate, and certain cold-water or specialty applications depending on the specific pipe type and local requirements. Standard PVC is lightweight, corrosion-resistant, and joined using compatible primers, solvent cements, fittings, or mechanical connections.
PVC pipe is not one universal product. Pipe schedule, pressure rating, cell classification, temperature limits, color, listing, and intended use vary. Drainage PVC is different from pressure-rated water pipe, and standard PVC is generally not used for hot-water distribution. The pipe and fittings must be selected for the exact application.
Common Applications
Drain, waste, and vent systems
Sink and bathroom drain lines
Plumbing vents
Irrigation systems
Air-conditioning condensate drains
Pool and spa piping where approved
Exterior drainage
Cold-water service in approved applications
Vacuum and specialty systems
Certain appliance and equipment drains
Common Types and Ratings
Schedule 40 PVC
Schedule 80 PVC
DWV PVC
Pressure-rated PVC
Foam-core PVC for approved DWV use
Solid-wall PVC
PVC conduit for electrical applications
Large-diameter drainage pipe
Flexible PVC for limited specialty uses
CPVC, a related but distinct material used for hotter water in approved systems
Advantages
Resistant to rust and many forms of corrosion
Lightweight and easy to transport
Smooth interior supports efficient flow
Widely available in many sizes and fittings
Relatively economical
Solvent-welded joints can be durable when properly made
Useful in humid and below-grade environments
Nonconductive
Disadvantages
Temperature limits restrict hot-water use
Can become brittle from impact, age, or ultraviolet exposure
Incorrect solvent welding can leak
Thermal expansion must be considered
Not suitable for every chemical or pressure application
Requires support at proper intervals
Some pipe types are not approved for exposed or pressurized use
Improper transitions to other materials can fail
When to Choose PVC Pipe
Installing an approved drain, waste, or vent system
Routing condensate or irrigation lines
Replacing corroded piping in an allowed application
A lightweight, corrosion-resistant pipe is beneficial
The pipe's schedule, listing, and temperature rating match the intended service
The installation can be properly supported, protected, and tested
Pristine Pro Tip 💡
Read the printing on the pipe and use matching listed fittings, primer, and cement. Dry-fit the layout, mark fitting alignment, make clean square cuts, deburr the pipe, apply the correct solvent products, fully seat the joint with a slight turn, and hold it long enough to prevent push-out. Observe cure times before testing or pressurizing.
Common Mistake ❌
A common mistake is using the wrong PVC product simply because the diameter appears correct. Foam-core DWV, pressure pipe, electrical conduit, and CPVC are not interchangeable. Another mistake is applying too little or too much solvent cement, failing to deburr the pipe, or testing before the joint has cured.
Designer Insight 🎨
PVC pipe is usually concealed, but its route affects cabinet storage, ceiling heights, wall thickness, and access panels. Coordinating plumbing before cabinetry and finishes are installed prevents unnecessary chases, awkward soffits, and lost storage.
Florida Rating 🌴
⭐⭐⭐⭐⭐ Excellent
PVC is widely suited to Florida because it resists rust, moisture, and many soil conditions. Outdoor pipe must be protected from ultraviolet exposure and impact, and installations should account for heat-related expansion, storm conditions, pest damage, and local requirements.
Maintenance Level
⭐⭐ Easy
Keep drains clear of grease, debris, and unsuitable chemicals.
Inspect exposed piping and supports for damage.
Protect outdoor pipe from sunlight and impact as required.
Repair leaks with approved fittings rather than temporary patches.
Maintain condensate drains to prevent algae blockage.
Avoid exposing standard PVC to temperatures or pressures beyond its rating.
Related Terms
CPVC Pipe
Drain-Waste-Vent (DWV)
Schedule 40
Schedule 80
Solvent Cement
Plumbing Vent
P-Trap
Condensate Drain
Irrigation
Plumbing Rough-In
-
Plaster
Plaster
Definition
Plaster is a wall and ceiling finishing material made by combining a powdered binder with water to create a workable paste that hardens into a dense, durable surface. Traditional plaster systems may use gypsum, lime, cement, or a combination of materials, depending on the application. Unlike drywall, which is installed as prefabricated sheets, plaster is applied wet in one or more coats over a supporting base such as wood lath, metal lath, masonry, concrete, gypsum lath, or an existing sound surface.
In older homes, plaster walls commonly consist of a base coat that keys through wood or metal lath, followed by one or more leveling coats and a smooth finish coat. Modern remodeling projects may use veneer plaster, patching plaster, lime plaster, decorative plaster, or specialty finishes such as Venetian plaster. Plaster is valued for its hardness, sound-dampening qualities, fire resistance, seamless appearance, and ability to create curved or highly detailed architectural surfaces.
Because plaster behaves differently from drywall joint compound, repairs require careful evaluation. Cracks may be caused by normal settlement, loose plaster keys, moisture intrusion, structural movement, or incompatible repair materials. A successful repair addresses the cause of the damage, stabilizes the surrounding plaster, and blends the new finish with the existing wall or ceiling.
Common Applications
- Historic home restoration
- Wall and ceiling resurfacing
- Repairing cracks and damaged areas
- Decorative wall finishes
- Venetian plaster and polished plaster
- Curved walls and arched openings
- Coffered ceilings and ornamental details
- Masonry wall finishing
- Fire-resistant wall assemblies
- Sound-dampening interior partitions
- High-end residential interiors
- Commercial lobbies and feature walls
- Matching original finishes during renovation
Common Types of Plaster
- Gypsum plaster
- Lime plaster
- Cement plaster
- Veneer plaste
- Three-coat plaster
- Patching plaster
- Venetian plaster
- Textured decorative plaster
- Stucco-related cement plaster
- Acoustical plaster
Advantages
- Creates a dense, durable wall or ceiling surface
- Provides a seamless appearance without visible panel joints
- Can be shaped around curves, arches, and architectural details
- Offers good sound-dampening qualities
- Provides natural fire resistance in many assemblies
- Can outlast standard drywall when properly maintained
- Accepts decorative textures and polished finishes
- Works well in historic restoration
- Feels more solid than typical drywall construction
- Can help regulate indoor humidity when lime-based products are used.
Disadvantages
- More labor-intensive than drywall
- Requires specialized skill for high-quality results
- Repairs can be difficult to blend invisibly
- Longer drying or curing time may affect the project schedule
- Can crack if the substrate moves
- Older plaster may separate from lath
- Demolition creates heavy debris and fine dust
- Moisture damage can remain hidden behind the surface
- Decorative finishes can be expensive
- Fasteners and wall-mounted accessories may require special anchors
When to Choose Plaster
- Plaster is commonly chosen or used when:
- Restoring a historic or architecturally significant home
- Matching existing plaster walls and ceilings
- Creating curved walls, arches, or detailed trim transitions
- Designing a high-end decorative feature wall
- Improving the solid feel and acoustic performance of an interior
- Repairing localized damage where the surrounding plaster remains sound
- Applying a polished or textured specialty finish
Pristine Pro Tip 💡
Before deciding to remove old plaster, determine whether it is truly failing. Many plaster walls with surface cracks can be stabilized and repaired without complete demolition. Preserving sound plaster often retains the character, density, and craftsmanship of the original home while reducing unnecessary disruption.
Common Mistake ❌
A common mistake is covering active plaster cracks with ordinary joint compound and paint without stabilizing the underlying surface. If the plaster has separated from the lath or the crack is caused by ongoing movement, the repair will usually reopen. Another mistake is applying modern materials over dusty, chalky, or moisture-damaged plaster without using the appropriate bonding primer or repair system.
Designer Insight 🎨
Plaster can make walls feel softer, richer, and more handcrafted than standard painted drywall. Limewash, Venetian plaster, and subtle troweled textures are especially effective in Mediterranean, Old World, organic modern, and luxury transitional interiors. Because plaster reflects light differently than flat paint, even a neutral color can gain depth and movement.
Florida Rating 🌴
⭐⭐⭐⭐ Very Good
Plaster can perform well in Florida when the building envelope is dry and the material is matched to the environment. Humidity itself is not necessarily harmful, but roof leaks, plumbing leaks, condensation, and poorly controlled indoor moisture can damage plaster or cause coatings to fail. In coastal or moisture-prone conditions, the substrate, bonding system, and finish should be selected carefully.
Maintenance Level
⭐⭐ Moderate
Dust with a soft cloth or vacuum brush attachment. Clean painted plaster with a mild cleaner appropriate for the paint finish. Monitor cracks for changes in width or pattern. Address roof, plumbing, or HVAC moisture problems immediately. Avoid repeatedly patching a moving crack without investigating the cause. Specialty polished plaster may require wax renewal or manufacturer-specific care.
Related Terms
Drywall
Joint Compound
Lath
Venetian Plaster
Stucco
Primer
Skim Coat
Wall Texture
Water Damage
Historic Restoration
-
Plumbing Rough-In
Plumbing Rough-In
Definition
Plumbing rough-in is the stage of construction or remodeling when water-supply lines, drain lines, vent piping, shutoff locations, fixture carriers, and other concealed plumbing components are installed before walls, floors, ceilings, cabinets, and finish surfaces are closed. It establishes the exact locations and elevations required for sinks, faucets, toilets, tubs, showers, appliances, floor drains, and other plumbing fixtures.
During a kitchen or bathroom remodel, rough-in work typically occurs after demolition and framing but before insulation, drywall, waterproofing, tile, cabinetry, and countertops. The plumber uses the approved layout and fixture specifications to position hot and cold water lines, drain-waste-vent piping, shower valves, tub fillers, toilet flanges, sink drains, refrigerator lines, dishwasher connections, and specialty features.
Accurate rough-in is critical because finished fixtures must align with cabinets, tile patterns, countertops, walls, and flooring. Moving a valve, drain, or toilet flange after finishes are installed can require expensive demolition and rework. Rough-in work should follow current plumbing code, manufacturer instructions, local inspection requirements, and the final design documents.
Common Applications
- Kitchen sink relocation
- Bathroom vanity installation
- Toilet replacement or relocation
- Walk-in shower construction
- Tub and shower conversions
- Freestanding tub installation
- Dishwasher and garbage disposal connections
- Refrigerator water lines
- Wet bars and prep sinks
- Commercial restroom renovations
Common Types of Plumbing Rough-In
- Water-supply rough-in
- Drain-waste-vent rough-in
- Gas piping rough-in when applicable
- Shower valve rough-in
- Tub filler rough-in
- Wall-hung toilet carrier rough-in
- Floor drain rough-in
- Appliance water and drain rough-in
- Recirculation line rough-in
- Commercial fixture rough-in
Advantages
- Allows concealed plumbing to be inspected before walls close
- Creates accurate fixture locations
- Supports a clean finished installation
- Makes future access planning possible
- Coordinates plumbing with framing, electrical, HVAC, cabinetry, and tile
- Reduces the risk of costly finish-stage changes
- Allows pressure and leak testing before concealment
- Supports code-compliant drainage and venting
- Makes specialty fixtures easier to install correctly
- Provides an opportunity to replace deteriorated piping during renovation
Disadvantages
- Errors may not become obvious until finish materials are installed
- Changes after rough-in can be expensive
- Requires finalized fixture selections and dimensions
- May involve opening slabs, walls, or ceilings
- Older homes may reveal corroded or noncompliant piping
- Inspection delays can affect the schedule
- Relocating drains can be difficult in concrete-slab homes
- Poor trade coordination can create conflicts with framing or cabinetry
When to Choose Plumbing Rough-In
Plumbing Rough-In is commonly chosen or used when:
- Changing the location of a sink, toilet, shower, tub, or appliance
- Replacing an outdated plumbing layout
- Converting a tub to a walk-in shower
- Installing body sprays, rain heads, handheld showers, or multiple valves
- Adding a wet bar, laundry sink, or prep sink
- Remodeling a kitchen with a new cabinet layout
- Opening walls where aging plumbing should be evaluated
- Completing a permitted plumbing alteration that requires inspection
Pristine Pro Tip 💡
Select faucets, shower valves, tubs, toilets, sinks, and specialty fixtures before rough-in whenever possible. Specification sheets provide the exact centerlines, heights, connection sizes, clearances, and mounting requirements the plumber needs. A generic rough-in based on assumptions can create avoidable problems when the final fixture arrives.
Common Mistake ❌
One of the most expensive mistakes is roughing in plumbing from a conceptual layout rather than the final cabinet, countertop, and fixture plans. Another common error is failing to account for finished wall thickness. Cement board, waterproofing, tile, stone, and decorative panels can move the final surface forward, leaving shower valves or tub spouts set too deep or too far out.
Designer Insight 🎨
Plumbing rough-in determines whether a beautiful design is physically possible. Symmetrical vanity faucets, centered shower controls, wall-mounted fillers, floating vanities, niche placement, and clean countertop layouts all depend on precise concealed work. Good design coordination happens before the wall is closed, not after the tile is installed.
Florida Rating 🌴
⭐⭐⭐⭐⭐ Excellent
Careful plumbing rough-in is especially important in Florida homes built on concrete slabs because relocating drains after construction can require slab cutting and trenching. Florida's humidity also makes leak prevention essential. Pressure testing, proper pipe support, correct insulation where needed, and documenting concealed piping locations help protect the finished remodel.
Maintenance Level
⭐ None Directly
The concealed rough-in itself requires no routine maintenance once properly installed. Homeowners should maintain shutoff valves, inspect visible supply lines, monitor for changes in water pressure, and respond quickly to stains, odors, unexplained moisture, or rising water bills. Photos taken before walls close can be valuable for future repairs.
Related Terms
Plumbing Trim-Out
Drain-Waste-Vent (DWV)
Shutoff Valve
P-Trap
Toilet Flange
Shower Valve
Water Supply Line
Vent Stack
Framing
Permit Inspection
-
Plumbing Trim-Out
Plumbing Trim-Out
Definition
Plumbing trim-out is the finish stage when visible plumbing fixtures, fittings, controls, drains, supply connections, and accessories are installed after walls, tile, flooring, cabinets, countertops, and paint are substantially complete. It transforms the concealed plumbing rough-in into a functional kitchen, bathroom, laundry room, or commercial space.
Typical trim-out work includes installing faucets, sinks, toilets, showerheads, handheld shower wands, valve trim, tub fillers, drain assemblies, garbage disposals, dishwasher connections, refrigerator water lines, angle stops, escutcheons, supply tubes, and decorative accessories. The plumber also tests operation, checks for leaks, adjusts water flow and temperature, confirms proper drainage, and may complete final code-related items.
Trim-out requires careful handling because it occurs around finished surfaces. Fixtures must be aligned, sealed, tightened correctly, and protected from scratches. Manufacturer instructions are especially important for thermostatic valves, electronic faucets, wall-mounted fixtures, freestanding tub fillers, smart toilets, and other specialty products.
Common Applications
- Kitchen faucet and sink installation
- Bathroom faucet installation
- Toilet installation
- Showerhead and valve trim installation
- Garbage disposal connection
- Dishwasher connection
- Refrigerator water hookup
- Laundry sink fixtures
- Bidet and bidet-seat connections
- Water filtration faucets
- Commercial restroom fixtures
- Accessory and drain installation
Common Types of Plumbing Trim-Out
- Kitchen plumbing trim-out
- Bathroom plumbing trim-out
- Shower trim package
- Tub trim package
- Appliance connection trim-out
- Commercial fixture trim-out
- Smart plumbing fixture commissioning
Advantages
- Completes the visible plumbing design
- Allows fixtures to be tested under normal operating conditions
- Provides an opportunity to correct minor alignment issues
- Confirms drains and traps are functioning properly
- Finishes penetrations with decorative escutcheons
- Allows final leak checks before occupancy
- Coordinates fixture finishes with the room design
- Makes the space usable
Disadvantages
- Finished surfaces can be damaged if installers are careless
- Missing parts can delay completion
- Incompatible trim may not fit the installed rough-in valve
- Imported or specialty fixtures may require unique adapters
- Leaks can damage new cabinets or flooring
- Fixture defects may not be discovered until installation
- Overtightening can crack porcelain or damage finishes
- Final adjustments may require access panels or minor rework
When to Choose Plumbing Trim-Out
Plumbing Trim-Out is commonly chosen or used when:
- Completing a kitchen or bathroom remodel
- Replacing fixtures while keeping existing rough-in locations
- Installing a coordinated faucet and shower collection
- Connecting new sinks, toilets, tubs, or appliances
- Commissioning specialty plumbing products
- Preparing a renovated space for final walkthrough and use
Pristine Pro Tip 💡
Keep every valve cartridge, trim kit, mounting bracket, gasket, adapter, and manufacturer instruction together from delivery through installation. Many decorative trim pieces are designed for one specific rough-in valve. Confirming model compatibility before tile is complete prevents a situation where the visible trim cannot be installed on the concealed valve.
Common Mistake ❌
A common mistake is purchasing shower trim based only on appearance without confirming that it matches the valve body installed inside the wall. Brand names alone are not always enough because manufacturers use multiple valve platforms. Another mistake is disposing of small parts or protective covers during demolition or rough-in, then discovering they are required for final installation.
Designer Insight 🎨
Plumbing trim is one of the most visible finishing layers in a kitchen or bathroom. Coordinating the faucet, shower trim, drain, tub filler, accessories, cabinet hardware, lighting, and mirror details creates a polished result. Mixed metals can work beautifully, but they should look intentional rather than accidental.
Florida Rating 🌴
⭐⭐⭐⭐⭐ Excellent
Quality trim-out practices are important in Florida because even a small undetected leak can contribute to cabinet damage, mold growth, or deterioration in a humid environment. Corrosion-resistant finishes and components are especially valuable in coastal areas. Final testing should include all spray settings, diverters, drains, shutoffs, and appliance connections.
Maintenance Level
⭐⭐ Easy
Wipe fixtures with a soft cloth and mild soap. Avoid abrasive cleaners and harsh chemicals that can damage decorative finishes. Clean faucet aerators and showerheads when mineral buildup reduces flow. Exercise shutoff valves periodically. Inspect flexible supply lines and under-sink connections for moisture. Follow manufacturer care instructions for specialty finishes.
Related Terms
Plumbing Rough-In
Faucet
Shower Valve
Angle Stop
Supply Line
Escutcheon
P-Trap
Drain Assembly
Garbage Disposal
Final Walkthrough
-
Poplar Wood
Poplar Wood
Definition
Poplar is a widely available hardwood commonly used for painted cabinetry, trim, millwork, furniture components, drawer parts, face frames, and custom carpentry. Although botanically classified as a hardwood, poplar is softer and lighter than species such as oak, maple, hickory, or walnut. It machines easily, holds detail well, and has a relatively smooth, uniform grain.
Poplar's natural color ranges from creamy white and pale yellow to green, gray, brown, or occasional purple mineral streaks. Because the color variation can be unpredictable, poplar is most often painted rather than clear-finished. When properly prepared, it provides a smooth surface for high-quality painted finishes and is frequently selected for shaker-style cabinet doors, decorative panels, built-ins, crown molding, baseboards, and custom trim.
Poplar should not automatically be considered a low-quality material. Its suitability depends on the application. It performs very well for interior painted millwork but is less appropriate for exposed exterior use, high-abuse surfaces, or projects where a pronounced natural wood grain is desired.
Common Applications
- Paint-grade cabinet doors
- Cabinet face frames
- Built-in shelving
- Bookcases and entertainment centers
- Crown molding
- Baseboards and door casing
- Wainscoting
- Wall paneling
- Furniture frames
- Drawer sides and secondary components
- Decorative brackets and corbels
- Interior stair components
- Custom range hoods
- Fireplace mantels
- Interior doors
Common Types of Poplar Wood
- Solid poplar lumber
- Finger-jointed paint-grade poplar
- Poplar plywood
- Laminated poplar panels
- Milled poplar trim
- Kiln-dried poplar boards
Advantages
- Smooth surface for painted finishes
- Machines and sands easily
- Accepts routed profiles and decorative details
- More affordable than many premium hardwoods
- Readily available in many dimensions
- Relatively stable when properly dried
- Lighter than many dense hardwoods
- Good choice for custom interior millwork
- Can be repaired and repainted
- Works well with common woodworking adhesives and fasteners
Disadvantages
- Dents more easily than harder woods
- Natural color variation can show through light stains
- Often blotches when stained
- Not ideal for a clear natural finish
- Limited exterior durability unless specially protected
- Edges can crush if fasteners are overtightened
- Requires proper priming to prevent tannin or color bleed
- May not withstand heavy abuse as well as maple or oak
When to Choose Poplar Wood
Poplar Wood is commonly chosen or used when:
- Painted custom cabinetry
- Paint-grade built-ins and trim
- Projects requiring routed profiles or decorative details
- Budget-conscious custom millwork
- Interior applications where a smooth finish matters more than visible grain
- Repairs or additions that must match existing painted woodwork
Pristine Pro Tip 💡
For a premium painted finish, use properly dried, straight poplar and seal knots, green streaks, and areas prone to bleed-through with an appropriate stain-blocking primer. Sanding between primer coats helps create the smooth surface homeowners expect from custom millwork.
Common Mistake ❌
A common mistake is selecting poplar for a stained project because the sample board looks light and uniform. Poplar can absorb stain unevenly and may display green, brown, or purple areas that become more noticeable after finishing. Another mistake is treating it like a high-impact hardwood in mudrooms, stair nosings, or heavily used work surfaces.
Designer Insight 🎨
Poplar is a practical material for sophisticated painted details. It can be shaped into inset cabinet frames, furniture-style toe kicks, custom hood surrounds, paneled islands, and layered molding. The luxury appearance comes from proportion, joinery, surface preparation, and finish quality rather than from the raw wood species alone.
Florida Rating 🌴
⭐⭐⭐⭐ Very Good
Poplar performs well in Florida's air-conditioned interiors when it is acclimated, sealed on all sides where appropriate, and protected from water. It should not be left exposed in damp locations or used outdoors without a suitable exterior-rated system. In kitchens and bathrooms, prompt repair of leaks and durable paint coverage are important.
Maintenance Level
⭐⭐ Easy
Clean painted poplar with a soft damp cloth and mild soap. Avoid soaking joints or edges. Touch up chips before moisture reaches bare wood. Use pads or bumpers in high-contact areas. Maintain interior humidity as consistently as practical. Recaulk gaps where trim meets walls if seasonal movement occurs.
Related Terms
Maple Wood
Oak Wood
MDF
Plywood
Paint-Grade Cabinetry
Shaker Cabinet
Millwork
Crown Molding
Built-In Cabinetry
Wood Grain
-
Post and Beam
Post and Beam
Definition
Post and beam is a structural building method that uses vertical posts to support horizontal beams, creating a load-bearing framework with wider spans and fewer interior walls than conventional light-frame construction. The posts and beams may be solid sawn timber, engineered lumber, steel, or a combination of materials, depending on the building design and loads.
In residential remodeling, post-and-beam construction may be original to the home or introduced during a structural renovation to open a kitchen, combine rooms, support a vaulted ceiling, create a covered outdoor area, or replace a load-bearing wall. Exposed beams can become a major architectural feature, while concealed beams can provide support without changing the finished style.
Structural modifications involving posts and beams require professional evaluation. Beam size, material, bearing length, connections, footing capacity, roof or floor loads, wind loads, and load paths must be considered. Removing or altering a structural post or beam without proper engineering can cause sagging, cracking, roof movement, or structural failure.
Common Applications
- Open-concept kitchen renovations
- Removing load-bearing walls
- Great rooms and vaulted ceilings
- Covered patios and lanais
- Timber-frame homes
- Room additions
- Garage openings
- Large window and door openings
- Porches and pergolas
- Commercial interiors
- Exposed architectural beams
- Support for second-story loads
- Restoration of older homes
Common Types of Post and Beam
- Traditional timber post and beam
- Engineered wood beam systems
- Laminated veneer lumber (LVL) beams
- Glulam beams
- Steel beam with wood posts
- Steel posts and beams
- Decorative nonstructural beam wraps
- Hybrid wood-and-steel framing
Advantages
- Allows wider open spaces
- Reduces the need for multiple interior bearing walls
- Creates strong architectural character
- Can support heavy roof or floor loads
- Works with vaulted and cathedral ceilings
- Allows large openings between rooms
- Can be concealed or featured as part of the design
- Engineered options provide predictable strength
- Supports flexible interior layouts
- Pairs well with modern, rustic, coastal, and transitional styles
Disadvantages
- Requires structural engineering in many remodeling situations
- May require permits and inspections
- Posts can interfere with cabinetry or circulation
- Footings may need reinforcement
- Large beams are heavy and difficult to install
- Exposed wood requires careful finishing
- Structural changes can increase project cost
- Utilities may need to be rerouted
- Poorly planned beam depth can affect ceiling height
- Connections must resist uplift and lateral forces
When to Choose Post and Beam
Post and Beam is commonly chosen or used when:
- Creating an open-concept kitchen and living area
- Replacing a load-bearing wall
- Supporting a wide opening
- Adding a covered outdoor living space
- Designing a vaulted ceiling
- Preserving or highlighting a timber-frame aesthetic
- Reinforcing an existing structure during renovation
- Creating a dramatic exposed-beam feature
Pristine Pro Tip 💡
Before finalizing cabinetry, lighting, or ceiling details, determine the exact beam depth, post locations, and required bearing points. A structural beam can affect upper cabinet heights, crown molding, island placement, recessed lights, HVAC ducts, and sightlines. Early coordination produces a much cleaner design.
Common Mistake ❌
The most serious mistake is assuming a wall or post is nonstructural based on appearance. Another common error is treating an engineered structural beam like decorative trim and cutting, drilling, or notching it for plumbing, electrical, or HVAC without approval. These changes can significantly reduce capacity.
Designer Insight 🎨
Exposed beams can organize a large open room and add scale, warmth, or contrast. A beam may be wrapped in painted millwork for a refined transitional look, finished in natural wood for organic warmth, or detailed with clean drywall returns for a modern interior. Posts can sometimes be integrated into cabinetry, islands, shelving, or architectural paneling.
Florida Rating 🌴
⭐⭐⭐⭐⭐ Excellent When Engineered Correctly
Post-and-beam systems can be highly effective in Florida, but they must account for wind resistance, uplift, moisture exposure, termite protection, and the complete load path from roof to foundation. Exterior wood posts need appropriate species, treatment, flashing, coatings, and separation from standing water. Structural work should follow current Florida code and local requirements.
Maintenance Level
⭐⭐ Moderate
Inspect exposed exterior posts and beams for coating failure, cracks, rot, insect activity, corrosion at connectors, and trapped water. Maintain sealants and finishes. Keep landscaping and irrigation away from wood bases. Interior structural members generally require little maintenance, but new sagging, cracking, or separation should be evaluated.
Related Terms
Load-Bearing Wall
Header
LVL Beam
Glulam
Structural Engineer
Framing
Footing
Open-Concept Layout
Column
Beam Wrap
-
Post-Form Laminate
Post-Form Laminate
Definition
Post-form laminate is a type of countertop made by bonding decorative plastic laminate to a shaped particleboard or engineered-wood core, typically with a curved, integrated front edge and often an integral backsplash. The term post-form refers to the manufacturing process in which heat and pressure bend the laminate around a rounded profile after the sheet has been formed.
These countertops are commonly manufactured in standard lengths and depths and may be fabricated with waterfall, no-drip, bullnose, beveled, or other molded edge profiles. They are widely used in budget-conscious kitchens, rental properties, laundry rooms, offices, break rooms, and secondary spaces because they are affordable, lightweight, and available in many colors and patterns.
Post-form laminate differs from custom flat-lay laminate and premium materials such as quartz, granite, solid surface, or porcelain. It offers good everyday performance when seams, sink cutouts, and edges remain sealed, but the wood-based core can swell if water penetrates.
Common Applications
- Budget kitchen remodels
- Rental properties
- Laundry rooms
- Utility rooms
- Home offices
- Commercial break rooms
- Apartment renovations
- Manufactured homes
- Garage work counters
- Secondary kitchens
- Temporary or phased renovations
Common Types of Post-Form Laminate
- Integrated backsplash countertop
- No-back post-form countertop
- Waterfall edge
- Bullnose edge
- No-drip edge
- Beveled edge
- Matte finish laminate
- Textured or stone-look laminate
- Wood-look laminate
Advantages
- Lower cost than stone or quartz
- Fast fabrication and installation
- Wide range of colors and patterns
- Lightweight compared with stone
- Integrated edge reduces visible front-edge seams
- Easy routine cleaning
- Can often be replaced without structural cabinet changes
- Suitable for many budget-conscious applications
- Does not require sealing like natural stone
- Warm and comfortable to the touch
Disadvantages
- Core can swell if water reaches it
- Hot cookware can scorch or delaminate the surface
- Knives can scratch or cut the laminate
- Seams may be visible
- Undermount sink options are limited
- Edge profiles are less customizable than fabricated stone
- Damage is difficult to repair invisibly
- May have lower resale appeal than premium countertops
- Long runs may require field seams
- Integrated backsplashes can look dated in some designs
When to Choose Post-Form Laminate
Post-Form Laminate is commonly chosen or used when:
- A cost-conscious kitchen or laundry remodel
- Rental or investment properties
- A fast renovation schedule
- Spaces where durability and easy cleaning matter more than luxury materials
- Temporary countertops during a phased remodel
- Commercial break rooms or light-duty work areas
- Projects requiring standard sizes and predictable pricing
Pristine Pro Tip 💡
The most vulnerable areas are sink cutouts, seams, end caps, faucet holes, and dishwasher edges. These locations should be carefully sealed, and standing water should be wiped promptly. A small leak that would be harmless on solid stone can permanently swell a laminate countertop core.
Common Mistake ❌
A common mistake is placing a hot pan, countertop appliance, or heat-producing device directly on the surface. Another is installing a sink or faucet without thoroughly sealing exposed core material. Once moisture causes particleboard to swell, the damage usually cannot be reversed.
Designer Insight 🎨
Modern high-definition laminates can convincingly imitate stone, concrete, terrazzo, and wood at a fraction of the cost. Choosing a simple edge, minimizing seams, using a separate tile backsplash, and pairing the counter with well-designed cabinetry can create a much more updated appearance than traditional one-piece laminate installations.
Florida Rating 🌴
⭐⭐⭐ Good
Post-form laminate can perform well in Florida's conditioned interiors, but humidity and water exposure make edge sealing especially important. It is not a good choice for outdoor kitchens, unconditioned lanais, or areas exposed to repeated moisture. In coastal homes, protect the substrate from leaks and avoid prolonged dampness.
Maintenance Level
⭐⭐ Easy
Clean with a soft cloth and mild non-abrasive cleaner. Use trivets under hot items and cutting boards for food preparation. Dry standing water around sinks and seams. Do not flood the backsplash joint. Inspect caulk and sink seals periodically. Avoid abrasive powders, steel wool, and harsh solvents.
Related Terms
Laminate Countertop
Particleboard
Countertop Edge
Backsplash
Drop-In Sink
Quartz Countertop
Solid Surface
Countertop Fabrication
End Cap
Seam
-
Pot Rack
Pot Rack
Definition
A pot rack is a storage fixture designed to hold pots, pans, utensils, or cookware in an accessible location. It may be suspended from the ceiling, mounted to a wall, installed above a kitchen island, attached to a cabinet, or integrated into a freestanding shelving system. Pot racks can provide both practical storage and a decorative focal point.
Ceiling-mounted racks typically hang from chains, rods, or rigid supports and use hooks to suspend cookware. Wall-mounted models may include a shelf, rail, grid, or peg system. Because cookware is heavy, the rack must be anchored into framing, blocking, masonry, or another structural support rather than attached only to drywall.
Pot racks work best when the kitchen has sufficient ceiling height, clear circulation, and cookware suitable for display. They may be less effective in small kitchens, low-ceiling rooms, or homes where open storage quickly collects grease and dust.
Common Applications
- Kitchen islands
- Chef-style kitchens
- Farmhouse kitchens
- Industrial kitchens
- Small kitchens with limited cabinet storage
- Butler's pantries
- Outdoor kitchens when rated for exterior use
- Commercial demonstration kitchens
- Wall-mounted utensil storage
- Decorative cookware displays
Common Types of Pot Rack
- Ceiling-mounted pot rack
- Wall-mounted pot rack
- Island-mounted rack
- Rail-and-hook system
- Shelf pot rack
- Grid rack
- Cabinet-integrated pullout rack
- Freestanding cookware rack
Advantages
- Frees cabinet storage
- Keeps frequently used cookware accessible
- Can create a strong visual focal point
- Makes use of overhead or wall space
- Works well for oversized pots and pans
- Allows cookware to dry in open air
- Can complement farmhouse, industrial, rustic, or professional kitchen styles
- Provides flexible hook placement
- May reduce stacking damage to cookware
Disadvantages
- Cookware collects dust and airborne grease
- Requires strong structural anchoring
- Can make a kitchen feel visually cluttered
- May interfere with lighting or sightlines
- Low-hanging cookware can create a head-impact hazard
- Not ideal over active cooking surfaces where grease accumulates
- May not suit minimalist interiors
- Heavy cookware can be difficult for some users to reach
- Ceiling installation may be complicated by ducts, wiring, or trusses
When to Choose Pot Rack
- Pot Rack is commonly chosen or used when:
- Cabinet storage is limited
- Cookware is used frequently and attractive enough to display
- The kitchen has adequate ceiling height
- A farmhouse, industrial, or chef-inspired look is desired
- The rack can be securely anchored
- The location will not obstruct lighting, ventilation, or circulation
Pristine Pro Tip 💡
Lay out the exact rack size and hanging height before installation. Use painter's tape or a temporary template to confirm that doors, pendant lights, range hoods, and walkways remain clear. Structural blocking is easiest to add before drywall or ceiling finishes are complete.
Common Mistake ❌
The most dangerous mistake is fastening a loaded pot rack only to drywall anchors. Another common problem is hanging the rack too low or placing it over a major walkway. Even a structurally secure rack becomes impractical if cookware blocks views, collides with lighting, or creates a head hazard.
Designer Insight 🎨
A pot rack should look intentionally integrated with the kitchen. Match or coordinate its finish with lighting, cabinet hardware, faucet finishes, and range-hood details. Curating the displayed cookware is important: a smaller collection of coordinated pieces usually looks more refined than every pot and utensil in the kitchen.
Florida Rating 🌴
⭐⭐⭐⭐ Very Good
Pot racks perform well in Florida interiors. In coastal homes, choose corrosion-resistant hardware and finishes because salt-laden air can tarnish untreated metal. For outdoor kitchens or humid lanais, use products specifically rated for exterior exposure and avoid hanging cookware where wind can cause movement.
Maintenance Level
⭐⭐⭐ Moderate
Dust the rack and cookware regularly. Degrease surfaces with a cleaner appropriate for the finish. Periodically check hooks, chains, mounting screws, and anchors for looseness or corrosion. Do not exceed the manufacturer's weight rating. Keep rarely used cookware in enclosed storage to reduce cleaning.
Related Terms
Kitchen Island
Open Shelving
Cabinet Storage
Ceiling Blocking
Pendant Light
Range Hood
Cookware Storage
Wall Rail
Butler's Pantry
Kitchen Layout
-
Project Manager
Project Manager
Definition
A project manager is the professional responsible for coordinating the people, information, materials, schedule, quality expectations, and day-to-day decisions required to move a remodeling project from planning through completion. The role serves as a central point of communication between the homeowner, design team, trades, vendors, office staff, inspectors, and company leadership.
In residential remodeling, a project manager may conduct the consultation, verify measurements, develop or review the scope of work, coordinate selections, prepare estimates, schedule subcontractors, order materials, oversee jobsite progress, document changes, monitor quality, resolve conflicts, manage client communication, and lead the final walkthrough. The exact responsibilities vary by company and project size.
A strong project manager does more than create a schedule. Remodeling involves hidden conditions, lead times, trade sequencing, homeowner decisions, access limitations, and changing site conditions. Effective management anticipates these variables, communicates clearly, documents decisions, and keeps the project aligned with the agreed scope, budget, and workmanship standards.
Common Applications
- Kitchen remodeling
- Bathroom remodeling
- Whole-home renovation
- Flooring and tile projects
- Cabinet installation
- Commercial tenant improvements
- Insurance rebuilds
- Occupied-home remodeling
- Condo and HOA-coordinated projects
- Multi-trade renovations
- Design-build projects
- Exterior improvement projects
- Common Project Management Roles
- Residential remodeling project manager
- Commercial construction project manager
- Design-build project manager
- Owner's representative
- Site superintendent with project-management duties
- Restoration project manager
- Specialty trade project manager
Advantages
- Provides one primary point of contact
- Coordinates multiple trades and vendors
- Improves schedule visibility
- Helps identify conflicts before they become delays
- Documents selections and change requests
- Monitors workmanship and jobsite conditions
- Supports clearer homeowner communication
- Tracks material orders and lead times
- Facilitates problem solving
- Coordinates final walkthrough and closeout
- Reduces the burden on the homeowner
- Helps maintain accountability across the project
Disadvantages
- Management quality varies by company and individual
- Poor communication can still create confusion
- A project manager cannot eliminate every unforeseen condition
- Changes outside the original scope may affect cost and schedule
- Overloaded managers may not provide enough site attention
- Homeowners may misunderstand the manager's authority or responsibilities
- The role adds cost, though it often prevents larger coordination expenses
When to Choose Project Manager
Project Manager is commonly chosen or used when:
- A project involves multiple trades
- The home will remain occupied during construction
- Materials have long or complicated lead times
- Work must be coordinated with an HOA, condo association, or business schedule
- The project includes custom cabinetry, countertops, plumbing, electrical, tile, and finish work
- Clear communication and accountability are priorities
- The homeowner cannot manage daily trade coordination
- The renovation has a detailed design or phased schedule
Pristine Pro Tip 💡
At the beginning of the project, establish how communication will work: who the primary contact is, how decisions will be documented, when updates will be provided, and how urgent issues should be reported. Clear communication expectations prevent small questions from becoming schedule problems.
Common Mistake ❌
A common mistake is making direct changes with a subcontractor without informing the project manager. Even a seemingly small request can affect price, material quantities, code requirements, sequencing, or another trade's work. Another mistake is relying on verbal approvals for selections or scope changes instead of documenting them.
Designer Insight 🎨
The project manager protects the connection between the design concept and the finished work. Details such as tile alignment, cabinet clearances, fixture placement, hardware locations, paint transitions, and countertop overhangs depend on accurate field coordination. The best designs still require disciplined execution.
Florida Rating 🌴
⭐⭐⭐⭐⭐ Excellent
Project management is especially valuable in Florida, where remodeling schedules may be affected by severe weather, heat, humidity, material storage requirements, condo rules, seasonal occupancy, and local inspection processes. A knowledgeable manager also helps coordinate moisture-sensitive work and protects the home during sudden rain events.
Maintenance Level
⭐ None
A project manager is a service role rather than a building material. Homeowners can support effective management by responding to selection requests promptly, keeping communication in the agreed channel, reviewing change documentation, providing access as scheduled, and reporting concerns early.
Related Terms
Scope of Work
Change Order
Construction Schedule
Subcontractor
Final Walkthrough
Punch List
Material Selection
Estimate
Quality Control
Client Communication
-
Punch List
Punch List
Definition
A punch list is a written record of incomplete, defective, damaged, or adjustment-related items identified near the end of a remodeling or construction project. It is typically created during a detailed inspection or final walkthrough and provides a clear checklist of work that must be corrected or completed before final closeout.
Punch-list items may include paint touch-ups, cabinet adjustments, missing caulk, hardware alignment, grout repair, fixture testing, damaged trim, cleaning, label removal, door adjustments, incomplete accessories, or other finish details. A punch list is not intended to introduce entirely new work that was not included in the agreed scope; new requests are generally handled separately as additional work or a change order.
An effective punch list is specific, organized by room or trade, supported by photos when helpful, and assigned to responsible parties. After corrections are made, the items should be verified and marked complete. The process helps distinguish normal final adjustments from unresolved workmanship concerns.
Common Applications
- Kitchen remodel completion
- Bathroom remodel completion
- Whole-home renovation closeout
- Commercial tenant improvement closeout
- Cabinet installation review
- Painting and trim review
- Flooring and tile inspection
- Fixture and appliance testing
- Warranty-preparation documentation
- Pre-handover quality-control inspection
Common Types of Punch Lists
- Contractor-generated punch list
- Homeowner walkthrough list
- Designer or architect punch list
- Trade-specific completion list
- Pre-final inspection list
- Warranty correction list
- Digital photo-based punch list
Advantages
- Creates a clear record of remaining work
- Organizes corrections by room or trade
- Reduces misunderstandings
- Supports quality control
- Helps confirm that the agreed scope is complete
- Provides accountability for final adjustments
- Makes final walkthroughs more efficient
- Can include photos and completion dates
- Supports orderly project closeout
- Helps separate legitimate corrections from new requests
Disadvantages
- Vague descriptions can cause confusion
- Large lists may delay closeout
- Items may be duplicated if multiple people create separate lists
- New scope may be incorrectly added as punch work
- Some touch-ups require drying or return visits
- Minor corrections can be damaged again if other work remains active
- Homeowners may expect absolute perfection in materials that naturally vary
When to Choose Punch List
- Punch List is commonly chosen or used when:
- The project is substantially complete
- Major construction and finish work has ended
- Fixtures and systems can be tested
- Final cleaning has exposed details for inspection
- The homeowner and project manager are ready for a room-by-room review
- Remaining work consists primarily of corrections, adjustments, and completion items
Pristine Pro Tip 💡
Wait until the project is substantially complete and reasonably clean before creating the final punch list. Inspect one room at a time, describe each item precisely, and include a photo or location reference. A single organized list is far more effective than scattered texts, emails, and verbal requests.
Common Mistake ❌
A common mistake is using the punch list to request design changes or additional work that was never part of the contract. Another is marking defects with adhesive tape that can damage fresh paint or delicate finishes. Use removable low-tack markers only when appropriate and document the item digitally.
Designer Insight 🎨
The punch-list stage is where small details have a large visual impact. Consistent reveals, aligned hardware, even caulk lines, clean paint transitions, level fixtures, and properly adjusted doors are what make a finished renovation feel intentional. This is also the time to view the room under both daylight and installed lighting.
Florida Rating 🌴
⭐⭐⭐⭐⭐ Excellent
A thorough punch list is valuable in Florida because humidity, rapid weather changes, and air-conditioning conditions can reveal door movement, caulk gaps, condensation concerns, or finish issues. Exterior and moisture-prone areas should be inspected after appropriate curing and, when practical, after exposure to normal weather conditions.
Maintenance Level
⭐ None
The punch list itself requires no maintenance, but homeowners should retain the completed list, product information, paint colors, warranties, and final photos with their project records. Future warranty concerns should be documented with dates, photos, and a clear description of the issue.
Related Terms
Final Walkthrough
Project Manager
Quality Control
Substantial Completion
Change Order
Warranty
Scope of Work
Closeout Documents
Touch-Up
Final Payment
-
Push-to-Open Hardware
Push-to-Open Hardware
Definition
Push-to-open hardware is a mechanical cabinet and drawer opening system that allows a door or drawer front to open when it is pressed inward. Instead of using a visible knob or pull, the user gently pushes the face of the cabinet or drawer, activating a spring-loaded latch or specialized drawer slide that releases and moves the front outward far enough to grasp.
In kitchen, bathroom, closet, entertainment-center, and built-in cabinetry, push-to-open hardware is commonly selected when the design calls for smooth, uninterrupted cabinet fronts. It is especially popular with slab-style doors, contemporary cabinetry, floating vanities, and other minimalist interiors where visible hardware would interrupt the clean lines of the design.
Push-to-open systems may be installed as individual touch latches, integrated into cabinet hinges, or built into premium drawer-slide systems. Proper alignment is essential. The door or drawer must have adequate clearance, consistent reveals, and a rigid, accurately installed cabinet box so the mechanism engages and releases reliably.
Common Applications
Push-to-Open Hardware is commonly used for:
- Handleless kitchen cabinetry
- Floating bathroom vanities
- Slab cabinet doors
- Built-in entertainment centers
- Pantry cabinets
- Closet systems
- Home office cabinetry
- Laundry-room storage
- Upper cabinets
- Base cabinets
- Hidden appliance garages
- Modern media walls
- Commercial reception cabinetry
- Display cabinetry
- Custom millwork
Common Types
Common types and configurations include:
- Magnetic push latch
- Mechanical spring latch
- Push-to-open hinge system
- Push-to-open drawer slide
- Push-to-open soft-close drawer slide
- Heavy-duty touch latch
- Adjustable-depth touch latch
- Integrated electronic opening system
Advantages
- Creates a clean, handleless appearance
- Eliminates protruding knobs and pulls
- Supports modern and minimalist design
- Can make narrow walkways feel less obstructed
- Works well on doors and drawers
- Reduces visual clutter
- Allows cabinet fronts to remain the primary design feature
- Can be combined with soft-close technology in premium systems
- Useful where hardware placement would be awkward
- Available in several load capacities and configurations
Disadvantages
- Requires more precise cabinet alignment than standard hardware
- Fingerprints may be more visible because fronts are touched directly
- Low-quality latches may wear out or release inconsistently
- Doors can open accidentally if leaned against
- Some systems require a small operating gap around the front
- May be less intuitive for guests
- Heavy drawers require properly rated slides
- Adjustment may be necessary as cabinetry settles
- Not ideal for every traditional cabinet style
When to Choose Push-to-Open Hardware
Push-to-Open Hardware may be an appropriate choice for:
- Contemporary or modern kitchens
- Minimalist bathroom designs
- Small kitchens with tight aisles
- Handleless custom cabinetry
- Floating vanities
- Built-ins where uninterrupted panels are desired
- Homes where protruding hardware is undesirable
- Projects using slab or flat-panel cabinet fronts
Pristine Pro Tip 💡
Select the push-to-open mechanism before the cabinets are fabricated or installed. Door overlays, drawer clearances, hinge selection, and reveal spacing can all affect how well the system operates. For frequently used drawers, we prefer a high-quality integrated slide rather than an inexpensive surface-mounted latch because the drawer movement feels smoother and the mechanism is designed to support repeated daily use.
Common Mistake ❌
A common mistake is installing a basic push latch on a heavy or oversized door without confirming the latch rating. The door may fail to release evenly, bounce back, or require excessive pressure. Another mistake is combining push-to-open hardware with misaligned doors. Even a small alignment problem can prevent the latch from catching or releasing correctly.
Designer Insight 🎨
Push-to-open hardware is most successful when it is part of an intentional handleless design rather than simply a substitute for missing pulls. Wide slab fronts, consistent shadow lines, concealed hinges, integrated lighting, and carefully planned appliance panels help create the refined, architectural appearance homeowners expect from this style.
Florida Rating 🌴
⭐⭐⭐⭐⭐ Excellent
Push-to-open hardware performs well in Florida homes when quality components are used. Humidity can cause some wood doors and cabinet boxes to expand or shift slightly, so adjustable hardware and proper cabinet construction are especially valuable. In coastal or high-humidity environments, corrosion-resistant components should be selected whenever metal parts may be exposed to moisture.
Maintenance Level
⭐⭐ Easy
Keep cabinet faces and latch contact points clean. Avoid spraying cleaner directly into the mechanism. If a door stops releasing smoothly, check alignment and adjust the latch depth before replacing the hardware. Drawer-slide systems should be kept free of crumbs, dust, and stored items that interfere with travel.
Related Terms
Cabinet Hardware
Cabinet Hinge
Soft-Close Hinge
Soft-Close Drawer
Slab Cabinet Door
Full Overlay Cabinet
Frameless Cabinet
Cabinet Door
Drawer Glide
Custom Cabinetry
Floating Vanity
Panel-Ready Appliance
-
Pattern Tile
Pattern Tile
Definition
Pattern tile is tile designed to create a repeated decorative motif through its printed surface, shape, color arrangement, or installation layout. The pattern may be contained on each individual tile, formed when multiple tiles are placed together, or created by arranging solid-colored tiles in a planned sequence.
Pattern tile is used in kitchens, bathrooms, laundry rooms, entryways, fireplaces, bars, and commercial interiors to introduce visual interest and define a focal area. Common styles include encaustic-inspired designs, geometric patterns, florals, Mediterranean motifs, Art Deco patterns, Moroccan designs, checkerboards, stars, and contemporary abstract graphics.
Pattern tile can be manufactured from porcelain, ceramic, cement, natural stone, glass, or other materials. Because the finished appearance depends heavily on layout, installers should dry-lay the tile before installation, confirm the intended direction, distribute color and pattern variations, and plan cuts around walls, niches, drains, cabinets, and fixtures.
Common Applications
Pattern Tile is commonly used for:
- Kitchen backsplashes
- Shower accent walls
- Shower niches
- Bathroom floors
- Powder bathrooms
- Laundry-room floors
- Entryways
- Fireplace surrounds
- Coffee bars
- Wet bars
- Kitchen islands
- Outdoor covered areas when tile is appropriately rated
- Restaurant and boutique interiors
- Decorative wall panels
- Stair risers
Common Types
Common types and configurations include:
- Encaustic-look porcelain tile
- Cement tile
- Printed ceramic tile
- Geometric mosaic
- Floral tile
- Moroccan-inspired tile
- Checkerboard pattern
- Medallion tile
- Patchwork tile
- Terrazzo-pattern tile
- Hand-painted tile
- Waterjet mosaic
Advantages
- Creates a strong visual focal point
- Adds color and personality
- Can define separate zones within an open room
- Available in traditional and contemporary styles
- Allows custom-looking design without fully custom fabrication
- Can complement simple cabinetry and countertops
- Works in both small accents and full-room installations
- Many porcelain versions are durable and low-maintenance
- Can hide minor everyday debris better than some solid-color surfaces
- Provides extensive design flexibility
Disadvantages
- Bold patterns may feel dated sooner than neutral tile
- Layout mistakes are highly visible
- Additional material may be needed to balance repeats and cuts
- Cement and natural-stone options may require sealing
- Complex patterns can increase installation labor
- Too many competing finishes can make a room feel busy
- Replacement pieces may be difficult to match later
- Pattern scale may overwhelm a small room if not selected carefully
When to Choose Pattern Tile
Pattern Tile may be an appropriate choice for:
- A room needs a focal point
- Cabinetry and countertops are relatively simple
- A powder bathroom needs personality
- A backsplash should function as artwork
- A homeowner wants Mediterranean, Spanish, Moroccan, vintage, or eclectic character
- A small area can support a bolder finish
- The pattern is coordinated with the overall color palette
Pristine Pro Tip 💡
Order enough tile to complete the project plus attic stock, and inspect several boxes before installation. Pattern tiles may have intentional variation, but accidental printing differences or shade-lot changes can be noticeable. Dry-laying the first several rows helps establish the repeat and prevents an unwanted directional change halfway through the installation.
Common Mistake ❌
A common mistake is selecting a pattern tile in isolation without comparing it to the cabinet color, countertop veining, flooring, paint, and metal finishes. Another mistake is failing to center or balance the pattern on the most visible wall. A technically correct installation can still look awkward when focal points and cut locations are not planned.
Designer Insight 🎨
The strongest pattern-tile designs usually allow one surface to lead. When the tile is bold, designers often simplify the surrounding countertop, cabinetry, and accessories. Repeating one or two colors from the tile elsewhere in the room helps the pattern feel connected rather than added as an afterthought.
Florida Rating 🌴
⭐⭐⭐⭐⭐ Excellent
Porcelain and ceramic pattern tiles are excellent for Florida because they tolerate humidity and are easy to clean. For patios, lanais, and other exterior applications, the tile must be rated for outdoor use and have appropriate slip resistance. Cement tile can also perform well but requires careful sealing and maintenance in moisture-prone areas.
Maintenance Level
⭐⭐ to ⭐⭐⭐ Moderate
Maintenance depends on the material. Glazed porcelain and ceramic generally require routine sweeping and mild cleaning. Cement tile and natural stone may require penetrating sealer and pH-neutral cleaners. Grout should be maintained according to the grout type and exposure conditions.
Related Terms
Encaustic Tile
Designer Tile
Penny Tile
Chevron Pattern
Ceramic Tile
Porcelain Tile
Cement Tile
Mosaic Tile
Waterjet Mosaic
Tile Layout
Backsplash
Shower Niche
Grout
Rectified Tile
-
Peel-and-Stick Tile
Peel-and-Stick Tile
Definition
Peel-and-stick tile is a thin decorative surface product manufactured with a pressure-sensitive adhesive backing. During installation, a protective release liner is removed and the tile is pressed directly onto a clean, smooth substrate. Products are available as vinyl floor tiles, vinyl planks, decorative wall tiles, faux stone panels, metal-look sheets, and backsplash mosaics.
Peel-and-stick tile is primarily used for quick, low-cost cosmetic updates rather than permanent high-performance remodeling. It can be useful in rentals, temporary displays, craft areas, closets, low-use rooms, and small backsplash projects where the substrate is stable and exposure to heat, water, grease, and movement is limited.
Performance varies significantly by product. Surface preparation, temperature, substrate porosity, moisture, and installation pressure all affect adhesion. Peel-and-stick tile should never be assumed to provide waterproofing, structural reinforcement, or the same service life as properly installed ceramic, porcelain, stone, or professionally adhered resilient flooring.
Common Applications
Peel-and-Stick Tile is commonly used for:
- Temporary kitchen backsplash updates
- Laundry-room accent walls
- Rental-property cosmetic improvements
- Closets
- Pantry floors
- Craft rooms
- Low-traffic utility areas
- Furniture and cabinet accents
- Display walls
- Home office accents
- Small powder-room wall accents
- Temporary commercial displays
Common Types
- Common types and configurations include:
- Self-adhesive vinyl floor tile
- Self-adhesive luxury vinyl tile
- Peel-and-stick backsplash mosaic
- Gel mosaic tile
- Metal-look adhesive tile
- Faux stone wall panel
- Removable decorative tile decal
- Carpet tile with pressure-sensitive backing
Advantages
- Fast installation
- Lower material cost than many permanent tile systems
- Minimal specialized tools
- Can be installed by experienced DIY homeowners
- Lightweight
- Available in many colors and patterns
- Useful for temporary design changes
- Little or no mortar mixing
- Usually produces less installation mess
- Individual pieces can sometimes be replaced
Disadvantages
- Shorter service life than professionally installed tile
- Adhesive may release in heat or humidity
- Not a waterproofing system
- Surface imperfections can telegraph through thin products
- Edges may curl or collect debris
- Difficult to reposition after firm contact
- Removal may leave adhesive residue
- Not appropriate for many showers or wet floors
- Can look less realistic than ceramic, porcelain, or stone
- Manufacturer warranties may be limited by substrate conditions
When to Choose Peel-and-Stick Tile
Peel-and-Stick Tile may be an appropriate choice for:
- The update is temporary or budget-driven
- The area has low moisture and limited heat exposure
- The substrate is smooth, clean, dry, and stable
- A rental-friendly cosmetic solution is needed
- A small accent area needs a fast refresh
- The manufacturer specifically approves the intended application.
Pristine Pro Tip 💡
Treat surface preparation as the most important step. Remove grease, wax, dust, texture, and loose paint; repair uneven areas; and allow the substrate to dry completely. Acclimate the product to the room and follow the manufacturer’s temperature requirements. A small test installation can reveal whether the adhesive is compatible with the wall or floor before the entire area is covered.
Common Mistake ❌
A common mistake is installing peel-and-stick backsplash tile directly over greasy paint or textured drywall. The tile may initially appear secure and then release at the edges. Another mistake is using a wall-rated decorative product inside a shower because it resembles real tile. Decorative adhesion does not equal waterproof construction.
Designer Insight 🎨
Peel-and-stick products can improve the appearance of a space, but they are most convincing when used in modest areas with careful cuts and straight lines. Designs with overly glossy printed grout lines or repeated graphics can reveal the material’s temporary nature. Simple colors and realistic textures usually produce a more polished result.
Florida Rating 🌴
⭐⭐⭐⭐⭐ ⭐⭐⭐ Conditional
Florida heat and humidity can challenge pressure-sensitive adhesives, especially in garages, sunrooms, non-conditioned spaces, exterior walls, and areas near ranges or windows. Products should be installed only within the temperature and humidity range approved by the manufacturer. Permanent tile systems are generally more reliable for showers, main living areas, and long-term kitchen remodels.
Maintenance Level
⭐⭐ Easy
Clean with a soft cloth or mop and a mild cleaner approved by the manufacturer. Avoid steam cleaning, prolonged standing water, abrasive scrubbers, and harsh solvents. Inspect edges periodically and replace loose pieces promptly so moisture and debris do not migrate beneath the surface.
Related Terms
Pressure-Sensitive Adhesive
Luxury Vinyl Tile
Luxury Vinyl Plank
Backsplash
Ceramic Tile
Porcelain Tile
Waterproofing Membrane
Tile Adhesive
Substrate
Surface Preparation
Vinyl Flooring
Grout
-
Paint Grade Cabinet
Paint Grade Cabinet
Definition
A paint grade cabinet is cabinetry manufactured from wood, engineered wood, or composite components selected and prepared to receive an opaque painted finish rather than a clear stain. Because the paint conceals the natural grain, the underlying material is chosen for stability, smoothness, machinability, and finish quality instead of decorative grain character.
Common paint grade cabinet materials include medium-density fiberboard (MDF), hardwood such as poplar or maple, furniture-grade plywood, and combinations of these materials. Doors may use MDF center panels with solid-wood rails and stiles, while cabinet boxes are often constructed from plywood or engineered panels. The exact construction varies by cabinet line and price level.
Paint grade does not automatically mean low quality. Many premium custom cabinets are paint grade because MDF and carefully selected hardwoods can produce exceptionally smooth, consistent painted surfaces. Quality depends on cabinet construction, joinery, substrate thickness, edge preparation, primer, coating system, curing process, and installation.
Common Applications
Paint Grade Cabinet is commonly used for:
- Painted kitchen cabinets
- Bathroom vanities
- Built-in bookcases
- Mudroom cabinetry
- Laundry-room cabinets
- Entertainment centers
- Home office built-ins
- Pantry cabinets
- Window seats
- Custom range hoods
- Cabinet end panels
- Decorative millwork
- Commercial casework
- Refaced cabinet systems
Common Types
Common types and configurations include:
- MDF door with solid-wood frame
- One-piece routed MDF door
- Paint grade maple cabinet
- Paint grade poplar cabinet
- Plywood cabinet box with painted face frame
- Frameless painted cabinet
- Inset painted cabinet
- Full-overlay painted cabinet
- Factory-finished cabinet
- Site-finished custom cabinet
Advantages
- Produces a smooth, uniform finish
- Available in nearly unlimited paint colors
- Does not require matching decorative wood grain
- Works with traditional, transitional, and modern styles
- MDF panels resist grain telegraphing
- Can be touched up when the coating system permits
- Allows color coordination with walls and trim
- Often more cost-effective than stain-grade premium hardwood
- Supports detailed profiles and custom millwork
- Factory finishes can be highly durable
Disadvantages
- Paint can chip at impact points
- Wood joints may develop fine hairline movement lines
- Dark colors may show dust and fingerprints
- Lower-quality MDF can swell if exposed to water
- Color matching may be difficult years later
- Site-applied finishes may not equal a controlled factory finish
- Repeated aggressive cleaning can dull the coating
- Opaque paint hides the natural character of wood
When to Choose Paint Grade Cabinet
Paint Grade Cabinet may be an appropriate choice for:
- The design calls for white, cream, gray, blue, green, black, or another opaque color
- A smooth, consistent finish is preferred
- The cabinetry includes detailed molding
- The homeowner wants a timeless painted kitchen
- The project requires custom color matching
- Wood grain is not a primary design feature
- A combination of painted and stained cabinetry is planned.
Pristine Pro Tip 💡
Ask what each cabinet component is made from rather than relying only on the phrase paint grade. A high-quality combination may include plywood boxes, hardwood face frames, and MDF center panels. Those materials serve different purposes. Also confirm whether the finish is catalyzed, conversion varnish, polyurethane, lacquer, or another system, because coating quality has a major effect on durability.
Common Mistake ❌
A common mistake is assuming that solid wood is always superior for a painted door. Wide solid-wood panels naturally expand and contract and may reveal grain or movement through the paint. Properly engineered MDF center panels can provide a smoother and more stable painted surface. Another mistake is allowing water to remain along sink-base doors or vanity edges.
Designer Insight 🎨
Painted cabinetry offers enormous design flexibility. Warm whites and muted colors tend to feel softer in Florida’s strong natural light, while deep navy, charcoal, and black can create dramatic islands or vanities. The undertone of the cabinet paint should be compared with the countertop, backsplash, flooring, and wall color under the actual room lighting.
Florida Rating 🌴
⭐⭐⭐⭐⭐ Excellent with proper construction
Paint grade cabinetry performs well in Florida when the materials are sealed on all exposed surfaces and indoor humidity is controlled. Bathrooms, laundry rooms, and sink bases require particular attention to water protection. Exterior outdoor kitchens should use cabinetry specifically engineered for exterior exposure rather than standard interior paint grade cabinets.
Maintenance Level
⭐⭐ Easy to Moderate
Wipe spills promptly with a soft damp cloth and dry the surface. Use mild soap when needed. Avoid abrasive pads, harsh degreasers, soaking wet cloths, and repeated contact with steam. Touch-up paint should be obtained from the cabinet manufacturer whenever possible so the sheen and color match the original finish.
Related Terms
Painted Cabinet
MDF
Cabinet Door
Shaker Cabinet
Slab Cabinet Door
Plywood Cabinet Box
Face Frame Cabinet
Frameless Cabinet
Custom Cabinetry
Cabinet Refacing
Primer
Paint Sheen
Factory Finish
Poplar Wood
-
Panel Molding
Panel Molding
Definition
Panel molding is narrow decorative trim used to create framed shapes, raised details, or architectural divisions on walls, ceilings, doors, cabinet panels, and built-in furniture. It is typically smaller and more detailed than baseboard or crown molding and may have a flat, rounded, stepped, or carved profile.
In residential remodeling, panel molding is commonly applied directly to drywall to form wall panels, picture-frame arrangements, wainscoting, or decorative feature walls. It can also be used to embellish cabinet end panels, islands, fireplace surrounds, stair walls, doors, and ceilings. Once installed, the molding is usually caulked, primed, and painted with the surrounding surface for a built-in appearance.
Panel molding may be manufactured from solid wood, finger-jointed wood, medium-density fiberboard, polyurethane, PVC, plaster, or flexible composite material. Material selection should match the location, design detail, moisture exposure, and desired paint or stain finish.
Common Applications
Panel Molding is commonly used for:
- Picture-frame wall molding
- Wainscoting
- Dining-room feature walls
- Foyer walls
- Staircase walls
- Powder bathrooms
- Bedroom accent walls
- Cabinet end panels
- Kitchen islands
- Fireplace surrounds
- Ceiling details
- Door embellishment
- Built-in bookcases
- Commercial lobbies
- Traditional and transitional interiors
Common Types
Common types and configurations include:
- Wood panel molding
- MDF panel molding
- Polyurethane molding
- PVC molding
- Flexible molding
- Applied wall molding
- Raised panel molding
- Recessed panel trim
- Ornamental panel molding
- Minimal flat-stock molding
Advantages
- Adds architectural character
- Creates a custom built-in appearance
- Can make plain walls feel more finished
- Supports traditional, transitional, and modern layouts
- Can visually adjust room proportions
- Works well with paint
- Available in many profiles and sizes
- Can coordinate with crown molding and baseboard
- Provides a high-impact design feature without changing the room layout
- Can conceal minor wall irregularities along planned lines
Disadvantages
- Requires precise measuring and layout
- Poorly planned spacing is noticeable
- Adds caulk lines and painted edges to maintain
- May collect dust on projecting profiles
- Can make small rooms feel busy if overused
- Installation labor increases with complex grids
- Wall outlets and switches may interrupt the pattern
- Wood and MDF require protection from moisture
When to Choose Panel Molding
Panel Molding may be an appropriate choice for:
- A room needs architectural detail
- A large blank wall feels unfinished
- A traditional or transitional design is desired
- The homeowner wants an upscale feature without wallpaper
- Wall proportions can support repeated frames
- Cabinetry or built-ins need decorative end treatment
- A ceiling or fireplace needs visual structure
Pristine Pro Tip 💡
Lay out the entire wall before cutting molding. Start with the visible boundaries—corners, doors, windows, baseboards, crown molding, outlets, and furniture placement—then calculate equal or intentionally proportioned spaces. A laser level and full-size tape mockup can prevent expensive spacing mistakes.
Common Mistake ❌
A common mistake is measuring each frame independently. Small errors accumulate and the final row may not align. Another mistake is choosing molding that is too heavy for the wall or too delicate for the room scale. The profile should relate to ceiling height, existing casing, baseboards, and the overall architectural style.
Designer Insight 🎨
Panel molding does not have to look formal. Thin rectangular molding painted the same color as the wall can create a restrained modern effect, while layered profiles and contrasting wallcovering can feel highly traditional. Painting the entire wall, molding, baseboard, and sometimes crown in one color creates a sophisticated, cohesive envelope.
Florida Rating 🌴
⭐⭐⭐⭐⭐ Excellent
Panel molding is well suited for conditioned Florida interiors. In bathrooms, laundry rooms, and other humid locations, moisture-resistant MDF, PVC, polyurethane, or properly sealed wood may be more appropriate than standard MDF. Exterior applications require exterior-rated materials, fasteners, caulk, primer, and paint.
Maintenance Level
⭐⭐ Easy
Dust periodically with a microfiber cloth or soft brush attachment. Clean painted molding with a lightly damp cloth and mild soap. Inspect caulk joints for movement and touch up chips or nail holes when necessary. Avoid saturating MDF or unfinished wood.
Related Terms
Picture Frame Molding
Wainscoting
Crown Molding
Baseboard
Chair Rail
Board and Batten
Batten Wall
Applied Molding
Wall Paneling
Finish Carpentry
Cabinet End Panel
Ornamental Millwork
Coffered Ceiling
-
Picture Frame Molding
Picture Frame Molding
Definition
Picture frame molding is a decorative wall treatment created by arranging narrow molding into rectangular, square, or other framed shapes that resemble picture frames. The molding is applied to the wall surface and typically painted the same color as the wall, although contrasting colors, wallpaper inserts, or specialty finishes may also be used.
Picture frame molding is frequently installed in dining rooms, hallways, foyers, staircases, bedrooms, living rooms, powder bathrooms, and home offices. It can cover the full height of a wall, appear below a chair rail as part of wainscoting, or be used as a single large frame around artwork, lighting, or a feature panel.
The design depends on proportion more than ornament. Frame width, height, spacing, relationship to doors and windows, and alignment around corners should be planned as a complete composition. Accurate installation includes level lines, clean miter joints, filled nail holes, flexible caulk, primer, and a consistent painted finish.
Common Applications
Picture Frame Molding is commonly used for:
- Dining-room walls
- Foyer walls
- Hallways
- Stair walls
- Living rooms
- Bedrooms
- Powder bathrooms
- Home offices
- Nurseries
- Feature walls
- Wainscoting
- Walls behind beds
- Walls framing sconces or artwork
- Commercial reception areas
- Model homes
Common Types
Common types and configurations include:
- Full-height picture frame molding
- Lower-wall frames below chair rail
- Single oversized wall frame
- Double-layer frame molding
- Square grid molding
- Rectangular traditional layout
- Modern thin-profile layout
- Wallpaper inset frame
- Arch-top decorative frame
- Asymmetrical contemporary frame
Advantages
- Creates architectural interest
- Can make a room feel more custom
- Works with many interior styles
- Allows paint or wallpaper to become a focal point
- Can visually raise or widen walls
- Provides a refined backdrop for artwork and furniture
- Uses relatively little material compared with full panel systems
- Can be adapted to nearly any wall size
- Pairs well with chair rail, crown molding, and baseboard
- Adds depth without reducing usable floor space
Disadvantages
- Requires careful proportional planning
- Uneven spacing is highly visible
- Miter joints may open if poorly installed
- Adds surfaces that collect dust
- Wall fixtures can disrupt the layout
- Complex arrangements increase labor
- May feel overly formal if the profile does not match the style
- Removal requires wall repair and repainting
When to Choose Picture Frame Molding
Picture Frame Molding may be an appropriate choice for:
- Plain walls need dimension
- A traditional or transitional room needs architectural detail
- A modern room can support a simplified grid
- The homeowner wants a permanent alternative to wallpaper alone
- A dining room, foyer, or staircase needs a stronger identity
- The frames can align intentionally with furniture, artwork, and openings
Pristine Pro Tip 💡
Determine furniture placement before finalizing the frame layout. A beautifully centered wall frame can appear off-balance once a bed, console, television, or dining buffet is installed. We recommend drawing elevations or taping the proposed frames onto the wall so the proportions can be viewed from across the room.
Common Mistake ❌
A common mistake is forcing identical frame sizes onto walls of different widths. Frames should look balanced, but they do not always need to be mathematically identical. Another mistake is placing molding too close to baseboards, crown molding, door casing, or electrical plates, leaving cramped spaces that look accidental.
Designer Insight 🎨
For a subtle luxury look, use a slim profile and paint the molding, wall, baseboard, and door casing in one low-sheen color. For greater contrast, install wallpaper inside selected frames or use a slightly different sheen. The molding should support the room rather than compete with every other decorative element.
Florida Rating 🌴
⭐⭐⭐⭐⭐ Excellent
Picture frame molding performs very well in Florida’s conditioned interiors. In bathrooms or humid rooms, use moisture-resistant materials and properly seal joints and cut edges. Standard interior molding should not be used outdoors or in unconditioned spaces unless it is specifically rated for those conditions.
Maintenance Level
⭐⭐ Easy
Dust horizontal edges periodically and wipe painted surfaces with a soft damp cloth. Repair separated caulk lines or open miters as seasonal movement appears. Maintain the paint finish and avoid excessive moisture on MDF products.
Related Terms
Panel Molding
Wainscoting
Chair Rail
Crown Molding
Baseboard
Wall Paneling
Finish Carpentry
Batten Wall
Board and Batten
Ornamental Millwork
Door Casing
Feature Wall
-
Pipe Insulation
Pipe Insulation
Definition
Pipe insulation is a protective thermal covering installed around plumbing, hydronic, refrigeration, or mechanical piping. It slows heat transfer, reduces condensation, protects pipes from temperature changes, conserves energy, limits noise, and helps shield piping from physical contact.
In residential remodeling, pipe insulation is commonly used on hot-water supply lines, cold-water lines that develop condensation, exterior or attic piping, air-conditioning refrigerant lines, water-heater connections, and plumbing located near living spaces. The insulation may be tubular foam, elastomeric rubber, fiberglass, polyethylene, mineral fiber, or another product designed for the pipe material and operating temperature.
Pipe insulation must be sized to match the outside diameter of the pipe and installed with tightly sealed seams and fittings. Gaps, crushed insulation, exposed elbows, and unsealed vapor barriers can reduce performance. Certain locations may also require protective jacketing, fire-rated materials, or compliance with mechanical, plumbing, and energy codes.
Common Applications
Pipe Insulation is commonly used for:
- Hot-water supply piping
- Cold-water lines
- Water-heater piping
- Attic plumbing
- Exterior wall plumbing
- Crawl-space piping
- Air-conditioning refrigerant lines
- Condensate lines where appropriate
- Mechanical rooms
- Recirculating hot-water systems
- Commercial plumbing
- Hydronic piping
- Under-sink piping for accessibility protection
- Garage plumbing
- Pool equipment piping when approved
Common Types
Common types and configurations include:
- Flexible polyethylene foam
- Elastomeric rubber insulation
- Fiberglass pipe insulation
- Mineral fiber insulation
- Closed-cell foam insulation
- Pre-slit tubular insulation
- Self-sealing pipe insulation
- Rigid insulation with protective jacket
- UV-resistant exterior pipe wrap
- Fire-rated pipe insulation system
Advantages
- Reduces heat loss from hot-water pipes
- Helps cold-water pipes resist condensation
- Can improve hot-water delivery efficiency
- Protects nearby finishes from dripping condensation
- May reduce pipe noise
- Provides limited protection from brief temperature drops
- Helps prevent burns on exposed hot piping
- Supports energy-code compliance
- Protects refrigerant lines
- Can extend the service life of some piping systems
Disadvantages
- Incorrect material may deteriorate from heat or UV exposure
- Gaps and open seams reduce effectiveness
- Wet insulation can trap moisture
- Some products are vulnerable to pests or physical damage
- Exterior installations may require protective jacketing
- Insulation alone cannot prevent freezing during prolonged cold exposure
- Installation around valves and fittings can be time-consuming
- Combustible materials must be kept away from heat sources as required
When to Choose Pipe Insulation
Pipe Insulation may be an appropriate choice for:
- Hot-water piping runs through unconditioned space
- Cold pipes create condensation
- Refrigerant lines are installed or replaced
- Piping is exposed where contact could cause burns
- Energy efficiency is a priority
- Plumbing is located in attics, garages, or exterior walls
- Local code or equipment instructions require insulation
- Accessible fixtures need protective pipe covers
Pristine Pro Tip 💡
Use insulation designed for the pipe temperature and environment, and seal every longitudinal seam, butt joint, elbow, and termination. On air-conditioning suction lines, a continuous vapor-resistant closed-cell system is critical because small gaps can allow humid air to reach the cold pipe and create condensation beneath the insulation.
Common Mistake ❌
A common mistake is leaving several inches of pipe exposed at elbows, valves, or wall penetrations. Condensation and heat loss often occur at these weak points. Another mistake is installing indoor foam insulation outdoors without UV protection; sunlight can rapidly degrade the material.
Designer Insight 🎨
Pipe insulation is mostly hidden, but thoughtful planning improves the finished project. In open vanities, commercial-style kitchens, and accessible sinks, exposed insulated piping should be neat, compact, and coordinated with escutcheons or protective covers so the functional requirement does not detract from the design.
Florida Rating 🌴
⭐⭐⭐⭐⭐ Excellent
Pipe insulation is especially valuable in Florida because warm, humid air readily condenses on cold water and air-conditioning lines. Properly sealed insulation helps prevent sweating pipes, ceiling stains, cabinet damage, and mold-supporting moisture. Freeze protection is less frequently needed than in northern climates, but exposed pipes can still be vulnerable during occasional cold events.
Maintenance Level
⭐⭐ Very Easy
Inspect accessible insulation periodically for splits, missing sections, moisture, UV damage, pest damage, or compression. Replace wet or deteriorated insulation and correct the moisture source. Keep exterior jacketing intact and ensure seams remain sealed.
Related Terms
Plumbing Rough-In
Plumbing Fixture
Water Heater
Hot Water Recirculation
PEX Pipe
PVC Pipe
CPVC Pipe
Copper Pipe
Closed Cell Foam
Mineral Wool Insulation
Condensation
Vapor Barrier
Mechanical Code
Energy Efficiency
-
Plumbing Fixture
Plumbing Fixture
Definition
A plumbing fixture is a permanently or semi-permanently installed device that receives water, discharges wastewater, or provides a controlled connection between a building’s plumbing system and the user. Common fixtures include sinks, faucets, toilets, bathtubs, showers, bidets, utility sinks, and drinking fountains.
In kitchen and bathroom remodeling, plumbing fixtures are among the most visible and frequently used components of the finished space. Their selection affects layout, cabinetry, countertop fabrication, waterproofing, drainage, water pressure, accessibility, cleaning, and overall design. Fixtures may be made from vitreous china, porcelain-enameled cast iron, stainless steel, fireclay, acrylic, composite materials, solid surface, copper, or natural stone.
Fixture planning begins before walls and floors are closed. Supply lines, shutoff valves, drain sizes, venting, rough-in dimensions, framing support, electrical connections, and waterproofing must match the selected products. Manufacturer cut sheets should be reviewed early, especially for wall-mounted faucets, freestanding tubs, smart toilets, body sprays, linear drains, and specialty sinks.
Common Applications
Plumbing Fixture is commonly used for:
- Kitchen sinks
- Bathroom sinks
- Faucets
- Toilets
- Bidets
- Bathtubs
- Shower systems
- Shower valves
- Utility sinks
- Laundry sinks
- Bar sinks
- Prep sinks
- Pot fillers
- Drinking fountains
- Commercial restroom fixtures
- Outdoor sinks and showers when appropriately rated
Common Types
Common types and configurations include:
- Kitchen fixture
- Lavatory fixture
- Water closet
- Bidet fixture
- Tub filler
- Shower fixture
- Utility fixture
- Wall-mounted fixture
- Deck-mounted fixture
- Floor-mounted fixture
- Smart plumbing fixture
- Touchless fixture
- Accessible fixture
- Commercial-grade fixture
Advantages
- Provides safe, controlled access to water
- Supports sanitation and daily hygiene
- Available in a wide range of styles and price levels
- Can improve water efficiency
- Modern fixtures may include comfort and smart features
- Quality fixtures can improve resale appeal
- Finish coordination supports cohesive design
- Accessible models improve long-term usability
- Replacement parts are available for many established brands
- Proper fixture selection can improve cleaning and maintenance
Disadvantages
- Specialty fixtures may require nonstandard rough-ins
- Low-quality internal components may fail prematurely
- Decorative finishes can require careful cleaning
- Some fixtures increase water or electrical demands
- Imported or discontinued models may have limited replacement parts
- Wall-mounted and freestanding fixtures require precise installation
- Hard-water deposits can affect appearance and function
- Changing fixture type late in construction can cause costly rework
When to Choose Plumbing Fixture
Plumbing Fixture may be an appropriate choice for:
- Any kitchen or bathroom is remodeled
- Existing fixtures are worn, leaking, inefficient, or poorly sized
- The layout is changing
- Accessibility or aging-in-place features are needed
- Water-saving improvements are desired
- A new design style or finish is being introduced
- The plumbing system is being updated
- A commercial or code-compliant fixture package is required
Pristine Pro Tip 💡
Finalize major plumbing fixtures before rough-in and countertop fabrication. The exact model matters—not just the general category. A wall-mounted faucet, apron-front sink, freestanding tub filler, smart toilet, and standard replacement fixture can each require different framing, supply locations, drains, electrical connections, and clearances.
Common Mistake ❌
A common mistake is buying fixtures based only on appearance without confirming compatibility with the existing plumbing, cabinet size, countertop holes, water pressure, and local code. Another mistake is discarding installation templates, cut sheets, special tools, and model information before the project is complete.
Designer Insight 🎨
Plumbing fixtures should be selected as a coordinated family, but every piece does not have to match exactly. Repeating the primary finish while varying shape or scale can create a layered design. In open kitchens and primary bathrooms, fixture proportions should relate to sink size, vanity width, tub dimensions, ceiling height, and surrounding lighting.
Florida Rating 🌴
⭐⭐⭐⭐⭐ Excellent
Quality plumbing fixtures are essential in Florida, where humidity, hard-water conditions in many communities, and heavy daily use can affect finishes and internal components. Corrosion-resistant materials, accessible replacement cartridges, and finishes suited to the home’s water chemistry can improve long-term performance. Exterior fixtures must be specifically rated for outdoor exposure.
Maintenance Level
⭐⭐ Easy to Moderate
Wipe fixtures dry when practical, clean with manufacturer-approved products, remove mineral deposits before they harden, and inspect caulk, supply connections, cartridges, aerators, and drains periodically. Avoid abrasive pads and acidic cleaners on specialty finishes. Repair leaks promptly to protect cabinetry, flooring, and wall assemblies.
Related Terms
Plumbing Rough-In
Plumbing Trim-Out
Faucet
Kitchen Sink
Bathroom Vanity
Toilet
Bidet
Bathtub
Shower Valve
Drain Assembly
P-Trap
Angle Stop Valve
Supply Line
Cut Sheet
WaterSense
Remodeling Glossary P FAQs
Explore common questions related to remodeling terminology, construction vocabulary, and design language to better understand the terms featured in Letter P.
What's the difference between porcelain and ceramic tile?
Porcelain tile is manufactured from denser clay and fired at higher temperatures than ceramic tile, making it more durable, less porous, and better suited for wet areas and high-traffic spaces. Ceramic tile remains an excellent choice for many interior applications and often offers a wider variety of decorative styles.
What is a plumbing rough-in?
A plumbing rough-in refers to the stage of construction where supply lines, drainpipes, and venting are installed before walls and floors are finished. Proper rough-in work ensures fixtures fit correctly and function as designed once installation is complete.
What's the difference between a kitchen peninsula and an island?
Both provide additional workspace and storage, but a peninsula remains connected to surrounding cabinetry while an island is completely freestanding. The best choice depends on available space, traffic flow, and the overall kitchen layout.
Why is proper project planning so important before remodeling?
Careful planning helps coordinate material selections, scheduling, budgeting, and construction sequencing before work begins. Investing time in the planning phase often results in a smoother remodeling experience and fewer unexpected changes during construction.
What paint sheen is best for bathrooms?
A high-quality satin or moisture-resistant eggshell is often appropriate for bathroom walls, while semi-gloss may be used on trim and doors. The best choice depends on ventilation, surface condition, desired appearance, and the specific paint manufacturer's recommendations.
Are painted cabinets less durable than stained cabinets?
Not necessarily. A high-quality painted cabinet can be extremely durable, but painted finishes tend to show chips, scratches, and joint movement more clearly than stained wood. Construction quality, preparation, coating system, curing, and daily care all influence long-term performance.
Does a panel-ready appliance come with the cabinet panel?
Usually no. The appliance is manufactured to receive a custom panel, but the matching panel and decorative hardware are generally ordered through the cabinet company or fabricated by a millwork professional.
How deep should a pantry cabinet be?
Many full-height pantry cabinets are approximately 24 inches deep to align with base cabinets, but shallower designs can improve visibility and access. The best depth depends on the room layout, door swing, storage needs, and whether roll-out accessories are included.
Is a pantry pull-out better than fixed shelves?
For narrow or deep cabinets, a pull-out often provides better visibility and access. Fixed shelves may offer more total storage volume and lower cost, but items at the back can be harder to reach. The best choice depends on cabinet width, budget, and storage habits.
Is a peninsula better than a kitchen island?
Neither is universally better. A peninsula can provide excellent storage and seating in a tighter space, while an island offers circulation on all sides and greater layout flexibility. The correct choice depends on room dimensions, traffic flow, utilities, and how the kitchen will be used.
How high should pendant lights hang above a kitchen island?
Many pendants are installed roughly 30 to 36 inches above the countertop, but the correct height depends on fixture size, ceiling height, user height, light distribution, and sight lines. The fixture manufacturer's guidance and the room's proportions should control the final placement.
Is penny tile good for a shower floor?
Yes, many porcelain penny mosaics are well suited for shower floors because the small pieces conform to slope and the grout joints improve traction. The tile must be rated for the application and installed over a properly waterproofed, correctly sloped shower assembly.
Should perimeter countertops match the kitchen island?
They can match, but they do not have to. Matching surfaces create continuity, while a contrasting island can add depth and emphasis. The materials should still coordinate in undertone, pattern scale, durability, and maintenance requirements.
Is perimeter lighting the same as recessed lighting?
Not always. Recessed fixtures may be used as perimeter lighting, but the term also includes undercabinet, cove, toe-kick, wall-wash, and concealed linear lighting located around the edges of a space or feature.
Do all kitchen and bathroom remodels require permits?
No. Requirements depend on the work being performed and the local jurisdiction. Cosmetic finish changes may be exempt, while plumbing, electrical, mechanical, structural, or exterior work often requires permits. Always verify the specific scope with the local building department and licensed professionals.
Can a picture window be opened?
No. A true picture window is fixed. It can be combined with operable casement, awning, sliding, or double-hung units when ventilation is desired.
Is a plywood cabinet box always better than particle board?
Plywood generally offers excellent strength and screw holding, but overall cabinet quality depends on far more than the panel name. Thickness, core quality, joinery, back construction, finish, hardware, and installation must all be evaluated.
Related Terms
Can a pocket door provide good bathroom privacy?
It can provide reasonable visual privacy when fitted with a solid door, proper jambs, and a quality privacy lock, but it may not control sound as well as a tightly sealed hinged door.
Are pocket-screw joints strong?
They can be very strong for cabinetry, face frames, furniture, and many nonstructural assemblies when designed and installed correctly. They are not a universal substitute for structural fasteners, engineered connectors, or traditional joinery in every application.
Is a polished finish harder to maintain than a honed finish?
It depends on the material and use. Polished surfaces may wipe clean easily, but they can show smudges, water spots, scratches, and etching. Honed surfaces reduce glare but may show oils or require different sealing and care.
Is porcelain better than quartz for countertops?
Each has advantages. Porcelain offers excellent heat and UV resistance and is highly stain resistant, while quartz is thicker, widely fabricated, and may have more consistent through-edge appearance. The best material depends on design, installation, budget, outdoor exposure, and local fabrication expertise.
Will pipe insulation prevent pipes from freezing?
It slows heat loss and can protect pipes during short temperature drops, but it does not generate heat. During prolonged freezing conditions, vulnerable piping may also require heat cable, enclosure, conditioned air, draining, or other approved freeze-protection measures.
Is a porcelain slab the same as large-format porcelain tile?
They are related, but porcelain slabs are typically much larger and may be thinner than conventional large-format tile. Their size requires specialized fabrication, handling, adhesive coverage, and installation methods.
What is the difference between porcelain tile and ceramic tile?
Porcelain is a type of ceramic tile made to meet stricter density and water-absorption criteria. It is generally denser and less absorbent than standard ceramic tile, although suitability still depends on the individual product's ratings and intended application.
Is a pot filler worth adding during a kitchen remodel?
A pot filler can be worthwhile for homeowners who cook frequently, use large pots, or have a range far from the sink. It is primarily a convenience and design upgrade rather than a necessity. Its value depends on how often it will be used, whether plumbing access is available, and whether the homeowner is comfortable maintaining a fixture located above the cooking surface.
What is the difference between a powder bathroom and a half bathroom?
In residential use, the terms usually mean the same thing: a bathroom with a toilet and sink but no bathing fixture. “Powder room” often emphasizes a guest-oriented, decorative space, while “half bathroom” is the more technical real-estate description.
What is the difference between a power vent and a direct vent water heater?
A power vent water heater uses an electric blower to push exhaust gases outdoors and commonly draws combustion air from the room. A direct vent unit generally draws combustion air from outdoors through a sealed venting arrangement and discharges exhaust outdoors. Some products combine powered and direct-vent characteristics, so the exact manufacturer's description should be reviewed.
What is the difference between a prep kitchen and a butler's pantry?
A butler's pantry traditionally focuses on serving, dish storage, beverages, and the transition between a kitchen and dining room. A prep kitchen is usually designed for more active food preparation and cleanup and may include major appliances, a full sink, a dishwasher, and cooking equipment. Modern homes often combine the two concepts.
How large should a prep sink be?
The appropriate size depends on the intended task and available cabinet space. A small bar sink may be adequate for beverages and handwashing, while produce preparation and pot filling usually benefit from a wider, deeper single bowl. The sink should be large enough to be useful without consuming the entire work surface.
Is a pressure balance valve the same as a thermostatic valve?
No. A pressure balance valve reacts to changes in hot and cold water pressure to reduce sudden temperature shifts. A thermostatic valve senses and regulates the mixed water temperature more directly and often allows separate control of temperature and volume. Thermostatic systems typically offer more precise control at a higher cost.
Can pressure treated lumber be painted or stained?
Yes, but it should be sufficiently dry and properly prepared first. Fresh treated lumber may contain too much moisture for a coating to bond well. Drying time varies with the product, weather, storage, and exposure. Follow the coating manufacturer's moisture and preparation requirements.
Should a primary bathroom always include a bathtub?
No. The best choice depends on the homeowners' habits, available space, resale considerations, and whether another bathtub exists in the home. Many homeowners prefer a larger walk-in shower, while others value a soaking tub. The layout should reflect actual use rather than a rule that every primary bathroom must contain both.
What rooms are included in a primary suite?
At minimum, a primary suite generally includes a primary bedroom and a private attached bathroom. Walk-in closets are common but not universal. Larger suites may add dressing areas, sitting rooms, laundry access, beverage stations, or private outdoor space.
Do I need primer before every painting project?
Not always. A clean, sound, previously painted surface may accept a compatible finish coat without separate primer. Primer is strongly recommended for bare or porous materials, repairs, stains, glossy surfaces, cabinets, major color changes, and situations where the coating manufacturer requires it.
Can people see through privacy glass at night?
Sometimes. Many privacy-glass products obscure detail but may still reveal shapes or silhouettes when the room is brightly lit and the opposite side is dark. The result depends on the glass pattern, distance, lighting, and privacy rating. Testing a sample under real conditions is the best way to confirm performance.
What size cabinet is best for a pull-out trash system?
Common systems fit a range of base-cabinet widths, but the best size depends on bin capacity, the number of bins, and available space. A wider cabinet often accommodates two usable containers for trash and recycling. Always match the cabinet's clear interior dimensions to the hardware manufacturer's requirements.
Should a spice pull-out be installed next to the range?
It can be convenient near the range, but it should not violate appliance clearances or expose contents to excessive heat. A nearby prep zone or a cabinet separated from the range by a filler or panel may be a better location. Follow appliance and cabinetry requirements.
Can pull-out shelves be added to existing cabinets?
Yes, many cabinets can be retrofitted if the openings are large enough and the cabinet boxes are sound. The installer must account for hinges, face frames, doors, plumbing, and interior obstructions. Custom-sized pull-outs often provide the best fit.
Why does a sink smell like sewer gas even though it has a P-trap?
Possible causes include a dried-out trap, a leak that allows the water seal to escape, improper venting that siphons the trap, buildup inside the drain, or another plumbing defect. Adding water may solve a dry trap, but recurring odor should be evaluated by a qualified plumbing professional.
Are puck lights better than LED strip lights under cabinets?
Neither is universally better. Puck lights create focused pools of light and work well for accents or short areas. LED strips usually provide more continuous, even illumination along a countertop. The best choice depends on cabinet construction, visual preference, task needs, and wiring access.
Does PVC trim need to be painted?
Many PVC trim products can remain unpainted if the factory color is acceptable, but painting may improve color consistency, reduce surface weathering, and coordinate the trim with the home. Use a coating approved for PVC and follow restrictions on light-reflective value or dark colors.
What is the difference between PVC and CPVC pipe?
PVC and CPVC are related plastic piping materials with different formulations and temperature capabilities. CPVC is commonly manufactured for hot- and cold-water distribution in approved systems, while standard PVC is widely used for drain, waste, vent, irrigation, and cold-water applications. Their pipe dimensions, fittings, primers, cements, and approvals may differ and should not be mixed unless a listed transition method is used.
Can cracked plaster be repaired without replacing the entire wall?
Often, yes. Hairline cracks, localized damage, and areas of loose plaster can frequently be stabilized and patched. Full replacement is usually considered when large sections have detached, extensive water damage is present, or the underlying lath or framing has failed.
What is included in a plumbing rough-in inspection?
Requirements vary by jurisdiction, but an inspection commonly verifies pipe sizing, slope, support, venting, approved materials, pressure or leak testing, fixture locations, and compliance with the applicable plumbing code before concealed piping is covered.
Is plumbing trim-out the same as plumbing rough-in?
No. Rough-in installs the concealed supply, drain, vent, and valve components before walls and finishes are completed. Trim-out occurs later and includes the visible fixtures, controls, drains, connections, testing, and final adjustments.
Is poplar good for cabinets?
Yes, especially for painted cabinet doors, face frames, and custom millwork. It is smooth and workable, but it is softer than maple and may dent more easily. For stained cabinetry, another species is often preferred.
Can a post be removed to make a room more open?
Possibly, but only after the supported loads and foundation conditions are evaluated. The post may need to be replaced with a larger beam, a stronger beam, concealed steel, or a new support arrangement designed by a qualified professional.
How high should a pot rack be installed?
The correct height depends on the ceiling, rack design, user height, island size, and cookware length. It should be reachable without creating a head hazard or blocking views. Manufacturer guidance and an on-site mockup are more reliable than a single universal dimension.
What should a homeowner expect from a remodeling project manager?
A homeowner should expect organized communication, schedule coordination, trade oversight, documentation of decisions, attention to jobsite conditions, and a clear process for questions, changes, and final completion. The specific duties should be explained before the project begins.
When should the final payment be made in relation to the punch list?
Payment timing depends on the contract and applicable law. The agreement should explain substantial completion, retainage if any, final payment, and how remaining punch-list items are handled. Homeowners and contractors should follow the written contract rather than relying on assumptions.
Can push-to-open cabinets also be soft-close?
Yes. Many premium drawer slides and some door systems combine push-to-open operation with soft-close technology. Compatibility depends on the specific hinge, latch, or slide system, so the components should be selected as a coordinated set rather than mixed without confirming manufacturer requirements.
Is pattern tile too trendy for a permanent remodel?
Not necessarily. Classic patterns such as checkerboard, traditional encaustic motifs, and simple geometric mosaics have been used for generations. Longevity depends on the pattern, color palette, scale, and how heavily it is used. A smaller backsplash or powder-room application is often easier to update than a full main-floor installation.
Can peel-and-stick tile be installed in a shower?
Most peel-and-stick decorative tiles should not be used as the finished surface of a shower unless the manufacturer specifically approves that exact product for continuous wet-area use. Even when approved as a decorative finish, the shower still requires a complete waterproofing system behind it.
Are MDF cabinet doors considered high quality?
They can be. High-density, properly sealed MDF is widely used in quality painted cabinetry because it machines smoothly and remains stable. Quality varies by density, thickness, construction, edge sealing, finish system, and exposure to moisture. MDF should not be judged solely by name without considering the complete cabinet specification.
What is the difference between panel molding and wainscoting?
Panel molding is the trim profile itself. Wainscoting is a broader wall-treatment system that may include panel molding, rails, stiles, beadboard, raised panels, or flat panels, usually applied to the lower portion of a wall. Panel molding can be used within wainscoting or independently across an entire wall.
Does picture frame molding make a small room look smaller?
It can if the molding is oversized, darkly contrasted, or divided into too many small frames. A restrained profile, consistent wall color, generous spacing, and vertically proportioned frames can actually make a small room feel taller and more finished.