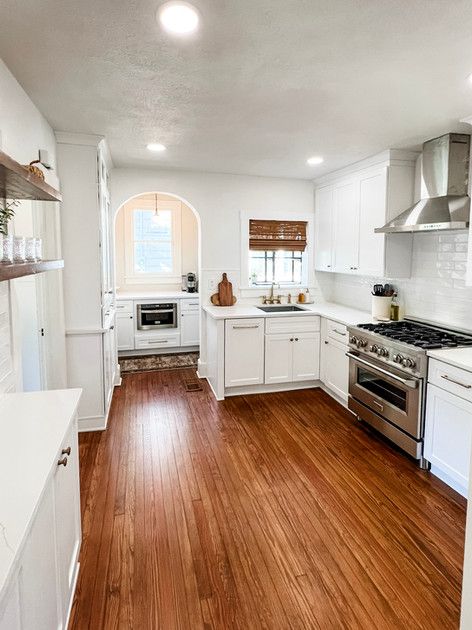

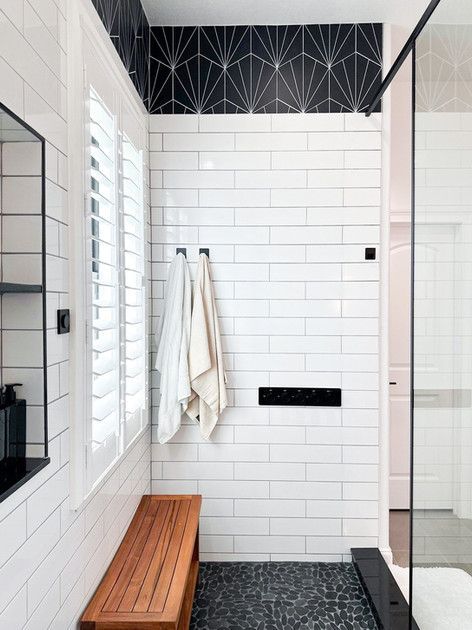

Glossary- Letter F
Small technical details can have a big impact on the finished result.
Letter F explores terminology related to edge profiles, engineered materials, and installation details that influence both appearance and performance.
-
Face Frame Cabinet
Face Frame Cabinet
Definition
Face Frame Cabinet is a cabinet construction style with a solid-wood rail-and-stile frame attached to the front of the cabinet box; doors and drawers mount to or overlap this frame. In residential and commercial remodeling, this term affects not only the visible design but also installation sequence, surrounding materials, clearances, support, service access, and long-term performance.
The exact product or construction method varies by manufacturer and project. Common considerations include material quality, dimensions, compatibility with adjacent finishes, fastener or connection requirements, and the condition of the substrate. Adds rigidity but slightly narrows clear openings;accessories must fit between stiles.
A successful face frame cabinet installation begins with accurate field measurements and coordination before related cabinetry, plumbing, electrical work, framing, drywall, tile, countertops, or finish carpentry are completed. Manufacturer instructions and applicable building requirements should always take priority over assumptions based on appearance alone.
Common Applications
Face Frame Cabinet is commonly used for:
Kitchen Base And Wall Cabinets
Bathroom Vanities
Built-Ins
Islands
Laundry Cabinetry
Common Types
Common forms and configurations include:
Partial Overlay
Full Overlay
Inset
Beaded Face Frame
Flush Inset
Advantages
Advantages include:
Creates an intentional, finished appearance
Supports efficient storage planning
Can be customized to the room and design style
Works with modern hardware and organizational accessories
Can improve daily function and perceived value
Allows the project team to tailor face frame cabinet to the room's dimensions, use, and design goals
Disadvantages
Potential disadvantages and limitations include:
Requires accurate design measurements and installation
Poor materials or alignment remain visible
Moisture can damage unfinished edges and cabinet cores
Specialty construction and finishes may cost more
Walls, corners, and appliances must be coordinated carefully
Poor selection or installation of face frame cabinet can create costly corrections after surrounding finishes are complete
When to Choose Face Frame Cabinet
Choose face frame cabinet when its function, appearance, and installation requirements support the complete remodeling plan. It is particularly appropriate for kitchen base and wall cabinets, bathroom vanities, built-ins, islands. Compare products using real dimensions, technical data, maintenance expectations, and compatibility with nearby materials rather than selecting from a photograph alone.
Before ordering, confirm rough openings, finished thicknesses, clearances, loads, plumbing or electrical locations, and any manufacturer-specific accessories. The goal is not simply to include face frame cabinet, but to integrate it so it operates comfortably and looks intentional after every surrounding finish is installed.
Pristine Pro Tip 💡
Treat face frame cabinet as an early coordination item, not a last-minute accessory. Adds rigidity but slightly narrows clear openings;accessories must fit between stiles. We verify the exact product information and installation conditions before dependent materials are fabricated or walls are closed. That extra planning protects both the finished appearance and the homeowner's investment.
Common Mistake ❌
A common mistake is assuming products with the same general name or nominal size are interchangeable. Small differences in dimensions, mounting, support, clearances, finish thickness, or service access can change the entire installation. Another mistake is expecting caulk, trim, shims, or field cutting to correct a condition that should have been resolved during design and rough construction.
Designer Insight 🎨
Face Frame Cabinet should feel connected to the room rather than selected in isolation. Its scale, lines, finish, and visual weight should relate to the cabinetry, countertop, tile, lighting, hardware, and architecture. Repeating a small number of intentional details usually creates a more polished result than adding unrelated decorative features.
Florida Rating 🌴
⭐⭐⭐⭐⭐ Excellent
Face Frame Cabinet can perform very well in Florida when cabinet cores, exposed edges, hardware, and floor-level details are protected from plumbing leaks and humid air. Consistent indoor climate control, sealed field cuts, and prompt cleanup of water help preserve alignment and finish quality.
Maintenance Level
⭐⭐ Easy
Clean with a soft cloth and compatible cleaner, avoid prolonged moisture and abrasive chemicals, and correct loose hardware, damaged finish, or misalignment promptly.
Frequently Asked Questions
Is face frame cabinet appropriate for every remodeling project?
Not necessarily. The correct choice depends on the room, dimensions, substrate, budget, design style, maintenance expectations, and surrounding systems. A qualified remodeling professional can determine whether face frame cabinet fits the specific project and identify coordination issues before ordering.
What should be confirmed before installing face frame cabinet?
Confirm the exact product, finished dimensions, manufacturer requirements, substrate or structural support, required clearances, adjacent finish thicknesses, and access for future cleaning or service. For regulated work, applicable code and permit requirements must also be verified.
Related Terms
• Frameless Cabinet
• Cabinet Stile
• Full Overlay Cabinet
• Cabinet Rail
• Inset Cabinet
• Full Extension Drawer Slides
• Cabinet Box
• Furniture Toe Kick
-
Farmhouse Sink
Farmhouse Sink
Definition
Farmhouse Sink is a deep apron-front sink whose finished front remains exposed through the sink-base cabinet. In residential and commercial remodeling, this term affects not only the visible design but also installation sequence, surrounding materials, clearances, support, service access, and long-term performance.
The exact product or construction method varies by manufacturer and project. Common considerations include material quality, dimensions, compatibility with adjacent finishes, fastener or connection requirements, and the condition of the substrate. Requires a compatible cabinet, dedicated support, exact templating, and protection at the apron-to-cabinet transition.
A successful farmhouse sink installation begins with accurate field measurements and coordination before related cabinetry, plumbing, electrical work, framing, drywall, tile, countertops, or finish carpentry are completed. Manufacturer instructions and applicable building requirements should always take priority over assumptions based on appearance alone.
Common Applications
Farmhouse Sink is commonly used for:
- Kitchens
- Butler'S Pantries
- Laundry Rooms
- Large Food-Preparation Areas
Common forms and configurations include:
- Fireclay
- Cast Iron
- Stainless Steel
- Copper
- Composite Granite
- Single Bowl
- Double Bowl
- Workstation
Advantages
- Provides an important daily-use function
- Available in multiple sizes, materials, and configurations
- Can improve comfort and efficiency
- Coordinates with surrounding cabinetry, tile, and countertops
- Quality products can provide long service life
- Allows the project team to tailor farmhouse sink to the room's dimensions, use, and design goals
Disadvantages
Potential disadvantages and limitations include:
- Installation may require cabinet, countertop, or framing changes
- Leaks can damage surrounding finishes
- Heavy or specialty products may require added support
- Replacement may be constrained by existing cutouts
- Incorrect installation can affect drainage or service access
- Poor selection or installation of farmhouse sink can create costly corrections after surrounding finishes are complete
When to Choose Farmhouse Sink
Choose farmhouse sink when its function, appearance, and installation requirements support the complete remodeling plan. It is particularly appropriate for kitchens, butler's pantries, laundry rooms, large food-preparation areas. Compare products using real dimensions, technical data, maintenance expectations, and compatibility with nearby materials rather than selecting from a photograph alone.
Before ordering, confirm rough openings, finished thicknesses, clearances, loads, plumbing or electrical locations, and any manufacturer-specific accessories. The goal is not simply to include farmhouse sink, but to integrate it so it operates comfortably and looks intentional after every surrounding finish is installed.
Pristine Pro Tip 💡
Treat farmhouse sink as an early coordination item, not a last-minute accessory. Requires a compatible cabinet, dedicated support, exact templating, and protection at the apron-to-cabinet transition. We verify the exact product information and installation conditions before dependent materials are fabricated or walls are closed. That extra planning protects both the finished appearance and the homeowner's investment.
Common Mistake ❌
A common mistake is assuming products with the same general name or nominal size are interchangeable. Small differences in dimensions, mounting, support, clearances, finish thickness, or service access can change the entire installation. Another mistake is expecting caulk, trim, shims, or field cutting to correct a condition that should have been resolved during design and rough construction.
Designer Insight 🎨
Farmhouse Sink should feel connected to the room rather than selected in isolation. Its scale, lines, finish, and visual weight should relate to the cabinetry, countertop, tile, lighting, hardware, and architecture. Repeating a small number of intentional details usually creates a more polished result than adding unrelated decorative features.
Florida Rating 🌴
⭐⭐⭐⭐⭐ Excellent
Farmhouse Sink is well suited to Florida homes, but mineral content, sediment, humidity, and concealed condensation can affect long-term performance. Use quality corrosion-resistant components, keep service information, and address drips or restricted flow promptly.
Maintenance Level
⭐⭐ Easy to Moderate
Clean with manufacturer-approved products, monitor for leaks or restricted flow, and service replaceable components before surrounding materials are damaged.
Related Terms
• Fireclay Sink
• Sink Base Cabinet
• Apron-Front Sink
• Countertop Template
• Undermount Sink
• Kitchen Faucet
• Workstation Sink
• Air Switch
-
Faucet Aerator
Faucet Aerator
Definition
Faucet Aerator is a small fitting at the faucet outlet that mixes air with water to shape the stream, reduce splashing, and often reduce water use. In residential and commercial remodeling, this term affects not only the visible design but also installation sequence, surrounding materials, clearances, support, service access, and long-term performance.
The exact product or construction method varies by manufacturer and project. Common considerations include material quality, dimensions, compatibility with adjacent finishes, fastener or connection requirements, and the condition of the substrate. Mineral scale and construction debris can imitate a pressure problem;match thread, key, and flow rate.
A successful faucet aerator installation begins with accurate field measurements and coordination before related cabinetry, plumbing, electrical work, framing, drywall, tile, countertops, or finish carpentry are completed. Manufacturer instructions and applicable building requirements should always take priority over assumptions based on appearance alone.
Common Applications
Faucet Aerator is commonly used for:
- Bathroom Faucets
- Kitchen Faucets
- Bar Faucets
- Laundry Faucets
- Commercial Lavatories
- Common Types
- Common forms and configurations include:
- Standard Threaded
- Recessed Cache
- Swivel
- Laminar-Flow
- Pressure-Compensating
- Low-Flow
- Tamper-Resistant
Advantages
- Supports reliable fixture operation
- Can often be serviced or replaced without replacing the entire fixture
- Improves water control and user comfort
- Small corrections can prevent larger plumbing concerns
- Widely available for many residential applications
- Allows the project team to tailor faucet aerator to the room's dimensions, use, and design goals
Disadvantages
Potential disadvantages and limitations include:
- Exact replacement parts may be difficult to identify
- Mineral scale and sediment can reduce performance
- Incorrect installation can cause leaks
- Decorative finishes can be damaged during service
- Manufacturer-specific components may cost more
- Poor selection or installation of faucet aerator can create costly corrections after surrounding finishes are complete
When to Choose Faucet Aerator
Choose faucet aerator when its function, appearance, and installation requirements support the complete remodeling plan. It is particularly appropriate for bathroom faucets, kitchen faucets, bar faucets, laundry faucets. Compare products using real dimensions, technical data, maintenance expectations, and compatibility with nearby materials rather than selecting from a photograph alone.
Before ordering, confirm rough openings, finished thicknesses, clearances, loads, plumbing or electrical locations, and any manufacturer-specific accessories. The goal is not simply to include faucet aerator, but to integrate it so it operates comfortably and looks intentional after every surrounding finish is installed.
Pristine Pro Tip 💡
Treat faucet aerator as an early coordination item, not a last-minute accessory. Mineral scale and construction debris can imitate a pressure problem;match thread, key, and flow rate. We verify the exact product information and installation conditions before dependent materials are fabricated or walls are closed. That extra planning protects both the finished appearance and the homeowner's investment.
Common Mistake ❌
A common mistake is assuming products with the same general name or nominal size are interchangeable. Small differences in dimensions, mounting, support, clearances, finish thickness, or service access can change the entire installation. Another mistake is expecting caulk, trim, shims, or field cutting to correct a condition that should have been resolved during design and rough construction.
Designer Insight 🎨
Faucet Aerator should feel connected to the room rather than selected in isolation. Its scale, lines, finish, and visual weight should relate to the cabinetry, countertop, tile, lighting, hardware, and architecture. Repeating a small number of intentional details usually creates a more polished result than adding unrelated decorative features.
Florida Rating 🌴
⭐⭐⭐⭐⭐ Excellent
Faucet Aerator is well suited to Florida homes, but mineral content, sediment, humidity, and concealed condensation can affect long-term performance. Use quality corrosion-resistant components, keep service information, and address drips or restricted flow promptly.
Maintenance Level
⭐⭐ Easy to Moderate
Clean with manufacturer-approved products, monitor for leaks or restricted flow, and service replaceable components before surrounding materials are damaged.
Related Terms
• Faucet Cartridge
• Low-Flow Fixture
• Faucet
• Supply Line
• Flow Rate
• Shutoff Valve
• Water Pressure
• Hard Water
-
Faucet Cartridge
Faucet Cartridge
Definition
Faucet Cartridge is the replaceable internal valve that controls water flow and temperature as a faucet handle moves. In residential and commercial remodeling, this term affects not only the visible design but also installation sequence, surrounding materials, clearances, support, service access, and long-term performance.
The exact product or construction method varies by manufacturer and project. Common considerations include material quality, dimensions, compatibility with adjacent finishes, fastener or connection requirements, and the condition of the substrate. Exact cartridges are manufacturer- and model-specific;incorrect orientation can cause leaks or reversed operation.
A successful faucet cartridge installation begins with accurate field measurements and coordination before related cabinetry, plumbing, electrical work, framing, drywall, tile, countertops, or finish carpentry are completed. Manufacturer instructions and applicable building requirements should always take priority over assumptions based on appearance alone.
Common Applications
Faucet Cartridge is commonly used for:
- Kitchen Faucets
- Bathroom Faucets
- Tub And Shower Valves
- Thermostatic Valves
- Commercial Faucets
- Common Types
- Common forms and configurations include:
- Ceramic-Disc
- Quarter-Turn
- Compression
- Single-Control Mixing
- Pressure-Balancing
- Thermostatic
- Hot-Side
- Cold-Side
Advantages
- Supports reliable fixture operation
- Can often be serviced or replaced without replacing the entire fixture
- Improves water control and user comfort
- Small corrections can prevent larger plumbing concerns
- Widely available for many residential applications
- Allows the project team to tailor faucet cartridge to the room's dimensions, use, and design goals
Disadvantages
Potential disadvantages and limitations include:
- Exact replacement parts may be difficult to identify
- Mineral scale and sediment can reduce performance
- Incorrect installation can cause leaks
- Decorative finishes can be damaged during service
- Manufacturer-specific components may cost more
- Poor selection or installation of faucet cartridge can create costly corrections after surrounding finishes are complete
When to Choose Faucet Cartridge
Choose faucet cartridge when its function, appearance, and installation requirements support the complete remodeling plan. It is particularly appropriate for kitchen faucets, bathroom faucets, tub and shower valves, thermostatic valves. Compare products using real dimensions, technical data, maintenance expectations, and compatibility with nearby materials rather than selecting from a photograph alone.
Before ordering, confirm rough openings, finished thicknesses, clearances, loads, plumbing or electrical locations, and any manufacturer-specific accessories. The goal is not simply to include faucet cartridge, but to integrate it so it operates comfortably and looks intentional after every surrounding finish is installed.
Pristine Pro Tip 💡
Treat faucet cartridge as an early coordination item, not a last-minute accessory. Exact cartridges are manufacturer- and model-specific;incorrect orientation can cause leaks or reversed operation. We verify the exact product information and installation conditions before dependent materials are fabricated or walls are closed. That extra planning protects both the finished appearance and the homeowner's investment.
Common Mistake ❌
A common mistake is assuming products with the same general name or nominal size are interchangeable. Small differences in dimensions, mounting, support, clearances, finish thickness, or service access can change the entire installation. Another mistake is expecting caulk, trim, shims, or field cutting to correct a condition that should have been resolved during design and rough construction.
Designer Insight 🎨
Faucet Cartridge should feel connected to the room rather than selected in isolation. Its scale, lines, finish, and visual weight should relate to the cabinetry, countertop, tile, lighting, hardware, and architecture. Repeating a small number of intentional details usually creates a more polished result than adding unrelated decorative features.
Florida Rating 🌴
⭐⭐⭐⭐⭐ Excellent
Faucet Cartridge is well suited to Florida homes, but mineral content, sediment, humidity, and concealed condensation can affect long-term performance. Use quality corrosion-resistant components, keep service information, and address drips or restricted flow promptly.
Maintenance Level
⭐⭐ Easy to Moderate
Clean with manufacturer-approved products, monitor for leaks or restricted flow, and service replaceable components before surrounding materials are damaged.
Related Terms
• Faucet Aerator
• Shutoff Valve
• Mixing Valve
• Supply Line
• Pressure-Balancing Valve
• O-Ring
• Thermostatic Valve
• Ceramic Disc
-
Filler Strip
Filler Strip
Definition
Filler Strip is a narrow finished panel placed between cabinetry and a wall, appliance, corner, or neighboring cabinet to close a gap and provide operating clearance. In residential and commercial remodeling, this term affects not only the visible design but also installation sequence, surrounding materials, clearances, support, service access, and long-term performance.
The exact product or construction method varies by manufacturer and project. Common considerations include material quality, dimensions, compatibility with adjacent finishes, fastener or connection requirements, and the condition of the substrate. Apparently unused space often prevents doors, drawers, and hardware from striking walls or appliances.
A successful filler strip installation begins with accurate field measurements and coordination before related cabinetry, plumbing, electrical work, framing, drywall, tile, countertops, or finish carpentry are completed. Manufacturer instructions and applicable building requirements should always take priority over assumptions based on appearance alone.
Common Applications
Filler Strip is commonly used for:
- Cabinet-To-Wall Transitions
- Refrigerator Surrounds
- Corners
- Vanities
- Pantries
- Tall Cabinet Runs
- Common Types
Common forms and configurations include:
- Wall Filler
- Corner Filler
- Scribed Filler
- Appliance Filler
- Base Filler
- Wall-Cabinet Filler
- Tall-Cabinet Filler
Advantages
- Creates an intentional, finished appearance
- Supports efficient storage planning
- Can be customized to the room and design style
- Works with modern hardware and organizational accessories
- Can improve daily function and perceived value
- Allows the project team to tailor filler strip to the room's dimensions, use, and design goals
Disadvantages
Potential disadvantages and limitations include:
- Requires accurate design measurements and installation
- Poor materials or alignment remain visible
- Moisture can damage unfinished edges and cabinet cores
- Specialty construction and finishes may cost more
- Walls, corners, and appliances must be coordinated carefully
- Poor selection or installation of filler strip can create costly corrections after surrounding finishes are complete
When to Choose Filler Strip
Choose filler strip when its function, appearance, and installation requirements support the complete remodeling plan. It is particularly appropriate for cabinet-to-wall transitions, refrigerator surrounds, corners, vanities. Compare products using real dimensions, technical data, maintenance expectations, and compatibility with nearby materials rather than selecting from a photograph alone.
Before ordering, confirm rough openings, finished thicknesses, clearances, loads, plumbing or electrical locations, and any manufacturer-specific accessories. The goal is not simply to include filler strip, but to integrate it so it operates comfortably and looks intentional after every surrounding finish is installed.
Pristine Pro Tip 💡
Treat filler strip as an early coordination item, not a last-minute accessory. Apparently unused space often prevents doors, drawers, and hardware from striking walls or appliances. We verify the exact product information and installation conditions before dependent materials are fabricated or walls are closed. That extra planning protects both the finished appearance and the homeowner's investment.
Common Mistake ❌
A common mistake is assuming products with the same general name or nominal size are interchangeable. Small differences in dimensions, mounting, support, clearances, finish thickness, or service access can change the entire installation. Another mistake is expecting caulk, trim, shims, or field cutting to correct a condition that should have been resolved during design and rough construction.
Designer Insight 🎨
Filler Strip should feel connected to the room rather than selected in isolation. Its scale, lines, finish, and visual weight should relate to the cabinetry, countertop, tile, lighting, hardware, and architecture. Repeating a small number of intentional details usually creates a more polished result than adding unrelated decorative features.
Florida Rating 🌴
⭐⭐⭐⭐⭐ Excellent
Filler Strip can perform very well in Florida when cabinet cores, exposed edges, hardware, and floor-level details are protected from plumbing leaks and humid air. Consistent indoor climate control, sealed field cuts, and prompt cleanup of water help preserve alignment and finish quality.
Maintenance Level
⭐⭐ Easy
Clean with a soft cloth and compatible cleaner, avoid prolonged moisture and abrasive chemicals, and correct loose hardware, damaged finish, or misalignment promptly.
Related Terms
• Scribe Molding
• End Panel
• Full Overlay Cabinet
• Corner Cabinet
• Cabinet Installation
• Base Cabinet
• Refrigerator Panel
• Toe Kick
-
Finger Pull
Finger Pull
Definition
Finger Pull is a low-profile grip at the edge or within the face of a door or drawer that is opened with the fingertips. In residential and commercial remodeling, this term affects not only the visible design but also installation sequence, surrounding materials, clearances, support, service access, and long-term performance.
The exact product or construction method varies by manufacturer and project. Common considerations include material quality, dimensions, compatibility with adjacent finishes, fastener or connection requirements, and the condition of the substrate. Grip depth and leverage matter on heavy drawers and appliance panels;test a sample before ordering.
A successful finger pull installation begins with accurate field measurements and coordination before related cabinetry, plumbing, electrical work, framing, drywall, tile, countertops, or finish carpentry are completed. Manufacturer instructions and applicable building requirements should always take priority over assumptions based on appearance alone.
Common Applications
Finger Pull is commonly used for:
- Slab Cabinets
- Floating Vanities
- Closets
- Media Cabinetry
- Integrated Appliance Panels
Common forms and configurations include:
- Minimal Tab Pull
- Edge Pull
- Recessed Pull
- J-Pull
- Routed Channel
- Gola Profile
- Continuous Rail
Advantages
- Improves access and daily usability
- Supports a clean, coordinated cabinet design
- Available in multiple capacities and finishes
- Can be matched to specific doors, drawers, and users
- Quality hardware improves the feel of cabinetry
- Allows the project team to tailor finger pull to the room's dimensions, use, and design goals
Disadvantages
Potential disadvantages and limitations include:
- Requires precise layout and installation
- Low-quality hardware can loosen, bind, or wear prematurely
- Weight and leverage limits must be respected
- Finish can scratch or corrode
- Special systems may require proprietary parts
- Poor selection or installation of finger pull can create costly corrections after surrounding finishes are complete
When to Choose Finger Pull
Choose finger pull when its function, appearance, and installation requirements support the complete remodeling plan. It is particularly appropriate for slab cabinets, floating vanities, closets, media cabinetry. Compare products using real dimensions, technical data, maintenance expectations, and compatibility with nearby materials rather than selecting from a photograph alone.
Before ordering, confirm rough openings, finished thicknesses, clearances, loads, plumbing or electrical locations, and any manufacturer-specific accessories. The goal is not simply to include finger pull, but to integrate it so it operates comfortably and looks intentional after every surrounding finish is installed.
Pristine Pro Tip 💡
Treat finger pull as an early coordination item, not a last-minute accessory. Grip depth and leverage matter on heavy drawers and appliance panels;test a sample before ordering. We verify the exact product information and installation conditions before dependent materials are fabricated or walls are closed. That extra planning protects both the finished appearance and the homeowner's investment.
Common Mistake ❌
A common mistake is assuming products with the same general name or nominal size are interchangeable. Small differences in dimensions, mounting, support, clearances, finish thickness, or service access can change the entire installation. Another mistake is expecting caulk, trim, shims, or field cutting to correct a condition that should have been resolved during design and rough construction.
Designer Insight 🎨
Finger Pull should feel connected to the room rather than selected in isolation. Its scale, lines, finish, and visual weight should relate to the cabinetry, countertop, tile, lighting, hardware, and architecture. Repeating a small number of intentional details usually creates a more polished result than adding unrelated decorative features.
Florida Rating 🌴
⭐⭐⭐⭐⭐ Excellent
Finger Pull is an excellent option for Florida interiors when materials are acclimated, moisture-resistant where needed, and installed according to manufacturer requirements. Humidity, slab moisture, strong daylight, and coastal corrosion should be considered during selection.
Maintenance Level
⭐⭐ Easy
Clean with a soft cloth and compatible cleaner, avoid prolonged moisture and abrasive chemicals, and correct loose hardware, damaged finish, or misalignment promptly.
Related Terms
• Cabinet Hardware
• Integrated Handle
• Flat Panel Cabinet
• Full Overlay Cabinet
• Frameless Cabinet
• Floating Vanity
• Gola Profile
• Appliance Panel
-
Finish Carpentry
Finish Carpentry
Definition
Finish Carpentry is the precise installation of visible trim, millwork, doors, built-ins, and architectural details after structural work is complete. In residential and commercial remodeling, this term affects not only the visible design but also installation sequence, surrounding materials, clearances, support, service access, and long-term performance.
The exact product or construction method varies by manufacturer and project. Common considerations include material quality, dimensions, compatibility with adjacent finishes, fastener or connection requirements, and the condition of the substrate. Quality is judged by tight joints, consistent reveals, proper proportions, and finish-ready surfaces.
A successful finish carpentry installation begins with accurate field measurements and coordination before related cabinetry, plumbing, electrical work, framing, drywall, tile, countertops, or finish carpentry are completed. Manufacturer instructions and applicable building requirements should always take priority over assumptions based on appearance alone.
Common Applications
Finish Carpentry is commonly used for:
- Baseboards
- Crown Molding
- Door And Window Casing
- Built-Ins
- Wainscoting
- Stair Trim
- Mantels
- Cabinet Trim
- Common Types
- Common forms and configurations include:
- Trim Carpentry
- Architectural Millwork
- Cabinet Finish Work
- Stair Carpentry
- Wall Paneling
- Custom Built-Ins
Advantages
Advantages include:
- Creates the visible precision that makes a remodel feel complete
- Allows custom architectural details
- Coordinates multiple materials and transitions
- Can correct or conceal minor construction irregularities
- Adds craftsmanship and character
- Allows the project team to tailor finish carpentry to the room's dimensions, use, and design goals
Disadvantages
Potential disadvantages and limitations include:
- Precision labor can be expensive
- Uneven existing surfaces increase difficulty
- Wood and composite products respond differently to humidity
- Poor joints and transitions remain visible
- Complex profiles increase labor and material waste
- Poor selection or installation of finish carpentry can create costly corrections after surrounding finishes are complete
When to Choose Finish Carpentry
Choose finish carpentry when its function, appearance, and installation requirements support the complete remodeling plan. It is particularly appropriate for baseboards, crown molding, door and window casing, built-ins. Compare products using real dimensions, technical data, maintenance expectations, and compatibility with nearby materials rather than selecting from a photograph alone.
Before ordering, confirm rough openings, finished thicknesses, clearances, loads, plumbing or electrical locations, and any manufacturer-specific accessories. The goal is not simply to include finish carpentry, but to integrate it so it operates comfortably and looks intentional after every surrounding finish is installed.
Pristine Pro Tip 💡
Treat finish carpentry as an early coordination item, not a last-minute accessory. Quality is judged by tight joints, consistent reveals, proper proportions, and finish-ready surfaces. We verify the exact product information and installation conditions before dependent materials are fabricated or walls are closed. That extra planning protects both the finished appearance and the homeowner's investment.
Common Mistake ❌
A common mistake is assuming products with the same general name or nominal size are interchangeable. Small differences in dimensions, mounting, support, clearances, finish thickness, or service access can change the entire installation. Another mistake is expecting caulk, trim, shims, or field cutting to correct a condition that should have been resolved during design and rough construction.
Designer Insight 🎨
Finish Carpentry should feel connected to the room rather than selected in isolation. Its scale, lines, finish, and visual weight should relate to the cabinetry, countertop, tile, lighting, hardware, and architecture. Repeating a small number of intentional details usually creates a more polished result than adding unrelated decorative features.
Florida Rating 🌴
⭐⭐⭐⭐⭐ Excellent
Finish Carpentry is an excellent option for Florida interiors when materials are acclimated, moisture-resistant where needed, and installed according to manufacturer requirements. Humidity, slab moisture, strong daylight, and coastal corrosion should be considered during selection.
Maintenance Level
⭐⭐ Easy
Clean with a soft cloth and compatible cleaner, avoid prolonged moisture and abrasive chemicals, and correct loose hardware, damaged finish, or misalignment promptly.
Related Terms
• Framing
• Wainscoting
• Baseboard
• Built-In Cabinetry
• Crown Molding
• Floating Shelf
• Door Casing
• Millwork
• Window Casing
-
Fireclay Sink
Fireclay Sink
Definition
Fireclay Sink is a dense ceramic sink formed from clay, glazed, and fired at very high temperature to create a hard non-porous finish. In residential and commercial remodeling, this term affects not only the visible design but also installation sequence, surrounding materials, clearances, support, service access, and long-term performance.
The exact product or construction method varies by manufacturer and project. Common considerations include material quality, dimensions, compatibility with adjacent finishes, fastener or connection requirements, and the condition of the substrate. Heavy and dimensionally variable;the actual sink should be onsite before cabinet cutting and countertop templating.
A successful fireclay sink installation begins with accurate field measurements and coordination before related cabinetry, plumbing, electrical work, framing, drywall, tile, countertops, or finish carpentry are completed. Manufacturer instructions and applicable building requirements should always take priority over assumptions based on appearance alone.
Common Applications
Fireclay Sink is commonly used for:
- Farmhouse Sinks
- Traditional Kitchens
- Transitional Kitchens
- Butler'S Pantries
- Laundry Sinks
Common Types
Common forms and configurations include:
- Single Bowl
- Double Bowl
- Reversible Apron
- Fluted Apron
- Smooth Apron
- Undermount
- Workstation
Advantages
Advantages include:
- Provides an important daily-use function
- Available in multiple sizes, materials, and configurations
- Can improve comfort and efficiency
- Coordinates with surrounding cabinetry, tile, and countertops
- Quality products can provide long service life
- Allows the project team to tailor fireclay sink to the room's dimensions, use, and design goals
Disadvantages
- Potential disadvantages and limitations include:
- Installation may require cabinet, countertop, or framing changes
- Leaks can damage surrounding finishes
- Heavy or specialty products may require added support
- Replacement may be constrained by existing cutouts
- Incorrect installation can affect drainage or service access
- Poor selection or installation of fireclay sink can create costly corrections after surrounding finishes are complete
When to Choose Fireclay Sink
Choose fireclay sink when its function, appearance, and installation requirements support the complete remodeling plan. It is particularly appropriate for farmhouse sinks, traditional kitchens, transitional kitchens, butler's pantries. Compare products using real dimensions, technical data, maintenance expectations, and compatibility with nearby materials rather than selecting from a photograph alone.
Before ordering, confirm rough openings, finished thicknesses, clearances, loads, plumbing or electrical locations, and any manufacturer-specific accessories. The goal is not simply to include fireclay sink, but to integrate it so it operates comfortably and looks intentional after every surrounding finish is installed.
Pristine Pro Tip 💡
Treat fireclay sink as an early coordination item, not a last-minute accessory. Heavy and dimensionally variable;the actual sink should be onsite before cabinet cutting and countertop templating. We verify the exact product information and installation conditions before dependent materials are fabricated or walls are closed. That extra planning protects both the finished appearance and the homeowner's investment.
Common Mistake ❌
A common mistake is assuming products with the same general name or nominal size are interchangeable. Small differences in dimensions, mounting, support, clearances, finish thickness, or service access can change the entire installation. Another mistake is expecting caulk, trim, shims, or field cutting to correct a condition that should have been resolved during design and rough construction.
Designer Insight 🎨
Fireclay Sink should feel connected to the room rather than selected in isolation. Its scale, lines, finish, and visual weight should relate to the cabinetry, countertop, tile, lighting, hardware, and architecture. Repeating a small number of intentional details usually creates a more polished result than adding unrelated decorative features.
Florida Rating 🌴
⭐⭐⭐⭐⭐ Excellent
Fireclay Sink is well suited to Florida homes, but mineral content, sediment, humidity, and concealed condensation can affect long-term performance. Use quality corrosion-resistant components, keep service information, and address drips or restricted flow promptly.
Maintenance Level
⭐⭐ Easy to Moderate
Clean with manufacturer-approved products, monitor for leaks or restricted flow, and service replaceable components before surrounding materials are damaged.
Related Terms
• Farmhouse Sink
• Sink Grid
• Apron-Front Sink
• Sink Base Cabinet
• Cast-Iron Sink
• Countertop Template
• Undermount Sink
• Workstation Sink
-
Fire-Rated Drywall
Fire-Rated Drywall
Definition
Fire-Rated Drywall is gypsum board such as Type X or Type C formulated for use in tested fire-resistance-rated wall and ceiling assemblies. In residential and commercial remodeling, this term affects not only the visible design but also installation sequence, surrounding materials, clearances, support, service access, and long-term performance.
The exact product or construction method varies by manufacturer and project. Common considerations include material quality, dimensions, compatibility with adjacent finishes, fastener or connection requirements, and the condition of the substrate. The rating belongs to the complete tested assembly, including layers, framing, fasteners, joints, and penetrations—not the board alone.
A successful fire-rated drywall installation begins with accurate field measurements and coordination before related cabinetry, plumbing, electrical work, framing, drywall, tile, countertops, or finish carpentry are completed. Manufacturer instructions and applicable building requirements should always take priority over assumptions based on appearance alone.
Common Applications
Fire-Rated Drywall is commonly used for:
- Garage Separations
- Mechanical Rooms
- Multifamily Separations
- Commercial Corridors
- Shaft Enclosures
Common Types
Common forms and configurations include:
- Type X
- Type C
- 5/8-Inch Panels
- Shaftliner
- Moisture-Resistant Type X
- Multi-Layer Assemblies
Advantages
Advantages include:
- Supports code-compliant and durable construction
- Accepts common finish materials
- Can improve performance when installed as a complete system
- Available in application-specific products
- Integrates with standard framing methods
- Allows the project team to tailor fire-rated drywall to the room's dimensions, use, and design goals
Disadvantages
Potential disadvantages and limitations include:
- Performance depends on the complete installation
- Incorrect penetrations or fasteners can reduce performance
- Panels may be heavy and harder to handle
- Special products cost more than basic materials
- It is not a substitute for waterproofing where water exposure is expected
- Poor selection or installation of fire-rated drywall can create costly corrections after surrounding finishes are complete
When to Choose Fire-Rated Drywall
Choose fire-rated drywall when its function, appearance, and installation requirements support the complete remodeling plan. It is particularly appropriate for garage separations, mechanical rooms, multifamily separations, commercial corridors. Compare products using real dimensions, technical data, maintenance expectations, and compatibility with nearby materials rather than selecting from a photograph alone.
Before ordering, confirm rough openings, finished thicknesses, clearances, loads, plumbing or electrical locations, and any manufacturer-specific accessories. The goal is not simply to include fire-rated drywall, but to integrate it so it operates comfortably and looks intentional after every surrounding finish is installed.
Pristine Pro Tip 💡
Treat fire-rated drywall as an early coordination item, not a last-minute accessory. The rating belongs to the complete tested assembly, including layers, framing, fasteners, joints, and penetrations—not the board alone. We verify the exact product information and installation conditions before dependent materials are fabricated or walls are closed. That extra planning protects both the finished appearance and the homeowner's investment.
Common Mistake ❌
A common mistake is assuming products with the same general name or nominal size are interchangeable. Small differences in dimensions, mounting, support, clearances, finish thickness, or service access can change the entire installation. Another mistake is expecting caulk, trim, shims, or field cutting to correct a condition that should have been resolved during design and rough construction.
Designer Insight 🎨
Fire-Rated Drywall should feel connected to the room rather than selected in isolation. Its scale, lines, finish, and visual weight should relate to the cabinetry, countertop, tile, lighting, hardware, and architecture. Repeating a small number of intentional details usually creates a more polished result than adding unrelated decorative features.
Florida Rating 🌴
⭐⭐⭐⭐⭐ Excellent
Florida construction must account for humidity, moisture intrusion, termites, and applicable code requirements. Keep materials dry before enclosure, protect structural connections, and never conceal wet or damaged framing behind new finishes.
Maintenance Level
⭐ None to Periodic Inspection
Once concealed or completed, direct maintenance is limited. Investigate movement, moisture, cracking, odors, or performance changes promptly rather than covering symptoms.
Related Terms
• Drywall
• Rated Wall Assembly
• Type X Drywall
• Garage Separation
• Type C Drywall
• Shaft Wall
• Firestopping
• Building Code
-
Flat Panel Cabinet
Flat Panel Cabinet
Definition
Flat Panel Cabinet is cabinetry with smooth slab doors and drawer fronts that have no raised, recessed, or shaker-style panel profile. In residential and commercial remodeling, this term affects not only the visible design but also installation sequence, surrounding materials, clearances, support, service access, and long-term performance.
The exact product or construction method varies by manufacturer and project. Common considerations include material quality, dimensions, compatibility with adjacent finishes, fastener or connection requirements, and the condition of the substrate. Simple surfaces make bowed doors, edge quality, grain direction, fingerprints, and uneven reveals highly visible.
A successful flat panel cabinet installation begins with accurate field measurements and coordination before related cabinetry, plumbing, electrical work, framing, drywall, tile, countertops, or finish carpentry are completed. Manufacturer instructions and applicable building requirements should always take priority over assumptions based on appearance alone.
Common Applications
Flat Panel Cabinet is commonly used for:
- Modern Kitchens
- Contemporary Baths
- Floating Vanities
- Closets
- Media Centers
- Integrated Appliances
Common Types
Common forms and configurations include:
- Painted Mdf
- Wood Veneer
- Solid Wood
- Laminate
- Acrylic High-Gloss
- Matte Anti-Fingerprint
- Thermofoil
- Melamine
Advantages
Advantages include:
- Creates an intentional, finished appearance
- Supports efficient storage planning
- Can be customized to the room and design style
- Works with modern hardware and organizational accessories
- Can improve daily function and perceived value
- Allows the project team to tailor flat panel cabinet to the room's dimensions, use, and design goals
Disadvantages
Potential disadvantages and limitations include:
- Requires accurate design measurements and installation
- Poor materials or alignment remain visible
- Moisture can damage unfinished edges and cabinet cores
- Specialty construction and finishes may cost more
- Walls, corners, and appliances must be coordinated carefully
- Poor selection or installation of flat panel cabinet can create costly corrections after surrounding finishes are complete
When to Choose Flat Panel Cabinet
Choose flat panel cabinet when its function, appearance, and installation requirements support the complete remodeling plan. It is particularly appropriate for modern kitchens, contemporary baths, floating vanities, closets. Compare products using real dimensions, technical data, maintenance expectations, and compatibility with nearby materials rather than selecting from a photograph alone.
Before ordering, confirm rough openings, finished thicknesses, clearances, loads, plumbing or electrical locations, and any manufacturer-specific accessories. The goal is not simply to include flat panel cabinet, but to integrate it so it operates comfortably and looks intentional after every surrounding finish is installed.
Pristine Pro Tip 💡
Treat flat panel cabinet as an early coordination item, not a last-minute accessory. Simple surfaces make bowed doors, edge quality, grain direction, fingerprints, and uneven reveals highly visible. We verify the exact product information and installation conditions before dependent materials are fabricated or walls are closed. That extra planning protects both the finished appearance and the homeowner's investment.
Common Mistake ❌
A common mistake is assuming products with the same general name or nominal size are interchangeable. Small differences in dimensions, mounting, support, clearances, finish thickness, or service access can change the entire installation. Another mistake is expecting caulk, trim, shims, or field cutting to correct a condition that should have been resolved during design and rough construction.
Designer Insight 🎨
Flat Panel Cabinet should feel connected to the room rather than selected in isolation. Its scale, lines, finish, and visual weight should relate to the cabinetry, countertop, tile, lighting, hardware, and architecture. Repeating a small number of intentional details usually creates a more polished result than adding unrelated decorative features.
Florida Rating 🌴
⭐⭐⭐⭐⭐ Excellent
Flat Panel Cabinet can perform very well in Florida when cabinet cores, exposed edges, hardware, and floor-level details are protected from plumbing leaks and humid air. Consistent indoor climate control, sealed field cuts, and prompt cleanup of water help preserve alignment and finish quality.
Maintenance Level
⭐⭐ Easy
Clean with a soft cloth and compatible cleaner, avoid prolonged moisture and abrasive chemicals, and correct loose hardware, damaged finish, or misalignment promptly.
Related Terms
• Frameless Cabinet
• Slab Door
• Face Frame Cabinet
• Wood Veneer
• Finger Pull
• Integrated Appliance Panel
• Full Overlay Cabinet
• Floating Vanity
-
Floating Shelf
Floating Shelf
Definition
Floating Shelf is a wall-mounted shelf whose primary brackets or cleats are concealed, creating a cantilevered appearance. In residential and commercial remodeling, this term affects not only the visible design but also installation sequence, surrounding materials, clearances, support, service access, and long-term performance.
The exact product or construction method varies by manufacturer and project. Common considerations include material quality, dimensions, compatibility with adjacent finishes, fastener or connection requirements, and the condition of the substrate. Capacity depends on bracket engineering, depth, span, wall framing, and fastener connection;heavy shelves need blocking.
A successful floating shelf installation begins with accurate field measurements and coordination before related cabinetry, plumbing, electrical work, framing, drywall, tile, countertops, or finish carpentry are completed. Manufacturer instructions and applicable building requirements should always take priority over assumptions based on appearance alone.
Common Applications
Floating Shelf is commonly used for:
- Kitchens
- Bathrooms
- Offices
- Bars
- Pantries
- Living Rooms
- Niches
- Bedside Storage
Common Types
Common forms and configurations include:
- Solid Wood
- Hollow Box
- Metal
- Glass
- Stone
- Live Edge
- Corner
- Integrated Led
Advantages
Advantages include:
- Adds useful storage without visual clutter
- Creates a custom architectural detail
- Can be sized and finished for the room
- Works in kitchens, bathrooms, and living areas
- Supports both modern and traditional design
- Allows the project team to tailor floating shelf to the room's dimensions, use, and design goals
Disadvantages
Potential disadvantages and limitations include:
- Load capacity varies by hardware and wall construction
- Open surfaces collect dust and require organization
- Long spans can sag
- Hidden supports complicate later changes
- Heavy materials may require engineering
- Poor selection or installation of floating shelf can create costly corrections after surrounding finishes are complete
When to Choose Floating Shelf
Choose floating shelf when its function, appearance, and installation requirements support the complete remodeling plan. It is particularly appropriate for kitchens, bathrooms, offices, bars. Compare products using real dimensions, technical data, maintenance expectations, and compatibility with nearby materials rather than selecting from a photograph alone.
Before ordering, confirm rough openings, finished thicknesses, clearances, loads, plumbing or electrical locations, and any manufacturer-specific accessories. The goal is not simply to include floating shelf, but to integrate it so it operates comfortably and looks intentional after every surrounding finish is installed.
Pristine Pro Tip 💡
Treat floating shelf as an early coordination item, not a last-minute accessory. Capacity depends on bracket engineering, depth, span, wall framing, and fastener connection;heavy shelves need blocking. We verify the exact product information and installation conditions before dependent materials are fabricated or walls are closed. That extra planning protects both the finished appearance and the homeowner's investment.
Common Mistake ❌
A common mistake is assuming products with the same general name or nominal size are interchangeable. Small differences in dimensions, mounting, support, clearances, finish thickness, or service access can change the entire installation. Another mistake is expecting caulk, trim, shims, or field cutting to correct a condition that should have been resolved during design and rough construction.
Designer Insight 🎨
Floating Shelf should feel connected to the room rather than selected in isolation. Its scale, lines, finish, and visual weight should relate to the cabinetry, countertop, tile, lighting, hardware, and architecture. Repeating a small number of intentional details usually creates a more polished result than adding unrelated decorative features.
Florida Rating 🌴
⭐⭐⭐⭐⭐ Excellent
Floating Shelf is an excellent option for Florida interiors when materials are acclimated, moisture-resistant where needed, and installed according to manufacturer requirements. Humidity, slab moisture, strong daylight, and coastal corrosion should be considered during selection.
Maintenance Level
⭐⭐ Easy
Clean with a soft cloth and compatible cleaner, avoid prolonged moisture and abrasive chemicals, and correct loose hardware, damaged finish, or misalignment promptly.
Related Terms
• French Cleat
• Built-In Cabinetry
• Wall Blocking
• LED Lighting
• Finish Carpentry
• Wall Stud
• Open Shelving
• Floating Vanity
-
Floating Vanity
Floating Vanity
Definition
Floating Vanity is a bathroom vanity secured to structural wall support above the finished floor, leaving open space below. In residential and commercial remodeling, this term affects not only the visible design but also installation sequence, surrounding materials, clearances, support, service access, and long-term performance.
The exact product or construction method varies by manufacturer and project. Common considerations include material quality, dimensions, compatibility with adjacent finishes, fastener or connection requirements, and the condition of the substrate. Requires continuous blocking and carefully located drains and supplies so plumbing remains concealed and drawers function.
A successful floating vanity installation begins with accurate field measurements and coordination before related cabinetry, plumbing, electrical work, framing, drywall, tile, countertops, or finish carpentry are completed. Manufacturer instructions and applicable building requirements should always take priority over assumptions based on appearance alone.
Common Applications
Floating Vanity is commonly used for:
- Modern Baths
- Powder Rooms
- Wet Rooms
- Small Bathrooms
- Double Vanities
- Accessible Designs
Common Types
Common forms and configurations include:
- Drawer Vanity
- Open-Cubby Vanity
- Integrated-Sink Vanity
- Custom Millwork
- Vessel-Sink Vanity
- Roll-Under Vanity
Advantages
Advantages include:
- Creates storage and establishes the bathroom design
- Can be customized for sink, plumbing, and user height
- Available in many materials and configurations
- Coordinates with mirrors, lighting, tile, and countertops
- Can improve both function and perceived space
- Allows the project team to tailor floating vanity to the room's dimensions, use, and design goals
Disadvantages
Potential disadvantages and limitations include:
- Requires careful wall, floor, plumbing, and countertop coordination
- Water can damage cabinet materials
- Special installations may cost more
- Storage may be reduced by plumbing or open space
- Heavy tops require proper support
- Poor selection or installation of floating vanity can create costly corrections after surrounding finishes are complete
When to Choose Floating Vanity
Choose floating vanity when its function, appearance, and installation requirements support the complete remodeling plan. It is particularly appropriate for modern baths, powder rooms, wet rooms, small bathrooms. Compare products using real dimensions, technical data, maintenance expectations, and compatibility with nearby materials rather than selecting from a photograph alone.
Before ordering, confirm rough openings, finished thicknesses, clearances, loads, plumbing or electrical locations, and any manufacturer-specific accessories. The goal is not simply to include floating vanity, but to integrate it so it operates comfortably and looks intentional after every surrounding finish is installed.
Pristine Pro Tip 💡
Treat floating vanity as an early coordination item, not a last-minute accessory. Requires continuous blocking and carefully located drains and supplies so plumbing remains concealed and drawers function. We verify the exact product information and installation conditions before dependent materials are fabricated or walls are closed. That extra planning protects both the finished appearance and the homeowner's investment.
Common Mistake ❌
A common mistake is assuming products with the same general name or nominal size are interchangeable. Small differences in dimensions, mounting, support, clearances, finish thickness, or service access can change the entire installation. Another mistake is expecting caulk, trim, shims, or field cutting to correct a condition that should have been resolved during design and rough construction.
Designer Insight 🎨
Floating Vanity should feel connected to the room rather than selected in isolation. Its scale, lines, finish, and visual weight should relate to the cabinetry, countertop, tile, lighting, hardware, and architecture. Repeating a small number of intentional details usually creates a more polished result than adding unrelated decorative features.
Florida Rating 🌴
⭐⭐⭐⭐⭐ Excellent
Floating Vanity can perform very well in Florida when cabinet cores, exposed edges, hardware, and floor-level details are protected from plumbing leaks and humid air. Consistent indoor climate control, sealed field cuts, and prompt cleanup of water help preserve alignment and finish quality.
Maintenance Level
⭐⭐ Easy
Clean with a soft cloth and compatible cleaner, avoid prolonged moisture and abrasive chemicals, and correct loose hardware, damaged finish, or misalignment promptly.
Related Terms
• Furniture Vanity
• Integrated Sink
• Wall Blocking
• Quartz Countertop
• French Cleat
• Finger Pull
• Vessel Sink
• Flat Panel Cabinet
-
Flush Baseboard
Flush Baseboard
Definition
Flush Baseboard is a minimalist base detail installed in the same plane as the wall, often separated by a narrow reveal or shadow gap. In residential and commercial remodeling, this term affects not only the visible design but also installation sequence, surrounding materials, clearances, support, service access, and long-term performance.
The exact product or construction method varies by manufacturer and project. Common considerations include material quality, dimensions, compatibility with adjacent finishes, fastener or connection requirements, and the condition of the substrate. Must be coordinated during framing and drywall; irregular walls and floors are difficult to hide.
A successful flush baseboard installation begins with accurate field measurements and coordination before related cabinetry, plumbing, electrical work, framing, drywall, tile, countertops, or finish carpentry are completed. Manufacturer instructions and applicable building requirements should always take priority over assumptions based on appearance alone.
Common Applications
Flush Baseboard is commonly used for:
- Modern Homes
- Gallery Halls
- Flush-Door Systems
- Wall Paneling
- Commercial Interiors
Common Types
Common forms and configurations include:
- Flush Wood Base
- Metal Reveal Base
- Recessed Base
- Tile Base
- Stone Base
- Drywall Shadow-Gap System
Advantages
Advantages include:
- Creates a refined architectural transition
- Supports a clean and consistent design language
- Can coordinate with doors, walls, floors, and cabinetry
- Reduces visual clutter
- Provides a custom appearance
- Allows the project team to tailor flush baseboard to the room's dimensions, use, and design goals
Disadvantages
Potential disadvantages and limitations include:
- Requires early coordination and precise substrates
- Retrofit work can be difficult and expensive
- Uneven walls and floors are more noticeable
- Repairs may be specialized
- Reveals and recesses can collect dust
- Poor selection or installation of flush baseboard can create costly corrections after surrounding finishes are complete
When to Choose Flush Baseboard
Choose flush baseboard when its function, appearance, and installation requirements support the complete remodeling plan. It is particularly appropriate for modern homes, gallery halls, flush-door systems, wall paneling. Compare products using real dimensions, technical data, maintenance expectations, and compatibility with nearby materials rather than selecting from a photograph alone.
Before ordering, confirm rough openings, finished thicknesses, clearances, loads, plumbing or electrical locations, and any manufacturer-specific accessories. The goal is not simply to include flush baseboard, but to integrate it so it operates comfortably and looks intentional after every surrounding finish is installed.
Pristine Pro Tip 💡
Treat flush baseboard as an early coordination item, not a last-minute accessory. Must be coordinated during framing and drywall; irregular walls and floors are difficult to hide. We verify the exact product information and installation conditions before dependent materials are fabricated or walls are closed. That extra planning protects both the finished appearance and the homeowner's investment.
Common Mistake ❌
A common mistake is assuming products with the same general name or nominal size are interchangeable. Small differences in dimensions, mounting, support, clearances, finish thickness, or service access can change the entire installation. Another mistake is expecting caulk, trim, shims, or field cutting to correct a condition that should have been resolved during design and rough construction.
Designer Insight 🎨
Flush Baseboard should feel connected to the room rather than selected in isolation. Its scale, lines, finish, and visual weight should relate to the cabinetry, countertop, tile, lighting, hardware, and architecture. Repeating a small number of intentional details usually creates a more polished result than adding unrelated decorative features.
Florida Rating 🌴
⭐⭐⭐⭐⭐ Excellent
Flush Baseboard is an excellent option for Florida interiors when materials are acclimated, moisture-resistant where needed, and installed according to manufacturer requirements. Humidity, slab moisture, strong daylight, and coastal corrosion should be considered during selection.
Maintenance Level
⭐⭐ Easy
Clean with a soft cloth and compatible cleaner, avoid prolonged moisture and abrasive chemicals, and correct loose hardware, damaged finish, or misalignment promptly.
Related Terms
• Baseboard
• Drywall
• Flush Door
• Finish Carpentry
• Shadow Gap
• Wall Paneling
• Reveal Trim
• Door Jamb
-
Flush Door
Flush Door
Definition
Flush Door is a door with smooth flat faces and no raised or recessed panel design. In residential and commercial remodeling, this term affects not only the visible design but also installation sequence, surrounding materials, clearances, support, service access, and long-term performance.
The exact product or construction method varies by manufacturer and project. Common considerations include material quality, dimensions, compatibility with adjacent finishes, fastener or connection requirements, and the condition of the substrate. Flush describes the face; a true flush-to-wall assembly also requires a concealed or minimal frame and precise hinges.
A successful flush door installation begins with accurate field measurements and coordination before related cabinetry, plumbing, electrical work, framing, drywall, tile, countertops, or finish carpentry are completed. Manufacturer instructions and applicable building requirements should always take priority over assumptions based on appearance alone.
Common Applications
Flush Door is commonly used for:
- Modern Interiors
- Closets
- Utility Rooms
- Offices
- Pocket Doors
- Concealed Wall Doors
Common Types
Common forms and configurations include:
- Hollow Core
- Solid Core
- Wood Veneer
- Paint-Grade
- Fire-Rated
- Acoustic
- Flush-To-Wall
Advantages
Advantages include:
- Provides privacy and circulation control
- Available in many cores, finishes, and hardware configurations
- Can support modern or traditional interiors
- May improve sound control when properly specified
- Coordinates with wall and trim details
- Allows the project team to tailor flush door to the room's dimensions, use, and design goals
Disadvantages
Potential disadvantages and limitations include:
- Poor installation creates uneven reveals or rubbing
- Hollow cores offer limited sound control
- Smooth surfaces show dents and defects
- Special frames and hinges increase cost
- Humidity can affect some wood-based products
- Poor selection or installation of flush door can create costly corrections after surrounding finishes are complete
When to Choose Flush Door
Choose flush door when its function, appearance, and installation requirements support the complete remodeling plan. It is particularly appropriate for modern interiors, closets, utility rooms, offices. Compare products using real dimensions, technical data, maintenance expectations, and compatibility with nearby materials rather than selecting from a photograph alone.
Before ordering, confirm rough openings, finished thicknesses, clearances, loads, plumbing or electrical locations, and any manufacturer-specific accessories. The goal is not simply to include flush door, but to integrate it so it operates comfortably and looks intentional after every surrounding finish is installed.
Pristine Pro Tip 💡
Treat flush door as an early coordination item, not a last-minute accessory. Flush describes the face; a true flush-to-wall assembly also requires a concealed or minimal frame and precise hinges. We verify the exact product information and installation conditions before dependent materials are fabricated or walls are closed. That extra planning protects both the finished appearance and the homeowner's investment.
Common Mistake ❌
A common mistake is assuming products with the same general name or nominal size are interchangeable. Small differences in dimensions, mounting, support, clearances, finish thickness, or service access can change the entire installation. Another mistake is expecting caulk, trim, shims, or field cutting to correct a condition that should have been resolved during design and rough construction.
Designer Insight 🎨
Flush Door should feel connected to the room rather than selected in isolation. Its scale, lines, finish, and visual weight should relate to the cabinetry, countertop, tile, lighting, hardware, and architecture. Repeating a small number of intentional details usually creates a more polished result than adding unrelated decorative features.
Florida Rating 🌴
⭐⭐⭐⭐⭐ Excellent
Flush Door is an excellent option for Florida interiors when materials are acclimated, moisture-resistant where needed, and installed according to manufacturer requirements. Humidity, slab moisture, strong daylight, and coastal corrosion should be considered during selection.
Maintenance Level
⭐⭐ Easy
Clean with a soft cloth and compatible cleaner, avoid prolonged moisture and abrasive chemicals, and correct loose hardware, damaged finish, or misalignment promptly.
Related Terms
• Flush Baseboard
• Pocket Door
• Solid-Core Door
• Door Jamb
• Hollow-Core Door
• Door Casing
• Concealed Hinge
• Fire-Rated Door
-
Flush Mount Lighting
Flush Mount Lighting
Definition
Flush Mount Lighting is a ceiling fixture installed directly against the ceiling with little or no hanging stem. In residential and commercial remodeling, this term affects not only the visible design but also installation sequence, surrounding materials, clearances, support, service access, and long-term performance.
The exact product or construction method varies by manufacturer and project. Common considerations include material quality, dimensions, compatibility with adjacent finishes, fastener or connection requirements, and the condition of the substrate. Compare lumens, cri, color temperature, dimming, and location rating; integrated leds may require full fixture replacement.
A successful flush mount lighting installation begins with accurate field measurements and coordination before related cabinetry, plumbing, electrical work, framing, drywall, tile, countertops, or finish carpentry are completed. Manufacturer instructions and applicable building requirements should always take priority over assumptions based on appearance alone.
Common Applications
Flush Mount Lighting is commonly used for:
- Hallways
- Bedrooms
- Closets
- Laundry Rooms
- Bathrooms
- Kitchens
- Low Ceilings
Common Types
Common forms and configurations include:
- Dome
- Drum
- Integrated Led Disk
- Decorative Glass
- Damp-Rated
- Wet-Rated
- Motion-Sensor
- Panel Light
Advantages
Advantages include:
- Provides necessary ambient or task illumination
- Available in many sizes, outputs, and design styles
- LED options can be energy efficient
- Can improve comfort, safety, and appearance
- Works with dimmers and layered lighting plans
- Allows the project team to tailor flush mount lighting to the room's dimensions, use, and design goals
Disadvantages
Potential disadvantages and limitations include:
- One fixture rarely provides complete layered lighting
- Incorrect output or beam spread can cause dim areas or glare
- Integrated LEDs may not be separately replaceable
- Dimmers must be compatible
- Damp or wet locations require the correct rating
- Poor selection or installation of flush mount lighting can create costly corrections after surrounding finishes are complete
When to Choose Flush Mount Lighting
Choose flush mount lighting when its function, appearance, and installation requirements support the complete remodeling plan. It is particularly appropriate for hallways, bedrooms, closets, laundry rooms. Compare products using real dimensions, technical data, maintenance expectations, and compatibility with nearby materials rather than selecting from a photograph alone.
Before ordering, confirm rough openings, finished thicknesses, clearances, loads, plumbing or electrical locations, and any manufacturer-specific accessories. The goal is not simply to include flush mount lighting, but to integrate it so it operates comfortably and looks intentional after every surrounding finish is installed.
Pristine Pro Tip 💡
Treat flush mount lighting as an early coordination item, not a last-minute accessory. Compare lumens, cri, color temperature, dimming, and location rating; integrated leds may require full fixture replacement. We verify the exact product information and installation conditions before dependent materials are fabricated or walls are closed. That extra planning protects both the finished appearance and the homeowner's investment.
Common Mistake ❌
A common mistake is assuming products with the same general name or nominal size are interchangeable. Small differences in dimensions, mounting, support, clearances, finish thickness, or service access can change the entire installation. Another mistake is expecting caulk, trim, shims, or field cutting to correct a condition that should have been resolved during design and rough construction.
Designer Insight 🎨
Flush Mount Lighting should feel connected to the room rather than selected in isolation. Its scale, lines, finish, and visual weight should relate to the cabinetry, countertop, tile, lighting, hardware, and architecture. Repeating a small number of intentional details usually creates a more polished result than adding unrelated decorative features.
Florida Rating 🌴
⭐⭐⭐⭐⭐ Excellent
Florida's bright daylight and strong contrast make careful lighting design especially important. Flush Mount Lighting should be considered with nighttime conditions, reflective tile and countertops, moisture ratings, and reliable LED components that tolerate warm ceiling cavities.
Maintenance Level
⭐⭐ Easy
Clean with a soft cloth and compatible cleaner, avoid prolonged moisture and abrasive chemicals, and correct loose hardware, damaged finish, or misalignment promptly.
Related Terms
• Semi-Flush Lighting
• Color Temperature
• Recessed Lighting
• Color Rendering Index
• LED Lighting
• Damp-Rated Fixture
• Foot Candle
• Dimmer Switch
-
Floor Drain
Floor Drain
Definition
Floor Drain is a drain set at or near the low point of a floor to collect water and direct it into an approved drainage system. In residential and commercial remodeling, this term affects not only the visible design but also installation sequence, surrounding materials, clearances, support, service access, and long-term performance.
The exact product or construction method varies by manufacturer and project. Common considerations include material quality, dimensions, compatibility with adjacent finishes, fastener or connection requirements, and the condition of the substrate. Requires slope and a continuous waterproofing or receptor system; unused traps may dry and allow sewer gas.
A successful floor drain installation begins with accurate field measurements and coordination before related cabinetry, plumbing, electrical work, framing, drywall, tile, countertops, or finish carpentry are completed. Manufacturer instructions and applicable building requirements should always take priority over assumptions based on appearance alone.
Common Applications
Floor Drain is commonly used for:
- Showers
- Wet Rooms
- Laundry Rooms
- Mechanical Rooms
- Commercial Kitchens
- Utility Spaces
Common Types
Common forms and configurations include:
- Point Drain
- Linear Drain
- Trench Drain
- Hub Drain
- Area Drain
- Clamping-Ring Drain
- Bonding-Flange Drain
Advantages
Advantages include:
- Provides an important daily-use function
- Available in multiple sizes, materials, and configurations
- Can improve comfort and efficiency
- Coordinates with surrounding cabinetry, tile, and countertops
- Quality products can provide long service life
- Allows the project team to tailor floor drain to the room's dimensions, use, and design goals
Disadvantages
Potential disadvantages and limitations include:
- Installation may require cabinet, countertop, or framing changes
- Leaks can damage surrounding finishes
- Heavy or specialty products may require added support
- Replacement may be constrained by existing cutouts
- Incorrect installation can affect drainage or service access
- Poor selection or installation of floor drain can create costly corrections after surrounding finishes are complete
When to Choose Floor Drain
Choose floor drain when its function, appearance, and installation requirements support the complete remodeling plan. It is particularly appropriate for showers, wet rooms, laundry rooms, mechanical rooms. Compare products using real dimensions, technical data, maintenance expectations, and compatibility with nearby materials rather than selecting from a photograph alone.
Before ordering, confirm rough openings, finished thicknesses, clearances, loads, plumbing or electrical locations, and any manufacturer-specific accessories. The goal is not simply to include floor drain, but to integrate it so it operates comfortably and looks intentional after every surrounding finish is installed.
Pristine Pro Tip 💡
Treat floor drain as an early coordination item, not a last-minute accessory. Requires slope and a continuous waterproofing or receptor system; unused traps may dry and allow sewer gas. We verify the exact product information and installation conditions before dependent materials are fabricated or walls are closed. That extra planning protects both the finished appearance and the homeowner's investment.
Common Mistake ❌
A common mistake is assuming products with the same general name or nominal size are interchangeable. Small differences in dimensions, mounting, support, clearances, finish thickness, or service access can change the entire installation. Another mistake is expecting caulk, trim, shims, or field cutting to correct a condition that should have been resolved during design and rough construction.
Designer Insight 🎨
Floor Drain should feel connected to the room rather than selected in isolation. Its scale, lines, finish, and visual weight should relate to the cabinetry, countertop, tile, lighting, hardware, and architecture. Repeating a small number of intentional details usually creates a more polished result than adding unrelated decorative features.
Florida Rating 🌴
⭐⭐⭐⭐⭐ Excellent
Floor Drain is well suited to Florida homes, but mineral content, sediment, humidity, and concealed condensation can affect long-term performance. Use quality corrosion-resistant components, keep service information, and address drips or restricted flow promptly.
Maintenance Level
⭐⭐ Easy to Moderate
Clean with manufacturer-approved products, monitor for leaks or restricted flow, and service replaceable components before surrounding materials are damaged.
Related Terms
• Linear Drain
• Trap Primer
• Shower Pan
• Curbless Shower
• Waterproofing Membrane
• Wet Room
• P-Trap
• Tile Slope
-
Floor Joist
Floor Joist
Definition
Floor Joist is a horizontal structural member that supports the subfloor, finished flooring, walls, fixtures, furniture, and occupants. In residential and commercial remodeling, this term affects not only the visible design but also installation sequence, surrounding materials, clearances, support, service access, and long-term performance.
The exact product or construction method varies by manufacturer and project. Common considerations include material quality, dimensions, compatibility with adjacent finishes, fastener or connection requirements, and the condition of the substrate. Holes, notches, plumbing conflicts, deflection, moisture, and added loads must be evaluated before modification.
A successful floor joist installation begins with accurate field measurements and coordination before related cabinetry, plumbing, electrical work, framing, drywall, tile, countertops, or finish carpentry are completed. Manufacturer instructions and applicable building requirements should always take priority over assumptions based on appearance alone.
Common Applications
Floor Joist is commonly used for:
Wood-Framed Floors
Second Stories
Raised Foundations
Bathrooms
Kitchens
Floor Openings
Common Types
Common forms and configurations include:
Solid-Sawn Lumber
Engineered I-Joist
Open-Web Truss
Lvl
Sistered Joist
Cantilevered Joist
Rim Joist
Advantages
Advantages include:
Carries and distributes building loads
Provides a substrate for floors and finishes
Can be reinforced or repaired when properly designed
Creates space for utilities
Supports long-term building performance
Allows the project team to tailor floor joist to the room's dimensions, use, and design goals
Disadvantages
Potential disadvantages and limitations include:
Improper cutting or drilling can weaken the structure
Moisture and insects can cause hidden damage
Repairs often require opening finished surfaces
Existing framing may be out of level or undersized
Changes may require engineering and permits
Poor selection or installation of floor joist can create costly corrections after surrounding finishes are complete
When to Choose Floor Joist
Choose floor joist when its function, appearance, and installation requirements support the complete remodeling plan. It is particularly appropriate for wood-framed floors, second stories, raised foundations, bathrooms. Compare products using real dimensions, technical data, maintenance expectations, and compatibility with nearby materials rather than selecting from a photograph alone.
Before ordering, confirm rough openings, finished thicknesses, clearances, loads, plumbing or electrical locations, and any manufacturer-specific accessories. The goal is not simply to include floor joist, but to integrate it so it operates comfortably and looks intentional after every surrounding finish is installed.
Pristine Pro Tip 💡
Treat floor joist as an early coordination item, not a last-minute accessory. Holes, notches, plumbing conflicts, deflection, moisture, and added loads must be evaluated before modification. We verify the exact product information and installation conditions before dependent materials are fabricated or walls are closed. That extra planning protects both the finished appearance and the homeowner's investment.
Common Mistake ❌
A common mistake is assuming products with the same general name or nominal size are interchangeable. Small differences in dimensions, mounting, support, clearances, finish thickness, or service access can change the entire installation. Another mistake is expecting caulk, trim, shims, or field cutting to correct a condition that should have been resolved during design and rough construction.
Designer Insight 🎨
Floor Joist should feel connected to the room rather than selected in isolation. Its scale, lines, finish, and visual weight should relate to the cabinetry, countertop, tile, lighting, hardware, and architecture. Repeating a small number of intentional details usually creates a more polished result than adding unrelated decorative features.
Florida Rating 🌴
⭐⭐⭐⭐⭐ Excellent
Florida construction must account for humidity, moisture intrusion, termites, and applicable code requirements. Keep materials dry before enclosure, protect structural connections, and never conceal wet or damaged framing behind new finishes.
Maintenance Level
⭐ None to Periodic Inspection
Once concealed or completed, direct maintenance is limited. Investigate movement, moisture, cracking, odors, or performance changes promptly rather than covering symptoms.
Related Terms
• Framing
• Sistering
• Subfloor
• Deflection
• Floor Truss
• Floor Leveling
• I-Joist
• Curbless Shower
• Beam
-
Floor Leveling
Floor Leveling
Definition
Floor Leveling is the correction of high spots, low spots, ridges, dips, or slopes so a substrate meets the flatness and elevation needs of the finish flooring. In residential and commercial remodeling, this term affects not only the visible design but also installation sequence, surrounding materials, clearances, support, service access, and long-term performance.
The exact product or construction method varies by manufacturer and project. Common considerations include material quality, dimensions, compatibility with adjacent finishes, fastener or connection requirements, and the condition of the substrate. Level and flat are different; diagnose structural movement and slab moisture before covering defects.
A successful floor leveling installation begins with accurate field measurements and coordination before related cabinetry, plumbing, electrical work, framing, drywall, tile, countertops, or finish carpentry are completed. Manufacturer instructions and applicable building requirements should always take priority over assumptions based on appearance alone.
Common Applications
Floor Leveling is commonly used for:
Lvp
Large-Format Tile
Hardwood
Engineered Wood
Laminate
Cabinet And Island Preparation
Common Types
Common forms and configurations include:
Self-Leveling Underlayment
Cement Patch
Grinding
Feather Finish
Joist Sistering
Subfloor Replacement
Sleepers
Advantages
Advantages include:
Improves the finished flooring appearance
Helps flooring meet manufacturer tolerances
Reduces movement, lippage, and premature wear
Supports accurate cabinet and appliance installation
Can correct localized substrate defects
Allows the project team to tailor floor leveling to the room's dimensions, use, and design goals
Disadvantages
Potential disadvantages and limitations include:
Adds cost and curing time
Can raise finished floor height
Requires clean, stable, compatible substrates
Moisture can cause bond failure
Major structural movement cannot be corrected with surface patch alone
Poor selection or installation of floor leveling can create costly corrections after surrounding finishes are complete
When to Choose Floor Leveling
Choose floor leveling when its function, appearance, and installation requirements support the complete remodeling plan. It is particularly appropriate for LVP, large-format tile, hardwood, engineered wood. Compare products using real dimensions, technical data, maintenance expectations, and compatibility with nearby materials rather than selecting from a photograph alone.
Before ordering, confirm rough openings, finished thicknesses, clearances, loads, plumbing or electrical locations, and any manufacturer-specific accessories. The goal is not simply to include floor leveling, but to integrate it so it operates comfortably and looks intentional after every surrounding finish is installed.
Pristine Pro Tip 💡
Treat floor leveling as an early coordination item, not a last-minute accessory. Level and flat are different; diagnose structural movement and slab moisture before covering defects. We verify the exact product information and installation conditions before dependent materials are fabricated or walls are closed. That extra planning protects both the finished appearance and the homeowner's investment.
Common Mistake ❌
A common mistake is assuming products with the same general name or nominal size are interchangeable. Small differences in dimensions, mounting, support, clearances, finish thickness, or service access can change the entire installation. Another mistake is expecting caulk, trim, shims, or field cutting to correct a condition that should have been resolved during design and rough construction.
Designer Insight 🎨
Floor Leveling should feel connected to the room rather than selected in isolation. Its scale, lines, finish, and visual weight should relate to the cabinetry, countertop, tile, lighting, hardware, and architecture. Repeating a small number of intentional details usually creates a more polished result than adding unrelated decorative features.
Florida Rating 🌴
⭐⭐⭐⭐⭐ Excellent
Floor Leveling is an excellent option for Florida interiors when materials are acclimated, moisture-resistant where needed, and installed according to manufacturer requirements. Humidity, slab moisture, strong daylight, and coastal corrosion should be considered during selection.
Maintenance Level
⭐ None to Periodic Inspection
Once concealed or completed, direct maintenance is limited. Investigate movement, moisture, cracking, odors, or performance changes promptly rather than covering symptoms.
Related Terms
• Self-Leveling Underlayment
• Deflection
• Subfloor
• Large-Format Tile
• Concrete Slab
• Luxury Vinyl Plank
• Floor Joist
• Moisture Testing
-
Foot Candle
Foot Candle
Definition
Foot Candle is a unit of illuminance equal to one lumen of light falling on one square foot of surface. In residential and commercial remodeling, this term affects not only the visible design but also installation sequence, surrounding materials, clearances, support, service access, and long-term performance.
The exact product or construction method varies by manufacturer and project. Common considerations include material quality, dimensions, compatibility with adjacent finishes, fastener or connection requirements, and the condition of the substrate. Lumens describe source output while foot candles describe light arriving at the work surface; glare and color quality still matter.
A successful foot candle installation begins with accurate field measurements and coordination before related cabinetry, plumbing, electrical work, framing, drywall, tile, countertops, or finish carpentry are completed. Manufacturer instructions and applicable building requirements should always take priority over assumptions based on appearance alone.
Common Applications
Foot Candle is commonly used for:
Kitchen Counters
Bathroom Vanities
Offices
Closets
Commercial Spaces
Exterior Entries
Common Types
Common forms and configurations include:
Horizontal
Vertical
Average
Minimum
Maintained
Task-Surface
Emergency-Lighting Measurement
Advantages
Advantages include:
Creates a measurable target for useful illumination
Helps compare lighting performance at actual task surfaces
Supports safer and more comfortable rooms
Improves coordination of ambient and task lighting
Useful in residential and commercial design
Allows the project team to tailor foot candle to the room's dimensions, use, and design goals
Disadvantages
Potential disadvantages and limitations include:
Does not describe color rendering, glare, or visual comfort by itself
Readings vary by location and surface
Calculations require accurate fixture data
Target levels vary by task and user
Higher numbers are not automatically better
Poor selection or installation of foot candle can create costly corrections after surrounding finishes are complete
When to Choose Foot Candle
Choose foot candle when its function, appearance, and installation requirements support the complete remodeling plan. It is particularly appropriate for kitchen counters, bathroom vanities, offices, closets. Compare products using real dimensions, technical data, maintenance expectations, and compatibility with nearby materials rather than selecting from a photograph alone.
Before ordering, confirm rough openings, finished thicknesses, clearances, loads, plumbing or electrical locations, and any manufacturer-specific accessories. The goal is not simply to include foot candle, but to integrate it so it operates comfortably and looks intentional after every surrounding finish is installed.
Pristine Pro Tip 💡
Treat foot candle as an early coordination item, not a last-minute accessory. Lumens describe source output while foot candles describe light arriving at the work surface; glare and color quality still matter. We verify the exact product information and installation conditions before dependent materials are fabricated or walls are closed. That extra planning protects both the finished appearance and the homeowner's investment.
Common Mistake ❌
A common mistake is assuming products with the same general name or nominal size are interchangeable. Small differences in dimensions, mounting, support, clearances, finish thickness, or service access can change the entire installation. Another mistake is expecting caulk, trim, shims, or field cutting to correct a condition that should have been resolved during design and rough construction.
Designer Insight 🎨
Foot Candle should feel connected to the room rather than selected in isolation. Its scale, lines, finish, and visual weight should relate to the cabinetry, countertop, tile, lighting, hardware, and architecture. Repeating a small number of intentional details usually creates a more polished result than adding unrelated decorative features.
Florida Rating 🌴
⭐⭐⭐⭐⭐ Excellent
Florida's bright daylight and strong contrast make careful lighting design especially important. Foot Candle should be considered with nighttime conditions, reflective tile and countertops, moisture ratings, and reliable LED components that tolerate warm ceiling cavities.
Maintenance Level
⭐ None to Periodic Inspection
Once concealed or completed, direct maintenance is limited. Investigate movement, moisture, cracking, odors, or performance changes promptly rather than covering symptoms.
Related Terms
• Lumens
• Ambient Lighting
• Color Temperature
• Under-Cabinet Lighting
• Color Rendering Index
• Recessed Lighting
• Task Lighting
• Dimmer Switch
-
French Cleat
French Cleat
Definition
French Cleat is a two-part hanging system with opposing beveled strips that interlock and distribute weight along their length. In residential and commercial remodeling, this term affects not only the visible design but also installation sequence, surrounding materials, clearances, support, service access, and long-term performance.
The exact product or construction method varies by manufacturer and project. Common considerations include material quality, dimensions, compatibility with adjacent finishes, fastener or connection requirements, and the condition of the substrate. Only as strong as its connection to studs, blocking, or masonry; lower spacers or secondary fasteners prevent swinging.
A successful french cleat installation begins with accurate field measurements and coordination before related cabinetry, plumbing, electrical work, framing, drywall, tile, countertops, or finish carpentry are completed. Manufacturer instructions and applicable building requirements should always take priority over assumptions based on appearance alone.
Common Applications
French Cleat is commonly used for:
Wall Cabinets
Floating Vanities
Floating Shelves
Mirrors
Headboards
Panels
Tool Storage
Common Types
Common forms and configurations include:
Wood Cleat
Plywood Cleat
Aluminum Z-Clip
Steel Cleat
Continuous Rail
Adjustable Cleat
Advantages
Advantages include:
Distributes load across a wider area
Conceals much of the mounting hardware
Supports accurate positioning and leveling
Can allow removal for service
Works with cabinets, shelves, mirrors, and panels
Allows the project team to tailor french cleat to the room's dimensions, use, and design goals
Disadvantages
Potential disadvantages and limitations include:
Only as strong as the wall connection
Requires accurate level installation
Removal needs vertical clearance
Deep cantilevered loads may need additional support
Hidden mounting errors may not be obvious until loaded
Poor selection or installation of french cleat can create costly corrections after surrounding finishes are complete
When to Choose French Cleat
Choose french cleat when its function, appearance, and installation requirements support the complete remodeling plan. It is particularly appropriate for wall cabinets, floating vanities, floating shelves, mirrors. Compare products using real dimensions, technical data, maintenance expectations, and compatibility with nearby materials rather than selecting from a photograph alone.
Before ordering, confirm rough openings, finished thicknesses, clearances, loads, plumbing or electrical locations, and any manufacturer-specific accessories. The goal is not simply to include french cleat, but to integrate it so it operates comfortably and looks intentional after every surrounding finish is installed.
Pristine Pro Tip 💡
Treat french cleat as an early coordination item, not a last-minute accessory. Only as strong as its connection to studs, blocking, or masonry; lower spacers or secondary fasteners prevent swinging. We verify the exact product information and installation conditions before dependent materials are fabricated or walls are closed. That extra planning protects both the finished appearance and the homeowner's investment.
Common Mistake ❌
A common mistake is assuming products with the same general name or nominal size are interchangeable. Small differences in dimensions, mounting, support, clearances, finish thickness, or service access can change the entire installation. Another mistake is expecting caulk, trim, shims, or field cutting to correct a condition that should have been resolved during design and rough construction.
Designer Insight 🎨
French Cleat should feel connected to the room rather than selected in isolation. Its scale, lines, finish, and visual weight should relate to the cabinetry, countertop, tile, lighting, hardware, and architecture. Repeating a small number of intentional details usually creates a more polished result than adding unrelated decorative features.
Florida Rating 🌴
⭐⭐⭐⭐⭐ Excellent
French Cleat is an excellent option for Florida interiors when materials are acclimated, moisture-resistant where needed, and installed according to manufacturer requirements. Humidity, slab moisture, strong daylight, and coastal corrosion should be considered during selection.
Maintenance Level
⭐⭐ Easy
Clean with a soft cloth and compatible cleaner, avoid prolonged moisture and abrasive chemicals, and correct loose hardware, damaged finish, or misalignment promptly.
Related Terms
• Floating Vanity
• Z-Clip
• Floating Shelf
• Wall Stud
• Wall Blocking
• Mounting Rail
• Cabinet Installation
• Fastener
-
Framing
Framing
Definition
Framing is the structural skeleton of walls, floors, ceilings, openings, chases, and supports to which finish materials are attached. In residential and commercial remodeling, this term affects not only the visible design but also installation sequence, surrounding materials, clearances, support, service access, and long-term performance.
The exact product or construction method varies by manufacturer and project. Common considerations include material quality, dimensions, compatibility with adjacent finishes, fastener or connection requirements, and the condition of the substrate. Determine structural role before demolition and coordinate utilities, finish thicknesses, and blocking while walls are open.
A successful framing installation begins with accurate field measurements and coordination before related cabinetry, plumbing, electrical work, framing, drywall, tile, countertops, or finish carpentry are completed. Manufacturer instructions and applicable building requirements should always take priority over assumptions based on appearance alone.
Common Applications
Framing is commonly used for:
Partitions
Load-Bearing Walls
Door Openings
Soffits
Shower Niches
Floor Systems
Blocking
Commercial Interiors
Common Types
Common forms and configurations include:
Wood Framing
Metal Studs
Load-Bearing
Non-Load-Bearing
Platform
Balloon
Advanced
Furring And Chase Framing
Advantages
Advantages include:
Creates the structure and geometry of the remodeled space
Provides attachment points for cabinets, glass, and finishes
Allows layouts and openings to be changed
Accommodates utilities and insulation
Can be reinforced for future accessories
Allows the project team to tailor framing to the room's dimensions, use, and design goals
Disadvantages
Potential disadvantages and limitations include:
Incorrect changes can compromise structure
Hidden utilities complicate demolition
Out-of-plumb framing affects every finish
Wood can move with moisture
Structural work may require permits or engineering
Poor selection or installation of framing can create costly corrections after surrounding finishes are complete
When to Choose Framing
Choose framing when its function, appearance, and installation requirements support the complete remodeling plan. It is particularly appropriate for partitions, load-bearing walls, door openings, soffits. Compare products using real dimensions, technical data, maintenance expectations, and compatibility with nearby materials rather than selecting from a photograph alone.
Before ordering, confirm rough openings, finished thicknesses, clearances, loads, plumbing or electrical locations, and any manufacturer-specific accessories. The goal is not simply to include framing, but to integrate it so it operates comfortably and looks intentional after every surrounding finish is installed.
Pristine Pro Tip 💡
Treat framing as an early coordination item, not a last-minute accessory. Determine structural role before demolition and coordinate utilities, finish thicknesses, and blocking while walls are open. We verify the exact product information and installation conditions before dependent materials are fabricated or walls are closed. That extra planning protects both the finished appearance and the homeowner's investment.
Common Mistake ❌
A common mistake is assuming products with the same general name or nominal size are interchangeable. Small differences in dimensions, mounting, support, clearances, finish thickness, or service access can change the entire installation. Another mistake is expecting caulk, trim, shims, or field cutting to correct a condition that should have been resolved during design and rough construction.
Designer Insight 🎨
Framing should feel connected to the room rather than selected in isolation. Its scale, lines, finish, and visual weight should relate to the cabinetry, countertop, tile, lighting, hardware, and architecture. Repeating a small number of intentional details usually creates a more polished result than adding unrelated decorative features.
Florida Rating 🌴
⭐⭐⭐⭐⭐ Excellent
Florida construction must account for humidity, moisture intrusion, termites, and applicable code requirements. Keep materials dry before enclosure, protect structural connections, and never conceal wet or damaged framing behind new finishes.
Maintenance Level
⭐ None to Periodic Inspection
Once concealed or completed, direct maintenance is limited. Investigate movement, moisture, cracking, odors, or performance changes promptly rather than covering symptoms.
Related Terms
• Floor Joist
• Load-Bearing Wall
• Wall Stud
• Non-Load-Bearing Wall
• Header
• Subfloor
• Blocking
• Fire-Rated Drywall
-
Frameless Cabinet
Frameless Cabinet
Definition
Frameless Cabinet is a cabinet-box system without a separate face frame; hinges and drawer hardware attach directly to the cabinet sides. In residential and commercial remodeling, this term affects not only the visible design but also installation sequence, surrounding materials, clearances, support, service access, and long-term performance.
The exact product or construction method varies by manufacturer and project. Common considerations include material quality, dimensions, compatibility with adjacent finishes, fastener or connection requirements, and the condition of the substrate. Offers wider clear openings but depends on precise box construction, edge banding, hardware, and installation.
A successful frameless cabinet installation begins with accurate field measurements and coordination before related cabinetry, plumbing, electrical work, framing, drywall, tile, countertops, or finish carpentry are completed. Manufacturer instructions and applicable building requirements should always take priority over assumptions based on appearance alone.
Common Applications
Frameless Cabinet is commonly used for:
Modern Kitchens
European Cabinetry
Bathrooms
Closets
Offices
Floating Vanities
Common Types
Common forms and configurations include:
Plywood Box
Particleboard Box
Melamine Interior
Veneer
Painted
Acrylic
Laminate
Advantages
Advantages include:
Creates an intentional, finished appearance
Supports efficient storage planning
Can be customized to the room and design style
Works with modern hardware and organizational accessories
Can improve daily function and perceived value
Allows the project team to tailor frameless cabinet to the room's dimensions, use, and design goals
Disadvantages
Potential disadvantages and limitations include:
Requires accurate design measurements and installation
Poor materials or alignment remain visible
Moisture can damage unfinished edges and cabinet cores
Specialty construction and finishes may cost more
Walls, corners, and appliances must be coordinated carefully
Poor selection or installation of frameless cabinet can create costly corrections after surrounding finishes are complete
When to Choose Frameless Cabinet
Choose frameless cabinet when its function, appearance, and installation requirements support the complete remodeling plan. It is particularly appropriate for modern kitchens, European cabinetry, bathrooms, closets. Compare products using real dimensions, technical data, maintenance expectations, and compatibility with nearby materials rather than selecting from a photograph alone.
Before ordering, confirm rough openings, finished thicknesses, clearances, loads, plumbing or electrical locations, and any manufacturer-specific accessories. The goal is not simply to include frameless cabinet, but to integrate it so it operates comfortably and looks intentional after every surrounding finish is installed.
Pristine Pro Tip 💡
Treat frameless cabinet as an early coordination item, not a last-minute accessory. Offers wider clear openings but depends on precise box construction, edge banding, hardware, and installation. We verify the exact product information and installation conditions before dependent materials are fabricated or walls are closed. That extra planning protects both the finished appearance and the homeowner's investment.
Common Mistake ❌
A common mistake is assuming products with the same general name or nominal size are interchangeable. Small differences in dimensions, mounting, support, clearances, finish thickness, or service access can change the entire installation. Another mistake is expecting caulk, trim, shims, or field cutting to correct a condition that should have been resolved during design and rough construction.
Designer Insight 🎨
Frameless Cabinet should feel connected to the room rather than selected in isolation. Its scale, lines, finish, and visual weight should relate to the cabinetry, countertop, tile, lighting, hardware, and architecture. Repeating a small number of intentional details usually creates a more polished result than adding unrelated decorative features.
Florida Rating 🌴
⭐⭐⭐⭐⭐ Excellent
Frameless Cabinet can perform very well in Florida when cabinet cores, exposed edges, hardware, and floor-level details are protected from plumbing leaks and humid air. Consistent indoor climate control, sealed field cuts, and prompt cleanup of water help preserve alignment and finish quality.
Maintenance Level
⭐⭐ Easy
Clean with a soft cloth and compatible cleaner, avoid prolonged moisture and abrasive chemicals, and correct loose hardware, damaged finish, or misalignment promptly.
Related Terms
• Face Frame Cabinet
• Concealed Hinge
• Full Overlay Cabinet
• Edge Banding
• Flat Panel Cabinet
• Cabinet Box
• European Cabinet
• Finger Pull
-
Frameless Shower
Frameless Shower
Definition
Frameless Shower is a shower enclosure made from heavy tempered glass with minimal metal framing, using hinges, clamps, channels, and discreet supports. In residential and commercial remodeling, this term affects not only the visible design but also installation sequence, surrounding materials, clearances, support, service access, and long-term performance.
The exact product or construction method varies by manufacturer and project. Common considerations include material quality, dimensions, compatibility with adjacent finishes, fastener or connection requirements, and the condition of the substrate. Final measurements occur after tile; walls and thresholds must be plumb and level; small operating gaps mean water management matters.
A successful frameless shower installation begins with accurate field measurements and coordination before related cabinetry, plumbing, electrical work, framing, drywall, tile, countertops, or finish carpentry are completed. Manufacturer instructions and applicable building requirements should always take priority over assumptions based on appearance alone.
Common Applications
Frameless Shower is commonly used for:
Custom Tile Showers
Walk-Ins
Curbless Showers
Corner Enclosures
Primary Bathrooms
Fixed Screens
Common Types
Common forms and configurations include:
Hinged Door
Fixed Panel
Door-And-Panel
Corner
Neo-Angle
Rolling System
Header-Supported Enclosure
Advantages
Advantages include:
Creates an open, custom appearance
Allows tile and stone to remain visible
Can be tailored to unusual dimensions
Uses durable safety glass
Available with many hardware finishes
Allows the project team to tailor frameless shower to the room's dimensions, use, and design goals
Disadvantages
Potential disadvantages and limitations include:
Costs more than basic framed enclosures
Requires exact field measurement
Glass is heavy and needs solid support
Small operating gaps can allow water escape
Hard water and soap residue require regular cleaning
Poor selection or installation of frameless shower can create costly corrections after surrounding finishes are complete
When to Choose Frameless Shower
Choose frameless shower when its function, appearance, and installation requirements support the complete remodeling plan. It is particularly appropriate for custom tile showers, walk-ins, curbless showers, corner enclosures. Compare products using real dimensions, technical data, maintenance expectations, and compatibility with nearby materials rather than selecting from a photograph alone.
Before ordering, confirm rough openings, finished thicknesses, clearances, loads, plumbing or electrical locations, and any manufacturer-specific accessories. The goal is not simply to include frameless shower, but to integrate it so it operates comfortably and looks intentional after every surrounding finish is installed.
Pristine Pro Tip 💡
Treat frameless shower as an early coordination item, not a last-minute accessory. Final measurements occur after tile; walls and thresholds must be plumb and level; small operating gaps mean water management matters. We verify the exact product information and installation conditions before dependent materials are fabricated or walls are closed. That extra planning protects both the finished appearance and the homeowner's investment.
Common Mistake ❌
A common mistake is assuming products with the same general name or nominal size are interchangeable. Small differences in dimensions, mounting, support, clearances, finish thickness, or service access can change the entire installation. Another mistake is expecting caulk, trim, shims, or field cutting to correct a condition that should have been resolved during design and rough construction.
Designer Insight 🎨
Frameless Shower should feel connected to the room rather than selected in isolation. Its scale, lines, finish, and visual weight should relate to the cabinetry, countertop, tile, lighting, hardware, and architecture. Repeating a small number of intentional details usually creates a more polished result than adding unrelated decorative features.
Florida Rating 🌴
⭐⭐⭐⭐⭐ Excellent
Frameless Shower works particularly well in bright Florida bathrooms. Specify safety glass and corrosion-resistant hardware where required, control hard-water deposits, and use ventilation to limit persistent moisture on glass and adjacent finishes.
Maintenance Level
⭐⭐⭐ Moderate
Squeegee or wipe regularly, use non-abrasive approved cleaners, control mineral buildup, and inspect seals, hardware, films, or coatings for wear.
Related Terms
• Tempered Glass
• Shower Curb
• Low-Iron Glass
• Fixed Glass Panel
• Frosted Glass
• Waterproofing Membrane
• Curbless Shower
• Wall Blocking
-
Frosted Glass
Frosted Glass
Definition
Frosted Glass is translucent glass that diffuses light and obscures direct views through etching, blasting, frit, patterning, lamination, or film. In residential and commercial remodeling, this term affects not only the visible design but also installation sequence, surrounding materials, clearances, support, service access, and long-term performance.
The exact product or construction method varies by manufacturer and project. Common considerations include material quality, dimensions, compatibility with adjacent finishes, fastener or connection requirements, and the condition of the substrate. Privacy varies with distance and backlighting; full-size samples should be viewed under day and night conditions.
A successful frosted glass installation begins with accurate field measurements and coordination before related cabinetry, plumbing, electrical work, framing, drywall, tile, countertops, or finish carpentry are completed. Manufacturer instructions and applicable building requirements should always take priority over assumptions based on appearance alone.
Common Applications
Frosted Glass is commonly used for:
Bathroom Windows
Showers
Doors
Cabinet Inserts
Office Partitions
Sidelights
Common Types
Common forms and configurations include:
Acid-Etched
Sandblasted
Ceramic Frit
Patterned Privacy
Laminated
Privacy Film
Gradient
Reeded
Advantages
Advantages include:
Provides privacy while transmitting light
Softens glare and direct views
Available in many opacity levels and patterns
Works in wet and dry locations when properly specified
Can become a subtle decorative feature
Allows the project team to tailor frosted glass to the room's dimensions, use, and design goals
Disadvantages
Potential disadvantages and limitations include:
Some finishes show fingerprints or mineral deposits
Privacy changes with lighting and distance
Textured surfaces may be harder to clean
Applied films can peel or bubble
Custom glass can be expensive
Poor selection or installation of frosted glass can create costly corrections after surrounding finishes are complete
When to Choose Frosted Glass
Choose frosted glass when its function, appearance, and installation requirements support the complete remodeling plan. It is particularly appropriate for bathroom windows, showers, doors, cabinet inserts. Compare products using real dimensions, technical data, maintenance expectations, and compatibility with nearby materials rather than selecting from a photograph alone.
Before ordering, confirm rough openings, finished thicknesses, clearances, loads, plumbing or electrical locations, and any manufacturer-specific accessories. The goal is not simply to include frosted glass, but to integrate it so it operates comfortably and looks intentional after every surrounding finish is installed.
Pristine Pro Tip 💡
Treat frosted glass as an early coordination item, not a last-minute accessory. Privacy varies with distance and backlighting; full-size samples should be viewed under day and night conditions. We verify the exact product information and installation conditions before dependent materials are fabricated or walls are closed. That extra planning protects both the finished appearance and the homeowner's investment.
Common Mistake ❌
A common mistake is assuming products with the same general name or nominal size are interchangeable. Small differences in dimensions, mounting, support, clearances, finish thickness, or service access can change the entire installation. Another mistake is expecting caulk, trim, shims, or field cutting to correct a condition that should have been resolved during design and rough construction.
Designer Insight 🎨
Frosted Glass should feel connected to the room rather than selected in isolation. Its scale, lines, finish, and visual weight should relate to the cabinetry, countertop, tile, lighting, hardware, and architecture. Repeating a small number of intentional details usually creates a more polished result than adding unrelated decorative features.
Florida Rating 🌴
⭐⭐⭐⭐⭐ Excellent
Frosted Glass works particularly well in bright Florida bathrooms. Specify safety glass and corrosion-resistant hardware where required, control hard-water deposits, and use ventilation to limit persistent moisture on glass and adjacent finishes.
Maintenance Level
⭐⭐⭐ Moderate
Squeegee or wipe regularly, use non-abrasive approved cleaners, control mineral buildup, and inspect seals, hardware, films, or coatings for wear.
Related Terms
• Tempered Glass
• Privacy Film
• Low-Iron Glass
• Laminated Glass
• Frameless Shower
• Cabinet Glass
• Reeded Glass
• Safety Glass
-
Full Extension Drawer Slides
Full Extension Drawer Slides
Definition
Full Extension Drawer Slides is drawer hardware that allows the drawer to travel far enough for the back of the drawer box to be fully accessible. In residential and commercial remodeling, this term affects not only the visible design but also installation sequence, surrounding materials, clearances, support, service access, and long-term performance.
The exact product or construction method varies by manufacturer and project. Common considerations include material quality, dimensions, compatibility with adjacent finishes, fastener or connection requirements, and the condition of the substrate. Weight rating, drawer width, exact clearances, and slide alignment determine performance; full extension and soft close are separate features.
A successful full extension drawer slides installation begins with accurate field measurements and coordination before related cabinetry, plumbing, electrical work, framing, drywall, tile, countertops, or finish carpentry are completed. Manufacturer instructions and applicable building requirements should always take priority over assumptions based on appearance alone.
Common Applications
Full Extension Drawer Slides is commonly used for:
Kitchen Drawers
Vanities
Pot Drawers
Pantry Pull-Outs
Trash Pull-Outs
File Drawers
Common Types
Common forms and configurations include:
Side-Mount Ball Bearing
Undermount Soft-Close
Push-To-Open
Heavy-Duty
Over-Travel
Locking
Concealed
Advantages
Advantages include:
Improves access and daily usability
Supports a clean, coordinated cabinet design
Available in multiple capacities and finishes
Can be matched to specific doors, drawers, and users
Quality hardware improves the feel of cabinetry
Allows the project team to tailor full extension drawer slides to the room's dimensions, use, and design goals
Disadvantages
Potential disadvantages and limitations include:
Requires precise layout and installation
Low-quality hardware can loosen, bind, or wear prematurely
Weight and leverage limits must be respected
Finish can scratch or corrode
Special systems may require proprietary parts
Poor selection or installation of full extension drawer slides can create costly corrections after surrounding finishes are complete
When to Choose Full Extension Drawer Slides
Choose full extension drawer slides when its function, appearance, and installation requirements support the complete remodeling plan. It is particularly appropriate for kitchen drawers, vanities, pot drawers, pantry pull-outs. Compare products using real dimensions, technical data, maintenance expectations, and compatibility with nearby materials rather than selecting from a photograph alone.
Before ordering, confirm rough openings, finished thicknesses, clearances, loads, plumbing or electrical locations, and any manufacturer-specific accessories. The goal is not simply to include full extension drawer slides, but to integrate it so it operates comfortably and looks intentional after every surrounding finish is installed.
Pristine Pro Tip 💡
Treat full extension drawer slides as an early coordination item, not a last-minute accessory. Weight rating, drawer width, exact clearances, and slide alignment determine performance; full extension and soft close are separate features. We verify the exact product information and installation conditions before dependent materials are fabricated or walls are closed. That extra planning protects both the finished appearance and the homeowner's investment.
Common Mistake ❌
A common mistake is assuming products with the same general name or nominal size are interchangeable. Small differences in dimensions, mounting, support, clearances, finish thickness, or service access can change the entire installation. Another mistake is expecting caulk, trim, shims, or field cutting to correct a condition that should have been resolved during design and rough construction.
Designer Insight 🎨
Full Extension Drawer Slides should feel connected to the room rather than selected in isolation. Its scale, lines, finish, and visual weight should relate to the cabinetry, countertop, tile, lighting, hardware, and architecture. Repeating a small number of intentional details usually creates a more polished result than adding unrelated decorative features.
Florida Rating 🌴
⭐⭐⭐⭐⭐ Excellent
Full Extension Drawer Slides is an excellent option for Florida interiors when materials are acclimated, moisture-resistant where needed, and installed according to manufacturer requirements. Humidity, slab moisture, strong daylight, and coastal corrosion should be considered during selection.
Maintenance Level
⭐⭐ Easy
Clean with a soft cloth and compatible cleaner, avoid prolonged moisture and abrasive chemicals, and correct loose hardware, damaged finish, or misalignment promptly.
Related Terms
• Drawer Box
• Cabinet Organizer
• Soft-Close Hardware
• Frameless Cabinet
• Undermount Slide
• Face Frame Cabinet
• Side-Mount Slide
• Pot Drawer
-
Full Height Backsplash
Full Height Backsplash
Definition
Full Height Backsplash is a backsplash extending from the countertop to upper cabinets, shelving, a hood, or the ceiling rather than stopping at a short splash. In residential and commercial remodeling, this term affects not only the visible design but also installation sequence, surrounding materials, clearances, support, service access, and long-term performance.
The exact product or construction method varies by manufacturer and project. Common considerations include material quality, dimensions, compatibility with adjacent finishes, fastener or connection requirements, and the condition of the substrate. Coordinate outlets, hood clearances, cabinet heights, wall flatness, seams, and countertop templating before installation.
A successful full height backsplash installation begins with accurate field measurements and coordination before related cabinetry, plumbing, electrical work, framing, drywall, tile, countertops, or finish carpentry are completed. Manufacturer instructions and applicable building requirements should always take priority over assumptions based on appearance alone.
Common Applications
Full Height Backsplash is commonly used for:
Kitchen Perimeter
Range Walls
Coffee Bars
Butler'S Pantries
Wet Bars
Vanity Walls
Common Types
Common forms and configurations include:
Tile
Quartz Slab
Natural-Stone Slab
Porcelain Panel
Glass
Stainless Steel
Bookmatched Slab
Advantages
Advantages include:
Protects a larger area than painted drywall
Creates a complete, high-end appearance
Can be coordinated with countertops and cabinetry
Offers many material and pattern choices
Is generally easier to wipe clean than paint
Allows the project team to tailor full height backsplash to the room's dimensions, use, and design goals
Disadvantages
Potential disadvantages and limitations include:
Uses more material and labor than a short backsplash
Outlets and corners interrupt patterns
Future cabinet changes become more difficult
Porous materials may require sealing
Bold patterns can overwhelm a small room
Poor selection or installation of full height backsplash can create costly corrections after surrounding finishes are complete
When to Choose Full Height Backsplash
Choose full height backsplash when its function, appearance, and installation requirements support the complete remodeling plan. It is particularly appropriate for kitchen perimeter, range walls, coffee bars, butler's pantries. Compare products using real dimensions, technical data, maintenance expectations, and compatibility with nearby materials rather than selecting from a photograph alone.
Before ordering, confirm rough openings, finished thicknesses, clearances, loads, plumbing or electrical locations, and any manufacturer-specific accessories. The goal is not simply to include full height backsplash, but to integrate it so it operates comfortably and looks intentional after every surrounding finish is installed.
Pristine Pro Tip 💡
Treat full height backsplash as an early coordination item, not a last-minute accessory. Coordinate outlets, hood clearances, cabinet heights, wall flatness, seams, and countertop templating before installation. We verify the exact product information and installation conditions before dependent materials are fabricated or walls are closed. That extra planning protects both the finished appearance and the homeowner's investment.
Common Mistake ❌
A common mistake is assuming products with the same general name or nominal size are interchangeable. Small differences in dimensions, mounting, support, clearances, finish thickness, or service access can change the entire installation. Another mistake is expecting caulk, trim, shims, or field cutting to correct a condition that should have been resolved during design and rough construction.
Designer Insight 🎨
Full Height Backsplash should feel connected to the room rather than selected in isolation. Its scale, lines, finish, and visual weight should relate to the cabinetry, countertop, tile, lighting, hardware, and architecture. Repeating a small number of intentional details usually creates a more polished result than adding unrelated decorative features.
Florida Rating 🌴
⭐⭐⭐⭐⭐ Excellent
Full Height Backsplash is an excellent option for Florida interiors when materials are acclimated, moisture-resistant where needed, and installed according to manufacturer requirements. Humidity, slab moisture, strong daylight, and coastal corrosion should be considered during selection.
Maintenance Level
⭐⭐ Easy
Clean with a soft cloth and compatible cleaner, avoid prolonged moisture and abrasive chemicals, and correct loose hardware, damaged finish, or misalignment promptly.
Related Terms
• Backsplash
• Tile Layout
• Quartz Countertop
• Range Hood
• Porcelain Slab
• Open Shelving
• Natural Stone
• Grout
-
Full Overlay Cabinet
Full Overlay Cabinet
Definition
Full Overlay Cabinet is cabinetry whose doors and drawer fronts cover nearly the entire face, leaving narrow consistent reveals. In residential and commercial remodeling, this term affects not only the visible design but also installation sequence, surrounding materials, clearances, support, service access, and long-term performance.
The exact product or construction method varies by manufacturer and project. Common considerations include material quality, dimensions, compatibility with adjacent finishes, fastener or connection requirements, and the condition of the substrate. Works on framed or frameless boxes; fillers and hinge adjustment prevent wall and corner collisions.
A successful full overlay cabinet installation begins with accurate field measurements and coordination before related cabinetry, plumbing, electrical work, framing, drywall, tile, countertops, or finish carpentry are completed. Manufacturer instructions and applicable building requirements should always take priority over assumptions based on appearance alone.
Common Applications
Full Overlay Cabinet is commonly used for:
Modern And Transitional Kitchens
Bathrooms
Built-Ins
Pantry Walls
Common Types
Common forms and configurations include:
Frameless Full Overlay
Face-Frame Full Overlay
Shaker
Slab
Appliance Panel
Advantages
Advantages include:
Creates an intentional, finished appearance
Supports efficient storage planning
Can be customized to the room and design style
Works with modern hardware and organizational accessories
Can improve daily function and perceived value
Allows the project team to tailor full overlay cabinet to the room's dimensions, use, and design goals
Disadvantages
Potential disadvantages and limitations include:
Requires accurate design measurements and installation
Poor materials or alignment remain visible
Moisture can damage unfinished edges and cabinet cores
Specialty construction and finishes may cost more
Walls, corners, and appliances must be coordinated carefully
Poor selection or installation of full overlay cabinet can create costly corrections after surrounding finishes are complete
When to Choose Full Overlay Cabinet
Choose full overlay cabinet when its function, appearance, and installation requirements support the complete remodeling plan. It is particularly appropriate for modern and transitional kitchens, bathrooms, built-ins, pantry walls. Compare products using real dimensions, technical data, maintenance expectations, and compatibility with nearby materials rather than selecting from a photograph alone.
Before ordering, confirm rough openings, finished thicknesses, clearances, loads, plumbing or electrical locations, and any manufacturer-specific accessories. The goal is not simply to include full overlay cabinet, but to integrate it so it operates comfortably and looks intentional after every surrounding finish is installed.
Pristine Pro Tip 💡
Treat full overlay cabinet as an early coordination item, not a last-minute accessory. Works on framed or frameless boxes; fillers and hinge adjustment prevent wall and corner collisions. We verify the exact product information and installation conditions before dependent materials are fabricated or walls are closed. That extra planning protects both the finished appearance and the homeowner's investment.
Common Mistake ❌
A common mistake is assuming products with the same general name or nominal size are interchangeable. Small differences in dimensions, mounting, support, clearances, finish thickness, or service access can change the entire installation. Another mistake is expecting caulk, trim, shims, or field cutting to correct a condition that should have been resolved during design and rough construction.
Designer Insight 🎨
Full Overlay Cabinet should feel connected to the room rather than selected in isolation. Its scale, lines, finish, and visual weight should relate to the cabinetry, countertop, tile, lighting, hardware, and architecture. Repeating a small number of intentional details usually creates a more polished result than adding unrelated decorative features.
Florida Rating 🌴
⭐⭐⭐⭐⭐ Excellent
Full Overlay Cabinet can perform very well in Florida when cabinet cores, exposed edges, hardware, and floor-level details are protected from plumbing leaks and humid air. Consistent indoor climate control, sealed field cuts, and prompt cleanup of water help preserve alignment and finish quality.
Maintenance Level
⭐⭐ Easy
Clean with a soft cloth and compatible cleaner, avoid prolonged moisture and abrasive chemicals, and correct loose hardware, damaged finish, or misalignment promptly.
Related Terms
• Frameless Cabinet
• Filler Strip
• Face Frame Cabinet
• Concealed Hinge
• Partial Overlay Cabinet
• Shaker Cabinet
• Inset Cabinet
• Cabinet Reveal
-
Furniture Toe Kick
Furniture Toe Kick
Definition
Furniture Toe Kick is a decorative cabinet-base treatment using feet, legs, arches, recessed sections, or a finished plinth to resemble freestanding furniture. In residential and commercial remodeling, this term affects not only the visible design but also installation sequence, surrounding materials, clearances, support, service access, and long-term performance.
The exact product or construction method varies by manufacturer and project. Common considerations include material quality, dimensions, compatibility with adjacent finishes, fastener or connection requirements, and the condition of the substrate. Must preserve comfortable toe space, structural support, floor cleaning, and moisture protection.
A successful furniture toe kick installation begins with accurate field measurements and coordination before related cabinetry, plumbing, electrical work, framing, drywall, tile, countertops, or finish carpentry are completed. Manufacturer instructions and applicable building requirements should always take priority over assumptions based on appearance alone.
Common Applications
Furniture Toe Kick is commonly used for:
Vanities
Islands
Hutches
Buffets
Built-Ins
Accent Cabinet Runs
Common Types
Common forms and configurations include:
Decorative Feet
Arched Valance
Furniture Legs
Flush Plinth
Recessed Center
Turned Feet
Bracket Feet
Advantages
Advantages include:
Adds furniture character and customization
Can visually lighten or distinguish cabinetry
Coordinates with decorative panels and molding
Works especially well on islands and vanities
Creates a more crafted appearance
Allows the project team to tailor furniture toe kick to the room's dimensions, use, and design goals
Disadvantages
Potential disadvantages and limitations include:
Adds labor and cost
Open areas collect dust
Feet and bases are vulnerable to mopping water
May reduce comfortable toe clearance
Overuse can make cabinetry visually busy
Poor selection or installation of furniture toe kick can create costly corrections after surrounding finishes are complete
When to Choose Furniture Toe Kick
Choose furniture toe kick when its function, appearance, and installation requirements support the complete remodeling plan. It is particularly appropriate for vanities, islands, hutches, buffets. Compare products using real dimensions, technical data, maintenance expectations, and compatibility with nearby materials rather than selecting from a photograph alone.
Before ordering, confirm rough openings, finished thicknesses, clearances, loads, plumbing or electrical locations, and any manufacturer-specific accessories. The goal is not simply to include furniture toe kick, but to integrate it so it operates comfortably and looks intentional after every surrounding finish is installed.
Pristine Pro Tip 💡
Treat furniture toe kick as an early coordination item, not a last-minute accessory. Must preserve comfortable toe space, structural support, floor cleaning, and moisture protection. We verify the exact product information and installation conditions before dependent materials are fabricated or walls are closed. That extra planning protects both the finished appearance and the homeowner's investment.
Common Mistake ❌
A common mistake is assuming products with the same general name or nominal size are interchangeable. Small differences in dimensions, mounting, support, clearances, finish thickness, or service access can change the entire installation. Another mistake is expecting caulk, trim, shims, or field cutting to correct a condition that should have been resolved during design and rough construction.
Designer Insight 🎨
Furniture Toe Kick should feel connected to the room rather than selected in isolation. Its scale, lines, finish, and visual weight should relate to the cabinetry, countertop, tile, lighting, hardware, and architecture. Repeating a small number of intentional details usually creates a more polished result than adding unrelated decorative features.
Florida Rating 🌴
⭐⭐⭐⭐⭐ Excellent
Furniture Toe Kick can perform very well in Florida when cabinet cores, exposed edges, hardware, and floor-level details are protected from plumbing leaks and humid air. Consistent indoor climate control, sealed field cuts, and prompt cleanup of water help preserve alignment and finish quality.
Maintenance Level
⭐⭐ Easy
Clean with a soft cloth and compatible cleaner, avoid prolonged moisture and abrasive chemicals, and correct loose hardware, damaged finish, or misalignment promptly.
Related Terms
• Toe Kick
• Kitchen Island
• Furniture Vanity
• Finish Carpentry
• Decorative End Panel
• Base Cabinet
• Cabinet Leg
• Valance
-
Furniture Vanity
Furniture Vanity
Definition
Furniture Vanity is a vanity designed to resemble a freestanding furniture piece through legs, feet, decorative sides, open shelves, or a finished base. In residential and commercial remodeling, this term affects not only the visible design but also installation sequence, surrounding materials, clearances, support, service access, and long-term performance.
The exact product or construction method varies by manufacturer and project. Common considerations include material quality, dimensions, compatibility with adjacent finishes, fastener or connection requirements, and the condition of the substrate. Secure it to the wall; protect wood from water; coordinate drawers, sink depth, plumbing, counter height, and stone load.
A successful furniture vanity installation begins with accurate field measurements and coordination before related cabinetry, plumbing, electrical work, framing, drywall, tile, countertops, or finish carpentry are completed. Manufacturer instructions and applicable building requirements should always take priority over assumptions based on appearance alone.
Common Applications
Furniture Vanity is commonly used for:
Powder Rooms
Primary Baths
Guest Baths
Traditional And Transitional Bathrooms
Common Types
Common forms and configurations include:
Freestanding
Leg-Style
Console
Open-Shelf
Dresser Conversion
Custom
Double Vanity
Advantages
Advantages include:
Creates storage and establishes the bathroom design
Can be customized for sink, plumbing, and user height
Available in many materials and configurations
Coordinates with mirrors, lighting, tile, and countertops
Can improve both function and perceived space
Allows the project team to tailor furniture vanity to the room's dimensions, use, and design goals
Disadvantages
Potential disadvantages and limitations include:
Requires careful wall, floor, plumbing, and countertop coordination
Water can damage cabinet materials
Special installations may cost more
Storage may be reduced by plumbing or open space
Heavy tops require proper support
Poor selection or installation of furniture vanity can create costly corrections after surrounding finishes are complete
When to Choose Furniture Vanity
Choose furniture vanity when its function, appearance, and installation requirements support the complete remodeling plan. It is particularly appropriate for powder rooms, primary baths, guest baths, traditional and transitional bathrooms. Compare products using real dimensions, technical data, maintenance expectations, and compatibility with nearby materials rather than selecting from a photograph alone.
Before ordering, confirm rough openings, finished thicknesses, clearances, loads, plumbing or electrical locations, and any manufacturer-specific accessories. The goal is not simply to include furniture vanity, but to integrate it so it operates comfortably and looks intentional after every surrounding finish is installed.
Pristine Pro Tip 💡
Treat furniture vanity as an early coordination item, not a last-minute accessory. Secure it to the wall; protect wood from water; coordinate drawers, sink depth, plumbing, counter height, and stone load. We verify the exact product information and installation conditions before dependent materials are fabricated or walls are closed. That extra planning protects both the finished appearance and the homeowner's investment.
Common Mistake ❌
A common mistake is assuming products with the same general name or nominal size are interchangeable. Small differences in dimensions, mounting, support, clearances, finish thickness, or service access can change the entire installation. Another mistake is expecting caulk, trim, shims, or field cutting to correct a condition that should have been resolved during design and rough construction.
Designer Insight 🎨
Furniture Vanity should feel connected to the room rather than selected in isolation. Its scale, lines, finish, and visual weight should relate to the cabinetry, countertop, tile, lighting, hardware, and architecture. Repeating a small number of intentional details usually creates a more polished result than adding unrelated decorative features.
Florida Rating 🌴
⭐⭐⭐⭐⭐ Excellent
Furniture Vanity can perform very well in Florida when cabinet cores, exposed edges, hardware, and floor-level details are protected from plumbing leaks and humid air. Consistent indoor climate control, sealed field cuts, and prompt cleanup of water help preserve alignment and finish quality.
Maintenance Level
⭐⭐ Easy
Clean with a soft cloth and compatible cleaner, avoid prolonged moisture and abrasive chemicals, and correct loose hardware, damaged finish, or misalignment promptly.
• Floating Vanity
• Bathroom Vanity
• Furniture Toe Kick
• Console Sink
• Vessel Sink
• Custom Cabinetry
• Undermount Sink
• Quartz Countertop
-
Floating Toilet
Floating Toilet
Definition
Floating Toilet is a wall-hung toilet bowl supported by a concealed structural carrier with the tank and flushing components inside the wall. In residential and commercial remodeling, this term affects not only the visible design but also installation sequence, surrounding materials, clearances, support, service access, and long-term performance.
The exact product or construction method varies by manufacturer and project. Common considerations include material quality, dimensions, compatibility with adjacent finishes, fastener or connection requirements, and the condition of the substrate. Select carrier, bowl, actuator, wall depth, and finished height as one system; service occurs through the actuator opening.
A successful floating toilet installation begins with accurate field measurements and coordination before related cabinetry, plumbing, electrical work, framing, drywall, tile, countertops, or finish carpentry are completed. Manufacturer instructions and applicable building requirements should always take priority over assumptions based on appearance alone.
Common Applications
Floating Toilet is commonly used for:
Modern Bathrooms
Powder Rooms
Wet Rooms
Accessible Bathrooms
Compact Layouts
Common Types
Common forms and configurations include:
Standard Wall-Hung
Dual-Flush
Rimless
Bidet
Compact Projection
Ada-Height
Smart Toilet
Advantages
Advantages include:
Provides an important daily-use function
Available in multiple sizes, materials, and configurations
Can improve comfort and efficiency
Coordinates with surrounding cabinetry, tile, and countertops
Quality products can provide long service life
Allows the project team to tailor floating toilet to the room's dimensions, use, and design goals
Disadvantages
Potential disadvantages and limitations include:
Installation may require cabinet, countertop, or framing changes
Leaks can damage surrounding finishes
Heavy or specialty products may require added support
Replacement may be constrained by existing cutouts
Incorrect installation can affect drainage or service access
Poor selection or installation of floating toilet can create costly corrections after surrounding finishes are complete
When to Choose Floating Toilet
Choose floating toilet when its function, appearance, and installation requirements support the complete remodeling plan. It is particularly appropriate for modern bathrooms, powder rooms, wet rooms, accessible bathrooms. Compare products using real dimensions, technical data, maintenance expectations, and compatibility with nearby materials rather than selecting from a photograph alone.
Before ordering, confirm rough openings, finished thicknesses, clearances, loads, plumbing or electrical locations, and any manufacturer-specific accessories. The goal is not simply to include floating toilet, but to integrate it so it operates comfortably and looks intentional after every surrounding finish is installed.
Pristine Pro Tip 💡
Treat floating toilet as an early coordination item, not a last-minute accessory. Select carrier, bowl, actuator, wall depth, and finished height as one system; service occurs through the actuator opening. We verify the exact product information and installation conditions before dependent materials are fabricated or walls are closed. That extra planning protects both the finished appearance and the homeowner's investment.
Common Mistake ❌
A common mistake is assuming products with the same general name or nominal size are interchangeable. Small differences in dimensions, mounting, support, clearances, finish thickness, or service access can change the entire installation. Another mistake is expecting caulk, trim, shims, or field cutting to correct a condition that should have been resolved during design and rough construction.
Designer Insight 🎨
Floating Toilet should feel connected to the room rather than selected in isolation. Its scale, lines, finish, and visual weight should relate to the cabinetry, countertop, tile, lighting, hardware, and architecture. Repeating a small number of intentional details usually creates a more polished result than adding unrelated decorative features.
Florida Rating 🌴
⭐⭐⭐⭐⭐ Excellent
Floating Toilet is well suited to Florida homes, but mineral content, sediment, humidity, and concealed condensation can affect long-term performance. Use quality corrosion-resistant components, keep service information, and address drips or restricted flow promptly.
Maintenance Level
⭐⭐ Easy to Moderate
Clean with manufacturer-approved products, monitor for leaks or restricted flow, and service replaceable components before surrounding materials are damaged.
Related Terms
• Wall-Hung Toilet
• Bidet Toilet
• Concealed Cistern
• Wet Room
• Actuator Plate
• Floor Drain
• Comfort-Height Toilet
• Wall Blocking
Remodeling Glossary-F FAQs
Explore common questions related to remodeling terminology, construction vocabulary, and design language to better understand the terms featured in Letter F.
What's the difference between floating floors and glued flooring?
Floating floors lock together without being permanently attached to the subfloor, while glued flooring uses adhesives for additional stability depending on the material and installation requirements.
Does flooring direction matter?
Yes. The direction flooring is installed can influence how large a room feels and how spaces visually connect throughout the home.
Why is finish carpentry considered specialized work?
Finish carpentry includes detailed installation of trim, molding, doors, and built-ins that require precision craftsmanship and careful attention to detail.
How do I choose the right flooring for Florida homes?
Humidity, moisture resistance, maintenance, and lifestyle all play important roles when selecting flooring materials for Florida's climate.
Is faucet aerator appropriate for every remodeling project?
Not necessarily. The correct choice depends on the room, dimensions, substrate, budget, design style, maintenance expectations, and surrounding systems. A qualified remodeling professional can determine whether faucet aerator fits the specific project and identify coordination issues before ordering.
What should be confirmed before installing faucet aerator?
Confirm the exact product, finished dimensions, manufacturer requirements, substrate or structural support, required clearances, adjacent finish thicknesses, and access for future cleaning or service. For regulated work, applicable code and permit requirements must also be verified.
What should be confirmed before installing farmhouse sink?
Confirm the exact product, finished dimensions, manufacturer requirements, substrate or structural support, required clearances, adjacent finish thicknesses, and access for future cleaning or service. For regulated work, applicable code and permit requirements must also be verified.
Is farmhouse sink appropriate for every remodeling project?
Not necessarily. The correct choice depends on the room, dimensions, substrate, budget, design style, maintenance expectations, and surrounding systems. A qualified remodeling professional can determine whether farmhouse sink fits the specific project and identify coordination issues before ordering.
Title or Question
What should be confirmed before installing faucet cartridge?
Confirm the exact product, finished dimensions, manufacturer requirements, substrate or structural support, required clearances, adjacent finish thicknesses, and access for future cleaning or service. For regulated work, applicable code and permit requirements must also be verified.
Is faucet cartridge appropriate for every remodeling project?
Not necessarily. The correct choice depends on the room, dimensions, substrate, budget, design style, maintenance expectations, and surrounding systems. A qualified remodeling professional can determine whether faucet cartridge fits the specific project and identify coordination issues before ordering.
What should be confirmed before installing filler strip?
Confirm the exact product, finished dimensions, manufacturer requirements, substrate or structural support, required clearances, adjacent finish thicknesses, and access for future cleaning or service. For regulated work, applicable code and permit requirements must also be verified.
Is filler strip appropriate for every remodeling project?
Not necessarily. The correct choice depends on the room, dimensions, substrate, budget, design style, maintenance expectations, and surrounding systems. A qualified remodeling professional can determine whether filler strip fits the specific project and identify coordination issues before ordering.
What should be confirmed before installing finger pull?
Confirm the exact product, finished dimensions, manufacturer requirements, substrate or structural support, required clearances, adjacent finish thicknesses, and access for future cleaning or service. For regulated work, applicable code and permit requirements must also be verified.
Is finger pull appropriate for every remodeling project?
Not necessarily. The correct choice depends on the room, dimensions, substrate, budget, design style, maintenance expectations, and surrounding systems. A qualified remodeling professional can determine whether finger pull fits the specific project and identify coordination issues before ordering.
What should be confirmed before installing finish carpentry?
Confirm the exact product, finished dimensions, manufacturer requirements, substrate or structural support, required clearances, adjacent finish thicknesses, and access for future cleaning or service. For regulated work, applicable code and permit requirements must also be verified.
Is finish carpentry appropriate for every remodeling project?
Not necessarily. The correct choice depends on the room, dimensions, substrate, budget, design style, maintenance expectations, and surrounding systems. A qualified remodeling professional can determine whether finish carpentry fits the specific project and identify coordination issues before ordering.
What should be confirmed before installing fireclay sink?
Confirm the exact product, finished dimensions, manufacturer requirements, substrate or structural support, required clearances, adjacent finish thicknesses, and access for future cleaning or service. For regulated work, applicable code and permit requirements must also be verified.
Is fireclay sink appropriate for every remodeling project?
Not necessarily. The correct choice depends on the room, dimensions, substrate, budget, design style, maintenance expectations, and surrounding systems. A qualified remodeling professional can determine whether fireclay sink fits the specific project and identify coordination issues before ordering.
What should be confirmed before installing fire-rated drywall?
Confirm the exact product, finished dimensions, manufacturer requirements, substrate or structural support, required clearances, adjacent finish thicknesses, and access for future cleaning or service. For regulated work, applicable code and permit requirements must also be verified.
Is fire-rated drywall appropriate for every remodeling project?
Not necessarily. The correct choice depends on the room, dimensions, substrate, budget, design style, maintenance expectations, and surrounding systems. A qualified remodeling professional can determine whether fire-rated drywall fits the specific project and identify coordination issues before ordering.
What should be confirmed before installing flat panel cabinet?
Confirm the exact product, finished dimensions, manufacturer requirements, substrate or structural support, required clearances, adjacent finish thicknesses, and access for future cleaning or service. For regulated work, applicable code and permit requirements must also be verified.
Is flat panel cabinet appropriate for every remodeling project?
Not necessarily. The correct choice depends on the room, dimensions, substrate, budget, design style, maintenance expectations, and surrounding systems. A qualified remodeling professional can determine whether flat panel cabinet fits the specific project and identify coordination issues before ordering.
What should be confirmed before installing floating shelf?
Confirm the exact product, finished dimensions, manufacturer requirements, substrate or structural support, required clearances, adjacent finish thicknesses, and access for future cleaning or service. For regulated work, applicable code and permit requirements must also be verified.
Is floating shelf appropriate for every remodeling project?
Not necessarily. The correct choice depends on the room, dimensions, substrate, budget, design style, maintenance expectations, and surrounding systems. A qualified remodeling professional can determine whether floating shelf fits the specific project and identify coordination issues before ordering.
What should be confirmed before installing floating vanity?
Confirm the exact product, finished dimensions, manufacturer requirements, substrate or structural support, required clearances, adjacent finish thicknesses, and access for future cleaning or service. For regulated work, applicable code and permit requirements must also be verified.
Is floating vanity appropriate for every remodeling project?
Not necessarily. The correct choice depends on the room, dimensions, substrate, budget, design style, maintenance expectations, and surrounding systems. A qualified remodeling professional can determine whether floating vanity fits the specific project and identify coordination issues before ordering.
What should be confirmed before installing flush baseboard?
Confirm the exact product, finished dimensions, manufacturer requirements, substrate or structural support, required clearances, adjacent finish thicknesses, and access for future cleaning or service. For regulated work, applicable code and permit requirements must also be verified.
Is flush baseboard appropriate for every remodeling project?
Not necessarily. The correct choice depends on the room, dimensions, substrate, budget, design style, maintenance expectations, and surrounding systems. A qualified remodeling professional can determine whether flush baseboard fits the specific project and identify coordination issues before ordering.
What should be confirmed before installing flush door?
Confirm the exact product, finished dimensions, manufacturer requirements, substrate or structural support, required clearances, adjacent finish thicknesses, and access for future cleaning or service. For regulated work, applicable code and permit requirements must also be verified.
Is flush door appropriate for every remodeling project?
Not necessarily. The correct choice depends on the room, dimensions, substrate, budget, design style, maintenance expectations, and surrounding systems. A qualified remodeling professional can determine whether flush door fits the specific project and identify coordination issues before ordering.
What should be confirmed before installing flush mount lighting?
Confirm the exact product, finished dimensions, manufacturer requirements, substrate or structural support, required clearances, adjacent finish thicknesses, and access for future cleaning or service. For regulated work, applicable code and permit requirements must also be verified.
Is flush mount lighting appropriate for every remodeling project?
Not necessarily. The correct choice depends on the room, dimensions, substrate, budget, design style, maintenance expectations, and surrounding systems. A qualified remodeling professional can determine whether flush mount lighting fits the specific project and identify coordination issues before ordering.
What should be confirmed before installing floor drain?
Confirm the exact product, finished dimensions, manufacturer requirements, substrate or structural support, required clearances, adjacent finish thicknesses, and access for future cleaning or service. For regulated work, applicable code and permit requirements must also be verified.
Is floor drain appropriate for every remodeling project?
Not necessarily. The correct choice depends on the room, dimensions, substrate, budget, design style, maintenance expectations, and surrounding systems. A qualified remodeling professional can determine whether floor drain fits the specific project and identify coordination issues before ordering.
What should be confirmed before installing floor joist?
Confirm the exact product, finished dimensions, manufacturer requirements, substrate or structural support, required clearances, adjacent finish thicknesses, and access for future cleaning or service. For regulated work, applicable code and permit requirements must also be verified.
Is floor joist appropriate for every remodeling project?
Not necessarily. The correct choice depends on the room, dimensions, substrate, budget, design style, maintenance expectations, and surrounding systems. A qualified remodeling professional can determine whether floor joist fits the specific project and identify coordination issues before ordering.
What should be confirmed before installing floor leveling?
Confirm the exact product, finished dimensions, manufacturer requirements, substrate or structural support, required clearances, adjacent finish thicknesses, and access for future cleaning or service. For regulated work, applicable code and permit requirements must also be verified.
Is floor leveling appropriate for every remodeling project?
Not necessarily. The correct choice depends on the room, dimensions, substrate, budget, design style, maintenance expectations, and surrounding systems. A qualified remodeling professional can determine whether floor leveling fits the specific project and identify coordination issues before ordering.
What should be confirmed before installing foot candle?
Confirm the exact product, finished dimensions, manufacturer requirements, substrate or structural support, required clearances, adjacent finish thicknesses, and access for future cleaning or service. For regulated work, applicable code and permit requirements must also be verified.
Is foot candle appropriate for every remodeling project?
Not necessarily. The correct choice depends on the room, dimensions, substrate, budget, design style, maintenance expectations, and surrounding systems. A qualified remodeling professional can determine whether foot candle fits the specific project and identify coordination issues before ordering.
What should be confirmed before installing french cleat?
Confirm the exact product, finished dimensions, manufacturer requirements, substrate or structural support, required clearances, adjacent finish thicknesses, and access for future cleaning or service. For regulated work, applicable code and permit requirements must also be verified.
Is french cleat appropriate for every remodeling project?
Not necessarily. The correct choice depends on the room, dimensions, substrate, budget, design style, maintenance expectations, and surrounding systems. A qualified remodeling professional can determine whether french cleat fits the specific project and identify coordination issues before ordering.
What should be confirmed before installing framing?
Confirm the exact product, finished dimensions, manufacturer requirements, substrate or structural support, required clearances, adjacent finish thicknesses, and access for future cleaning or service. For regulated work, applicable code and permit requirements must also be verified.
Is framing appropriate for every remodeling project?
Not necessarily. The correct choice depends on the room, dimensions, substrate, budget, design style, maintenance expectations, and surrounding systems. A qualified remodeling professional can determine whether framing fits the specific project and identify coordination issues before ordering.
What should be confirmed before installing frameless cabinet?
Confirm the exact product, finished dimensions, manufacturer requirements, substrate or structural support, required clearances, adjacent finish thicknesses, and access for future cleaning or service. For regulated work, applicable code and permit requirements must also be verified.
Is frameless cabinet appropriate for every remodeling project?
Not necessarily. The correct choice depends on the room, dimensions, substrate, budget, design style, maintenance expectations, and surrounding systems. A qualified remodeling professional can determine whether frameless cabinet fits the specific project and identify coordination issues before ordering.
What should be confirmed before installing frameless shower?
Confirm the exact product, finished dimensions, manufacturer requirements, substrate or structural support, required clearances, adjacent finish thicknesses, and access for future cleaning or service. For regulated work, applicable code and permit requirements must also be verified.
Is frameless shower appropriate for every remodeling project?
Not necessarily. The correct choice depends on the room, dimensions, substrate, budget, design style, maintenance expectations, and surrounding systems. A qualified remodeling professional can determine whether frameless shower fits the specific project and identify coordination issues before ordering.
What should be confirmed before installing frosted glass?
Confirm the exact product, finished dimensions, manufacturer requirements, substrate or structural support, required clearances, adjacent finish thicknesses, and access for future cleaning or service. For regulated work, applicable code and permit requirements must also be verified.
Is frosted glass appropriate for every remodeling project?
Not necessarily. The correct choice depends on the room, dimensions, substrate, budget, design style, maintenance expectations, and surrounding systems. A qualified remodeling professional can determine whether frosted glass fits the specific project and identify coordination issues before ordering.
What should be confirmed before installing full extension drawer slides?
Confirm the exact product, finished dimensions, manufacturer requirements, substrate or structural support, required clearances, adjacent finish thicknesses, and access for future cleaning or service. For regulated work, applicable code and permit requirements must also be verified.
Is full extension drawer slides appropriate for every remodeling project?
Not necessarily. The correct choice depends on the room, dimensions, substrate, budget, design style, maintenance expectations, and surrounding systems. A qualified remodeling professional can determine whether full extension drawer slides fits the specific project and identify coordination issues before ordering.
What should be confirmed before installing full height backsplash?
Confirm the exact product, finished dimensions, manufacturer requirements, substrate or structural support, required clearances, adjacent finish thicknesses, and access for future cleaning or service. For regulated work, applicable code and permit requirements must also be verified.
Is full height backsplash appropriate for every remodeling project?
Not necessarily. The correct choice depends on the room, dimensions, substrate, budget, design style, maintenance expectations, and surrounding systems. A qualified remodeling professional can determine whether full height backsplash fits the specific project and identify coordination issues before ordering.
What should be confirmed before installing full overlay cabinet?
Confirm the exact product, finished dimensions, manufacturer requirements, substrate or structural support, required clearances, adjacent finish thicknesses, and access for future cleaning or service. For regulated work, applicable code and permit requirements must also be verified.
Is full overlay cabinet appropriate for every remodeling project?
Not necessarily. The correct choice depends on the room, dimensions, substrate, budget, design style, maintenance expectations, and surrounding systems. A qualified remodeling professional can determine whether full overlay cabinet fits the specific project and identify coordination issues before ordering
What should be confirmed before installing furniture toe kick?
Confirm the exact product, finished dimensions, manufacturer requirements, substrate or structural support, required clearances, adjacent finish thicknesses, and access for future cleaning or service. For regulated work, applicable code and permit requirements must also be verified.
Is furniture toe kick appropriate for every remodeling project?
Not necessarily. The correct choice depends on the room, dimensions, substrate, budget, design style, maintenance expectations, and surrounding systems. A qualified remodeling professional can determine whether furniture toe kick fits the specific project and identify coordination issues before ordering.
What should be confirmed before installing furniture vanity?
Confirm the exact product, finished dimensions, manufacturer requirements, substrate or structural support, required clearances, adjacent finish thicknesses, and access for future cleaning or service. For regulated work, applicable code and permit requirements must also be verified.
Is furniture vanity appropriate for every remodeling project?
Not necessarily. The correct choice depends on the room, dimensions, substrate, budget, design style, maintenance expectations, and surrounding systems. A qualified remodeling professional can determine whether furniture vanity fits the specific project and identify coordination issues before ordering.
What should be confirmed before installing floating toilet?
Confirm the exact product, finished dimensions, manufacturer requirements, substrate or structural support, required clearances, adjacent finish thicknesses, and access for future cleaning or service. For regulated work, applicable code and permit requirements must also be verified.
Is floating toilet appropriate for every remodeling project?
Not necessarily. The correct choice depends on the room, dimensions, substrate, budget, design style, maintenance expectations, and surrounding systems. A qualified remodeling professional can determine whether floating toilet fits the specific project and identify coordination issues before ordering.