
Glossary- Letter D
Some of the most important parts of a remodel happen behind the finished surfaces.
Letter D explains structural and construction-related terms like drywall, demolition, and drainage in a way that feels practical and approachable.
-
Dado Joint
Dado Joint
Definition
An dado joint is a woodworking joint formed by cutting a flat-bottomed channel across the grain of one board so another piece can fit into it. In residential and commercial remodeling, it is commonly associated with cabinetry, built-ins, shelving, drawer construction, closet systems, wall paneling, and custom millwork.
Depending on the application, dado joint systems may involve solid wood, plywood, MDF, and other sheet goods. Product selection, dimensions, installation details, compatibility, and manufacturer requirements all influence how well the finished installation performs.
Although homeowners may encounter the term during design or construction, its importance extends beyond appearance. Proper planning and installation help protect surrounding materials, improve daily function, and reduce the likelihood of premature failure or costly corrective work.
Common Applications
Dado Joint is commonly used for:
- Cabinet shelves
- Bookcases
- Built-in storage
- Closet systems
- Pantry shelving
- Drawer dividers
- Window seats
- Entertainment centers
- Wall panel systems
- Custom furniture
- Common Types of Dado Joint
- Common variations include:
- Through dado
- Stopped dado
- Rabbet-and-dado joint
- Sliding dado
Dado reinforced with adhesive or fasteners
Each type is intended for a particular combination of use, material, installation method, performance requirement, and design preference.
Advantages
- Creates a strong mechanical connection
- Keeps shelves aligned during assembly
- Increases glue surface area
- Reduces reliance on visible fasteners
- Supports repeatable cabinet construction
- Can be concealed in finished work
- Provides better resistance to racking than a simple butt joint
- Works with solid wood and engineered panels
Disadvantages
- Requires accurate layout and cutting
- A channel cut too deeply can weaken the receiving panel
- Loose-fitting dados reduce strength
- Tight dados can split or distort sheet goods
- Specialized tools or jigs may be needed
- Errors are difficult to hide on exposed millwork
When to Choose Dado Joint
Dado Joint is commonly selected when the project involves:
- Custom cabinetry
- Built-in shelving
- Heavy-duty pantry storage
- Projects requiring clean concealed joinery
- Millwork where accurate alignment matters
- Furniture-grade construction
- Shelving that must resist sagging or side movement
The final choice should be coordinated with the project drawings, site conditions, applicable codes, manufacturer instructions, and the needs of the people using the space.
Pristine Pro Tip 💡
The strength of a dado joint depends on fit, depth, and panel quality. A well-cut dado should accept the mating piece without being forced and without visible side-to-side play. For cabinet work, we also account for the actual thickness of plywood, which is often slightly less than its nominal dimension.
Common Mistake ❌
A common mistake is cutting the dado based only on the stated panel thickness. A sheet labeled 3/4 inch may measure less, producing a loose joint. Another mistake is cutting too deeply; removing more than roughly one-third of the receiving panel thickness can unnecessarily weaken it.
Designer Insight 🎨
Dado joints are usually invisible after installation, but they contribute to the crisp lines and long-term stability associated with well-built cabinetry. They are especially valuable in open shelving and built-ins where visible metal brackets would interrupt the design.
Florida Rating 🌴
⭐⭐⭐⭐⭐ Excellent
Dado joints perform very well in Florida when the wood products are properly acclimated, sealed, and protected from moisture. Because humidity can cause wood movement and edge swelling in lower-grade panels, moisture-resistant materials and finished edges are important in kitchens, bathrooms, laundry rooms, and coastal homes.
Maintenance Level
⭐ None
The joint itself requires no direct maintenance once assembled and finished. Protect the surrounding cabinetry from leaks, prolonged humidity, and overloading. Movement, separation, or swelling usually indicates moisture intrusion or structural stress rather than a need to re-glue the visible edge.
Related Terms
Cabinet Box
Plywood
MDF
Built-In Cabinetry
Shelf Pin
Rabbet Joint
Millwork
Wood Glue
Finish Carpentry
Drawer Box
-
Damp Location
Damp Location
Definition
An damp location is an area that is regularly exposed to humidity or occasional condensation but is not normally subjected to direct saturation or standing water. In residential and commercial remodeling, it is commonly associated with electrical fixture selection, lighting, ventilation, cabinetry, wall finishes, and material specifications.
Depending on the application, damp location systems may involve lighting fixtures, fans, electrical devices, coatings, and finish materials carrying an appropriate damp-location rating. Product selection, dimensions, installation details, compatibility, and manufacturer requirements all influence how well the finished installation performs.
Although homeowners may encounter the term during design or construction, its importance extends beyond appearance.
Proper planning and installation help protect surrounding materials, improve daily function, and reduce the likelihood of premature failure or costly corrective work.
Common Applications
Damp Location is commonly used for:
- Bathrooms outside direct shower spray
- Covered lanais
- Covered porches
- Laundry rooms
- Utility rooms
- Basements
- Garage areas protected from rain
- Kitchen zones with high humidity
- Pool-adjacent covered areas
- Commercial restrooms
- Common Types of Damp Location
- Common variations include:
- Interior damp location
- Covered exterior damp location
- High-humidity room
- Condensation-prone location
- Wet location, which is a separate and more demanding classification
- Each type is intended for a particular combination of use, material, installation method, performance requirement, and design preference.
Advantages
- Improves safety in humid environments
- Helps prevent premature corrosion
- Supports code-compliant fixture selection
- Extends product service life
- Reduces finish deterioration
- Provides more design options than wet-location-only products
- Suitable for many covered Florida exterior spaces
- Clarifies where standard dry-rated products should not be used
Disadvantages
- A damp rating does not permit direct water exposure
- Product labels can be misunderstood
- Some decorative fixtures are not available with damp ratings
- Coastal air may require additional corrosion resistance
- Improper placement can void warranties
- Local code and manufacturer instructions still apply
When to Choose Damp Location
Damp Location is commonly selected when the project involves:
- Bathroom lighting outside shower or tub zones
- Covered outdoor ceilings
- Laundry and utility rooms
- Rooms with frequent condensation
- Covered pool or patio spaces
- Projects where humidity is consistently elevated
- Any location identified by the manufacturer or electrician as damp
The final choice should be coordinated with the project drawings, site conditions, applicable codes, manufacturer instructions, and the needs of the people using the space.
Pristine Pro Tip 💡
Always distinguish between damp-rated and wet-rated products before purchasing. A damp-rated light may be appropriate above a bathroom vanity or on a covered porch, but a fixture exposed to shower spray, wind-driven rain, or an uncovered exterior requires a wet-location rating.
Common Mistake ❌
The most common mistake is assuming that “damp” means waterproof. Damp-rated products are intended for moisture in the air or limited condensation, not direct spray. Another mistake is using an indoor decorative fixture on a covered lanai without confirming that humidity and corrosion are addressed by its listing.
Designer Insight 🎨
Damp-location ratings no longer require sacrificing style. Many decorative pendants, sconces, recessed lights, and ceiling fans are available in finishes and silhouettes suitable for high-end bathrooms and covered outdoor living areas.
Florida Rating 🌴
⭐⭐⭐⭐⭐ Excellent
Florida homes contain many damp locations because of high ambient humidity, frequent storms, air-conditioned interiors, and extensive covered outdoor living. Selecting properly rated fixtures and corrosion-resistant finishes is especially important near pools, coastal areas, and rooms with limited ventilation.
Maintenance Level
⭐⭐ Easy
Wipe fixtures and finishes regularly with a soft dry or slightly damp cloth. Inspect for corrosion, peeling finishes, loose seals, or moisture inside lenses. Correct ventilation or water intrusion if condensation is persistent.
Related Terms
Wet Location
Bathroom Ventilation
Exhaust Fan
Recessed Lighting
GFCI
IP Rating
Covered Lanai
Humidity
Electrical Rough-In
Vanity Lighting
-
Deck Mounted Faucet
Deck Mounted Faucet
Definition
An deck mounted faucet is a faucet installed through predrilled holes in a horizontal surface such as a countertop, sink deck, tub deck, or vanity top. In residential and commercial remodeling, it is commonly associated with kitchen sinks, bathroom vanities, Roman tubs, bar sinks, prep sinks, and laundry rooms.
Depending on the application, deck mounted faucet systems may involve brass, stainless steel, zinc alloys, ceramic cartridges, flexible supply lines, and decorative plated or powder-coated finishes. Product selection, dimensions, installation details, compatibility, and manufacturer requirements all influence how well the finished installation performs.
Although homeowners may encounter the term during design or construction, its importance extends beyond appearance. Proper planning and installation help protect surrounding materials, improve daily function, and reduce the likelihood of premature failure or costly corrective work.
Common Applications
Deck Mounted Faucet is commonly used for:
- Kitchen countertops
- Bathroom vanity tops
- Integrated sink decks
- Drop-in sinks
- Bar sinks
- Prep sinks
- Laundry sinks
- Roman tubs
- Freestanding vanity furniture
- Commercial counters
Common Types of Deck Mounted Faucet
Common variations include:
- Single-hole faucet
- Centerset faucet
- Widespread faucet
- Bridge faucet
- Deck-mounted tub filler
- Deck-mounted faucet with side spray or accessories
- Each type is intended for a particular combination of use, material, installation method, performance requirement, and design preference.
Advantages
- Familiar installation method
- Wide range of styles and price points
- Easier service access than many wall-mounted faucets
- Compatible with numerous sinks and countertops
- Available in single-hole and multi-hole layouts
- Allows matching accessories such as soap dispensers
- Works with most traditional plumbing rough-ins
- Can be replaced without opening a wall
- Disadvantages
- Creates penetrations that must be sealed
- Requires enough deck space behind the sink or tub
- Can collect water and residue around the base
- Hole spacing must match the selected fixture
- Large faucet bases may interfere with backsplashes
- Tub deck fillers may require access panels for future repairs
When to Choose Deck Mounted Faucet
Deck Mounted Faucet is commonly selected when the project involves:
- Standard kitchen remodels
- Vanities with adequate counter depth
- Projects where easy future service is important
- Replacement projects using existing faucet holes
- Roman or platform tub installations
- Traditional, transitional, and modern designs
- Layouts where wall-mounted plumbing is impractical
The final choice should be coordinated with the project drawings, site conditions, applicable codes, manufacturer instructions, and the needs of the people using the space.
Pristine Pro Tip 💡
Select the faucet before countertop fabrication. The number, diameter, and spacing of holes must be coordinated with the sink, backsplash, accessories, and faucet handle movement. For tub decks, include a concealed but usable access panel for valves and supply connections.
Common Mistake ❌
A frequent mistake is drilling the countertop before confirming the exact faucet template. Another is placing the faucet too close to a backsplash, preventing the handle from operating fully or making the area difficult to clean.
Designer Insight 🎨
Deck-mounted faucets offer the broadest range of design choices. A single-hole faucet creates a streamlined appearance, a widespread faucet feels more tailored, and a bridge faucet can become a focal point in a traditional or transitional kitchen.
Florida Rating 🌴
⭐⭐⭐⭐⭐ Excellent
Deck-mounted faucets are well suited to Florida homes. In areas with hard or mineral-rich water, durable finishes and quality cartridges are important. Coastal homeowners should consider corrosion-resistant materials and avoid harsh cleaners that damage protective coatings.
Maintenance Level
⭐⭐ Easy
Wipe the faucet dry regularly, clean mineral deposits with manufacturer-approved products, and inspect the base for failed seals or moisture. Replace cartridges, aerators, or supply lines when leaks or flow problems occur.
Related Terms
Wall-Mounted Faucet
Widespread Faucet
Single-Hole Faucet
Bridge Faucet
Roman Tub
Faucet Cartridge
Aerator
Sink Deck
Countertop Fabrication
Plumbing Rough-In
-
Dekton
Dekton
Definition
An dekton is an ultra-compact engineered surface manufactured by compressing and sintering a refined blend of mineral-based raw materials under intense heat and pressure. In residential and commercial remodeling, it is commonly associated with kitchen countertops, bathroom vanities, shower walls, fireplace surrounds, exterior kitchens, wall cladding, and large-format architectural surfaces.
Depending on the application, dekton systems may involve a proprietary blend of glass, porcelain-related materials, and quartz-like mineral components formed into dense slabs. Product selection, dimensions, installation details, compatibility, and manufacturer requirements all influence how well the finished installation performs.
Although homeowners may encounter the term during design or construction, its importance extends beyond appearance. Proper planning and installation help protect surrounding materials, improve daily function, and reduce the likelihood of premature failure or costly corrective work.
Common Applications
Dekton is commonly used for:
- Kitchen countertops
- Waterfall islands
- Bathroom vanity tops
- Shower wall panels
- Backsplashes
- Fireplace surrounds
- Outdoor kitchens
- Exterior cladding
- Tabletops
- Commercial counters
Common Types of Dekton
Common variations include:
- Polished Dekton
- Matte Dekton
- Textured Dekton
- Solid-color designs
- Stone-look designs
- Wood- or concrete-inspired designs
- Large-format wall and floor panels
Each type is intended for a particular combination of use, material, installation method, performance requirement, and design preference.
Advantages
- Exceptional heat resistance
- Very low water absorption
- High resistance to UV fading
- Excellent stain resistance
- Suitable for indoor and outdoor use
- Available in large slab formats
- Resists many household chemicals
- Thin-profile applications are available
- Low routine maintenance
- Broad range of contemporary designs
Disadvantages
- Edges can chip from sharp impact
- Fabrication requires specialized equipment and experience
- Material and installation costs can be high
- Repairs may remain visible
- Some patterns have limited through-body coloration
- Heavy slabs require proper handling and support
- Not every fabricator is certified or experienced with the product
When to Choose Dekton
Dekton is commonly selected when the project involves:
- High-use kitchens
- Outdoor kitchens
- Contemporary interiors
- Large-format shower walls
- Projects requiring UV stability
- Homeowners who want minimal maintenance
- Fireplace or heat-adjacent surfaces
- Designs using thin or visually continuous slabs
The final choice should be coordinated with the project drawings, site conditions, applicable codes, manufacturer instructions, and the needs of the people using the space.
Pristine Pro Tip 💡
Dekton should be fabricated and installed by a shop experienced with ultra-compact surfaces. Edge profiles, cutout radiuses, support requirements, and handling methods matter because the material is extremely dense but can be vulnerable to impact at corners and unsupported cutouts.
Common Mistake ❌
A common mistake is treating Dekton exactly like quartz or granite during fabrication. The tools, cutting speed, corner details, and installation methods differ. Another mistake is striking exposed edges with heavy cookware or tools, which can cause chips.
Designer Insight 🎨
Dekton is especially effective when a project calls for visual continuity. The same finish may be carried from a countertop to a full-height backsplash, waterfall panel, shower wall, or outdoor surface, creating a tailored architectural look with fewer grout joints.
Florida Rating 🌴
⭐⭐⭐⭐⭐ Excellent
Dekton is an excellent Florida material because it resists moisture, sunlight, heat, staining, and outdoor exposure. It is particularly useful for lanais and outdoor kitchens, although cabinets, substrates, adhesives, and fasteners beneath it must also be rated for exterior conditions.
Maintenance Level
⭐ Very Easy
Clean with mild soap and water or manufacturer-approved cleaners. Use cutting boards to protect knives, avoid concentrated impacts on edges, and do not use abrasive pads that could alter the finish. No sealing is generally required.
Related Terms
Quartz Countertop
Porcelain Slab
Sintered Stone
Granite
Outdoor Kitchen
Waterfall Countertop
Full-Height Backsplash
Countertop Edge
Slab Fabrication
UV Resistance
-
Demolition
Demolition
Definition
A demolition is the controlled removal of existing finishes, fixtures, cabinets, walls, flooring, plumbing components, and other building elements in preparation for remodeling or reconstruction. In residential and commercial remodeling, it is commonly associated with kitchens, bathrooms, whole-home renovations, insurance rebuilds, commercial tenant improvements, and selective structural alterations.
Depending on the application, demolition systems may involve hand tools, power tools, dust-control equipment, protective barriers, dumpsters, debris chutes, and personal protective equipment. Product selection, dimensions, installation details, compatibility, and manufacturer requirements all influence how well the finished installation performs.
Although homeowners may encounter the term during design or construction, its importance extends beyond appearance. Proper planning and installation help protect surrounding materials, improve daily function, and reduce the likelihood of premature failure or costly corrective work.
Common Applications
Demolition is commonly used for:
- Removing cabinets and countertops
- Taking out tile and flooring
- Removing tubs and showers
- Opening walls for plumbing or electrical work
- Removing non-load-bearing partitions
- Exposing concealed damage
- Preparing commercial spaces
- Removing damaged drywall
- Salvaging reusable fixtures
- Correcting previous construction defects
Common Types of Demolition
Common variations include:
- Selective demolition
- Interior demolition
- Finish demolition
- Mechanical demolition
- Deconstruction for salvage
- Exploratory demolition
- Structural demolition performed under appropriate engineering and permitting
Each type is intended for a particular combination of use, material, installation method, performance requirement, and design preference.
Advantages
- Reveals concealed conditions
- Creates access for new systems
- Allows layouts and finishes to be updated
- Removes damaged or unsafe materials
- Provides a clean starting point
- Can identify leaks, rot, mold, or pest damage
- Supports recycling and salvage when planned
- Improves accuracy of reconstruction work
Disadvantages
- Creates dust, noise, and debris
- May reveal unforeseen damage
- Can affect adjacent occupied areas
- Improper demolition can damage utilities or structure
- Disposal costs can be significant
- Hazardous materials may require specialized handling
- Project schedules may change after concealed conditions are exposed
When to Choose Demolition
Demolition is commonly selected when the project involves:
- Full kitchen or bathroom remodels
- Projects replacing multiple finish layers
- Layouts requiring moved utilities
- Spaces with water or fire damage
- Remodels involving outdated systems
- Commercial tenant improvements
- Projects where existing work is failing or improperly installed
The final choice should be coordinated with the project drawings, site conditions, applicable codes, manufacturer instructions, and the needs of the people using the space.
Pristine Pro Tip 💡
Demolition should begin only after utilities are identified, shutoffs are confirmed, protection is installed, and the removal sequence is planned. Selective demolition is not random destruction; careful removal protects items that remain and gives the trades a cleaner, safer workspace.
Common Mistake ❌
The biggest mistake is beginning demolition without checking for plumbing, electrical wiring, gas lines, load-bearing conditions, or hazardous materials. Another is failing to isolate the work zone, allowing dust to spread through the home and HVAC system.
Designer Insight 🎨
Thoughtful demolition can preserve valuable architectural features while removing only what prevents the new design from working. Original doors, trim, hardware, cabinetry, or stone may sometimes be refinished, relocated, or donated rather than discarded.
Florida Rating 🌴
⭐⭐⭐⭐⭐ Excellent
Demolition is a necessary phase of Florida remodeling, particularly where leaks, high humidity, termites, and storm-related damage may be concealed. Older homes may also contain regulated materials, so age, testing requirements, and local disposal rules should be reviewed before work begins.
Maintenance Level
⭐ None
Demolition itself has no maintenance requirement, but the work area should be cleaned continuously, debris removed promptly, and temporary protection inspected throughout the project. After demolition, exposed framing and systems should remain dry and secure until reconstruction begins.
Related Terms
Dust Containment
Selective Demolition
Deconstruction
Load-Bearing Wall
Dumpster
Site Protection
Mold Remediation
Water Damage
Asbestos
Lead-Safe Practices
-
Designer Tile
Designer Tile
Definition
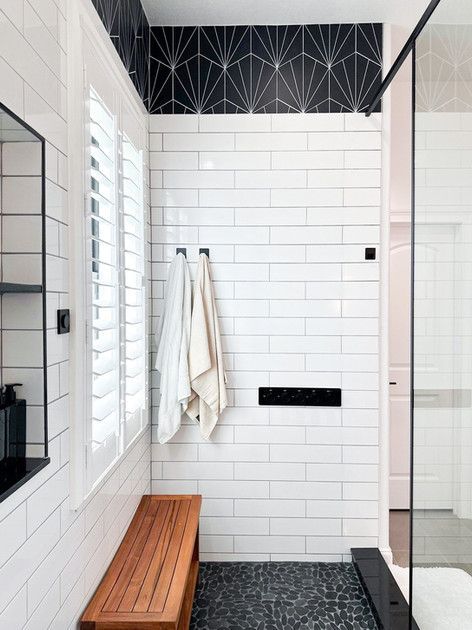
A designer tile is tile selected primarily for its distinctive color, pattern, texture, shape, scale, craftsmanship, or visual impact rather than for basic utility alone. In residential and commercial remodeling, it is commonly associated with backsplashes, shower accents, feature walls, niches, floors, fireplace surrounds, powder rooms, and custom commercial interiors.
Depending on the application, designer tile systems may involve ceramic, porcelain, glass, cement, natural stone, metal, terrazzo, handmade clay, and mixed-material mosaics. Product selection, dimensions, installation details, compatibility, and manufacturer requirements all influence how well the finished installation performs.
Although homeowners may encounter the term during design or construction, its importance extends beyond appearance. Proper planning and installation help protect surrounding materials, improve daily function, and reduce the likelihood of premature failure or costly corrective work.
Common Applications
Designer Tile is commonly used for:
- Kitchen backsplashes
- Shower feature walls
- Niche interiors
- Powder room floors
- Laundry room accents
- Fireplace surrounds
- Bar fronts
- Entry floors
- Vanity backsplashes
- Commercial reception areas
Common Types of Designer Tile
Common variations include:
- Handmade tile
- Encaustic-look tile
- Zellige-style tile
- Patterned porcelain
- Waterjet mosaic
- Large-format decorative tile
- Three-dimensional tile
- Metal or glass accent tile
Each type is intended for a particular combination of use, material, installation method, performance requirement, and design preference.
Advantages
- Creates a focal point
- Adds custom character
- Supports a defined design style
- Can elevate otherwise simple finishes
- Available in unusual shapes and colors
- May showcase artisan craftsmanship
- Works in small doses or full installations
- Adds texture and depth
- Helps distinguish a remodel from builder-grade work
Disadvantages
- Higher material cost
- Special-order lead times may be long
- Installation can require more labor and planning
- Pattern variation may be intentional but unexpected
- Some products require sealing
- Replacement pieces may be difficult to obtain later
- Complex layouts can increase waste
- Trendy patterns may date more quickly than classic finishes
When to Choose Designer Tile
Designer Tile is commonly selected when the project involves:
- Feature backsplashes
- Luxury bathrooms
- Powder rooms
- Projects needing a memorable focal point
- Homeowners who value artisan materials
- Spaces with otherwise restrained finishes
- Custom commercial interiors
Designs where pattern or texture is central
The final choice should be coordinated with the project drawings, site conditions, applicable codes, manufacturer instructions, and the needs of the people using the space.
Pristine Pro Tip 💡
Order samples and review several pieces together before approving a designer tile. Handmade, cement, stone, and specialty-glazed products often show intentional variation. We also recommend ordering sufficient overage because dye lots, batches, and future availability may change.
Common Mistake ❌
A common mistake is selecting tile from a single close-up image without considering the full repeat, grout color, lighting, and scale of the room. Another is failing to dry-lay patterned tile, which can produce awkward cuts or misaligned motifs.
Designer Insight 🎨
Designer tile is most successful when it has a clear role. A bold backsplash may pair best with quiet countertops and cabinetry, while a subtle handmade tile can add movement without dominating the room. Grout color can either emphasize the pattern or allow it to read as a unified surface.
Florida Rating 🌴
⭐⭐⭐⭐⭐ Excellent
Designer tile performs well in Florida when the product, substrate, mortar, grout, and sealer are selected for the environment. For showers, lanais, and floors, slip resistance, water absorption, thermal exposure, and cleaning requirements matter as much as appearance.
Maintenance Level
⭐⭐⭐ Varies
Maintenance depends on the material. Porcelain may need little more than routine cleaning, while cement, natural stone, crackle-glazed, or metallic tiles may require sealing and pH-neutral cleaners. Follow the manufacturer’s care instructions and retain spare pieces.
Related Terms
Backsplash
Mosaic Tile
Zellige Tile
Cement Tile
Porcelain Tile
Natural Stone Tile
Grout
Tile Layout
Feature Wall
Waterjet Mosaic
-
Dimmer Switch
Dimmer Switch
Definition
An dimmer switch is an electrical control that adjusts the amount of power delivered to a compatible light source, allowing the light level to be raised or lowered. In residential and commercial remodeling, it is commonly associated with ambient lighting, task lighting, decorative fixtures, recessed lights, under-cabinet lights, pendants, sconces, and smart-home lighting systems.
Depending on the application, dimmer switch systems may involve electronic control components, heat-dissipating devices, faceplates, wiring terminals, and sometimes wireless or networked controls. Product selection, dimensions, installation details, compatibility, and manufacturer requirements all influence how well the finished installation performs.
Although homeowners may encounter the term during design or construction, its importance extends beyond appearance. Proper planning and installation help protect surrounding materials, improve daily function, and reduce the likelihood of premature failure or costly corrective work.
Common Applications
Dimmer Switch is commonly used for:
- Kitchen recessed lighting
- Island pendants
- Dining lights
- Bathroom sconces
- Shower lighting where permitted
- Under-cabinet lighting
- Bedroom lighting
- Living room lighting
- Accent lighting
- Commercial conference rooms
- Common Types of Dimmer Switch
- Common variations include:
- Rotary dimmer
- Slide dimmer
- Toggle dimmer
- Touch dimmer
- Smart dimmer
- Multi-location dimmer
- 0-10V dimmer
LED-compatible phase-cut dimmer
Each type is intended for a particular combination of use, material, installation method, performance requirement, and design preference.
Advantages
- Adjustable light levels
- Improves ambiance
- Can reduce energy use
- Extends lamp life in some applications
- Allows task and mood lighting from the same fixture
- Supports layered lighting design
- Available with smart controls
- Can improve nighttime comfort
Disadvantages
- Must be compatible with the lamp and driver
- Incompatible combinations may flicker or buzz
- Some dimmers require a neutral wire
- Minimum and maximum load limits apply
- Multi-location wiring can be complex
- Low-quality LEDs may not dim smoothly
- Electronic dimmers can generate heat and require proper box capacity
When to Choose Dimmer Switch
Dimmer Switch is commonly selected when the project involves:
- Layered kitchen lighting
- Bathrooms requiring bright grooming and softer evening light
- Dining and entertaining areas
- Bedrooms
- Home theaters
- Accent lighting
- Smart-home upgrades
- Rooms with multiple lighting scenes
The final choice should be coordinated with the project drawings, site conditions, applicable codes, manufacturer instructions, and the needs of the people using the space.
Pristine Pro Tip 💡
Confirm compatibility among the dimmer, LED lamp, fixture driver, wattage, and wiring method. A product may be labeled “dimmable” yet still perform poorly with the wrong control. For integrated LED fixtures, use the manufacturer’s recommended dimmer list whenever available.
Common Mistake ❌
The most common mistake is installing a standard incandescent dimmer on LED fixtures without checking compatibility. This can cause flickering, humming, limited range, delayed startup, or premature failure. Another mistake is exceeding the dimmer’s rated load after accounting for LED derating requirements.
Designer Insight 🎨
Dimmers are one of the most effective ways to make a remodeled space feel intentional. Bright task lighting can be used for cooking, cleaning, or grooming, then lowered to create a softer atmosphere. Coordinated wall controls also help the finished electrical layout look clean.
Florida Rating 🌴
⭐⭐⭐⭐⭐ Excellent
Dimmers perform well in Florida and can reduce lighting heat load and energy use. In homes affected by voltage fluctuations or storm-related power events, quality listed devices and appropriate surge protection can help protect electronic lighting controls.
Maintenance Level
⭐ Very Easy
Keep the faceplate clean and dry. Replace the control if it becomes unusually hot, produces crackling sounds, operates inconsistently, or causes persistent flicker after lamp compatibility has been confirmed.
Related Terms
LED Lighting
Recessed Lighting
Smart Switch
Three-Way Switch
Lighting Plan
Under-Cabinet Lighting
Pendant Light
Electrical Rough-In
Neutral Wire
Surge Protection
-
Dishwasher Air Gap
Dishwasher Air Gap
Definition
A dishwasher air gap is a countertop- or sink-mounted plumbing fitting that creates a physical break in the dishwasher drain path to help prevent contaminated sink or disposal water from siphoning back into the dishwasher. In residential and commercial remodeling, it is commonly associated with dishwasher installations, kitchen sink plumbing, garbage disposal connections, and backflow prevention.
Depending on the application, dishwasher air gap systems may involve plastic internal fittings, a decorative metal or plastic cap, drain hoses, clamps, and sink or countertop mounting hardware. Product selection, dimensions, installation details, compatibility, and manufacturer requirements all influence how well the finished installation performs.
Although homeowners may encounter the term during design or construction, its importance extends beyond appearance.
Proper planning and installation help protect surrounding materials, improve daily function, and reduce the likelihood of premature failure or costly corrective work.
Common Applications
Dishwasher Air Gap is commonly used for:
- New dishwasher installation
- Kitchen remodeling
- Dishwasher replacement
- Garbage disposal installation
- Sink replacement
- Countertop replacement
- Code-compliance upgrades
- Multi-family kitchens
- Commercial break rooms
- Homes with recurring dishwasher drain backup
Common Types of Dishwasher Air Gap
Common variations include:
- Countertop-mounted air gap
- Sink-deck air gap
- Air gap with decorative cap
- Integrated specialty air-gap accessories where permitted
- Each type is intended for a particular combination of use, material, installation method, performance requirement, and design preference.
Advantages
- Provides reliable backflow protection
- Creates a visible indication of a blocked drain path
- Meets code requirements in jurisdictions that require it
- Contains no electronic components
- Simple operating principle
- Helps protect dishwasher sanitation
- Available in finishes matching faucets
- Can be serviced from above the counter
Disadvantages
- Adds a visible fitting to the sink area
- Can discharge water onto the counter if clogged
- Requires a dedicated hole
- Hoses can kink or loosen
- Not required or used in every jurisdiction
- Improper installation can reduce effectiveness
When to Choose Dishwasher Air Gap
Dishwasher Air Gap is commonly selected when the project involves:
- Local code requires an air gap
- Installing or relocating a dishwasher
- Replacing countertops and planning sink accessories
- A high-loop alternative is not permitted
- Additional backflow protection is desired
- The dishwasher drains through a disposal
- A kitchen is being brought up to current standards
- The final choice should be coordinated with the project drawings, site conditions, applicable codes, manufacturer instructions, and the needs of the people using the space.
Pristine Pro Tip 💡
Plan the air-gap hole before countertop fabrication and position it where the discharge can flow into the sink if a blockage occurs. The hose from the air gap to the disposal or drain should be as short and direct as practical, without kinks or sagging sections that collect debris.
Common Mistake ❌
A common mistake is connecting the air gap with an undersized, kinked, or excessively long hose. Another is failing to remove the dishwasher knockout plug from a new garbage disposal, which prevents drainage and can force water out through the air gap.
Designer Insight 🎨
Because an air gap is visible, match its cap to the faucet, soap dispenser, and cabinet hardware. Careful spacing helps it look intentional rather than crowded around the sink.
Florida Rating 🌴
⭐⭐⭐⭐⭐ Excellent
Dishwasher air gaps are highly reliable in Florida because humidity does not affect their mechanical operation. Local plumbing requirements vary, so the applicable code and inspection standards should be confirmed for the project location.
Maintenance Level
⭐ Very Easy
Remove the decorative cap periodically and clear debris from the internal fitting. If water spills from the air gap during a dishwasher cycle, inspect the downstream hose, disposal connection, and drain for blockage rather than covering or bypassing the fitting.
Related Terms
Air Gap
Dishwasher Drain Hose
Garbage Disposal
High Loop
Backflow Prevention
Kitchen Sink
P-Trap
Plumbing Code
Sink Accessory
Dishwasher Installation
-
Door Casing
Door Casing
Definition
A door casing is the finish trim installed around the perimeter of a door opening to cover the joint between the door jamb and the surrounding wall surface. In residential and commercial remodeling, it is commonly associated with interior doors, exterior doors, cased openings, pocket doors, closets, and decorative millwork packages.
Depending on the application, door casing systems may involve solid wood, finger-jointed pine, MDF, PVC, polyurethane, composite trim, and stain-grade hardwood. Product selection, dimensions, installation details, compatibility, and manufacturer requirements all influence how well the finished installation performs.
Although homeowners may encounter the term during design or construction, its importance extends beyond appearance. Proper planning and installation help protect surrounding materials, improve daily function, and reduce the likelihood of premature failure or costly corrective work.
Common Applications
Door Casing is commonly used for:
- Bedroom doors
- Bathroom doors
- Closet doors
- Exterior entry doors
- Cased openings
- Pocket doors
- French doors
- Pantry doors
- Commercial offices
- Decorative wall openings
Common Types of Door Casing
- Common variations include:
Flat stock casing - Colonial casing
- Craftsman casing
- Mitered casing
- Butt-jointed casing
- Fluted casing
- Back-banded casing
- Modern reveal casing
- Each type is intended for a particular combination of use, material, installation method, performance requirement, and design preference.
Advantages
- Conceals gaps around the jamb
- Creates a finished transition to the wall
- Adds architectural character
- Can coordinate with baseboards and crown molding
- Available in paint- and stain-grade materials
- Helps define traditional, Craftsman, or modern style
- Can be replaced without replacing the entire door
- Provides an opportunity to correct minor wall irregularities
Disadvantages
- Poor joints are highly visible
- MDF can swell when exposed to moisture
- Wide casing requires adequate wall space
- Existing electrical devices may interfere
- Uneven walls complicate installation
- Exterior casing requires proper flashing and weather-resistant materials
When to Choose Door Casing
Door Casing is commonly selected when the project involves:
- Replacing doors
- Updating interior trim
- Changing the architectural style of a home
- Correcting damaged or undersized trim
- Creating a coordinated millwork package
- Finishing a new cased opening
- Restoring historic details
- The final choice should be coordinated with the project drawings, site conditions, applicable codes, manufacturer instructions, and the needs of the people using the space.
Pristine Pro Tip 💡
Select casing proportions with the ceiling height, door size, baseboard profile, and surrounding wall space in mind. When replacing casing throughout a home, verify how it intersects with baseboards, countertops, cabinets, switches, and adjacent walls before ordering.
Common Mistake ❌
A common mistake is forcing mitered corners together on uneven jambs or walls, which creates open joints later. Another is using standard MDF in bathrooms or exterior conditions where repeated moisture exposure can cause swelling.
Designer Insight 🎨
Door casing has a significant influence on style. Narrow profiles feel simple and contemporary, substantial flat stock supports Craftsman interiors, and layered or back-banded trim creates a more formal appearance. Consistent reveals around the jamb are essential to a professional look.
Florida Rating 🌴
⭐⭐⭐⭐⭐ Very Good
Door casing performs well in Florida when material selection matches the location. Moisture-resistant composite, PVC, or properly sealed wood is preferable near exterior doors, bathrooms, and coastal environments. Interior MDF should be protected from wet floors and plumbing leaks.
Maintenance Level
⭐⭐ Easy
Dust and wipe regularly, touch up paint or finish as needed, and repair failed caulk joints. Investigate swelling, staining, or separation because these conditions may indicate water intrusion, humidity problems, or door movement.
Related Terms
Door Jamb
Baseboard
Cased Opening
Reveal
Backband
Finish Carpentry
MDF
PVC Trim
Interior Door
Caulk
-
Door Jamb
Door Jamb
Definition
A door jamb is the vertical and horizontal frame components that line a door opening and provide the surface to which the hinges, strike plate, stops, and door slab are fitted. In residential and commercial remodeling, it is commonly associated with interior doors, exterior entry doors, pocket-door openings, French doors, closets, and commercial door assemblies.
Depending on the application, door jamb systems may involve wood, finger-jointed lumber, composite materials, PVC, metal, and engineered exterior door-frame systems. Product selection, dimensions, installation details, compatibility, and manufacturer requirements all influence how well the finished installation performs.
Although homeowners may encounter the term during design or construction, its importance extends beyond appearance. Proper planning and installation help protect surrounding materials, improve daily function, and reduce the likelihood of premature failure or costly corrective work.
Common Applications
Door Jamb is commonly used for:
- Hinged interior doors
- Exterior entry doors
- French doors
- Closet doors
- Bathroom doors
- Garage-to-house doors
- Fire-rated assemblies
- Commercial offices
- Replacement door units
- Custom openings
Common Types of Door Jamb
Common variations include:
- Hinge jamb
- Strike jamb
- Head jamb
- Split jamb
- Flat jamb
- Rabbetted jamb
- Exterior composite jamb
- Metal frame jamb
- Each type is intended for a particular combination of use, material, installation method, performance requirement, and design preference.
Advantages
- Supports and aligns the door slab
- Provides secure hinge and lock attachment
- Allows weatherstripping and stops to function
- Creates a finished opening for casing
- Can be adjusted during installation
- Available as part of prehung door units
- Specialized materials resist rot and insects
- Supports fire- and impact-rated assemblies when properly listed
Disadvantages
- Out-of-plumb jambs cause operational problems
- Wood jambs can swell or rot
- Poor shimming leads to movement
- Exterior jamb failures can allow water intrusion
- Repair may require removing casing
- Incorrect width creates wall-finish alignment problems
When to Choose Door Jamb
Door Jamb is commonly selected when the project involves:
- Installing a new prehung door
- Replacing a damaged frame
- Changing door size or swing
- Correcting doors that cannot be aligned
- Upgrading exterior weather resistance
- Installing rated or specialty doors
- Remodeling walls with different thicknesses
- The final choice should be coordinated with the project drawings, site conditions, applicable codes, manufacturer instructions, and the needs of the people using the space.
Pristine Pro Tip 💡
A door jamb must be installed plumb, square, and securely shimmed at hinge and strike locations. Exterior units also require correct sill pan, flashing, sealant, and fastener placement. A beautiful door will not operate properly if the frame is twisted or unsupported.
Common Mistake ❌
The most common mistake is fastening the jamb tightly before checking the door reveal and operation. Another is relying on expanding foam alone for structural support. Excessive foam can also bow a jamb and cause the door to bind.
Designer Insight 🎨
Door jambs are usually visually quiet, but their depth and finish affect the casing and reveal. Stain-grade jambs can become part of a custom wood door statement, while paint-grade jambs should blend cleanly with the casing and wall palette.
Florida Rating 🌴
⭐⭐⭐⭐⭐ Very Good
Florida exterior door jambs must resist humidity, wind-driven rain, insects, and intense sun. Composite or rot-resistant systems are valuable, especially at thresholds. In wind-borne debris regions, the entire listed door assembly and installation requirements matter, not just the slab.
Maintenance Level
⭐⭐ Easy
Inspect exterior jambs for cracks, failed sealant, soft wood, insect damage, and paint failure. Keep thresholds and weep paths clear. Interior jambs generally require only cleaning, paint touch-ups, and occasional hinge or strike adjustment.
Related Terms
Door Casing
Prehung Door
Door Slab
Hinge
Strike Plate
Door Stop
Threshold
Weatherstripping
Sill Pan
Rough Opening
-
Double Bowl Sink
Double Bowl Sink
Definition
An double bowl sink is a sink divided into two separate basins within one fixture, allowing different washing, rinsing, soaking, food-preparation, or utility tasks to occur independently. In residential and commercial remodeling, it is commonly associated with kitchens, laundry rooms, utility areas, bars, and commercial prep spaces.
Depending on the application, double bowl sink systems may involve stainless steel, cast iron, fireclay, granite composite, quartz composite, porcelain, copper, and solid surface. Product selection, dimensions, installation details, compatibility, and manufacturer requirements all influence how well the finished installation performs.
Although homeowners may encounter the term during design or construction, its importance extends beyond appearance. Proper planning and installation help protect surrounding materials, improve daily function, and reduce the likelihood of premature failure or costly corrective work.
Common Applications
Double Bowl Sink is commonly used for:
- Kitchen cleanup
- Food preparation
- Dish soaking
- Hand-washing delicate items
- Garbage disposal separation
- Laundry soaking
- Utility rooms
- Multi-cook kitchens
- Kosher kitchen layouts
- Commercial prep areas
Common Types of Double Bowl Sink
Common variations include:
- Equal double bowl
- Low-divide double bowl
- Offset double bowl
- 60/40 sink
- 70/30 sink
- Double-bowl farmhouse sink
- Double-bowl undermount sink
- Double-bowl drop-in sink
- Each type is intended for a particular combination of use, material, installation method, performance requirement, and design preference.
Advantages
- Separates tasks
- Allows soaking while keeping another basin available
- Can isolate the garbage disposal
- Offers familiar traditional functionality
- Available in many materials and mounting styles
- Useful for hand-washing and rinsing
- Can support specialized household routines
- Multiple size proportions are available
Disadvantages
- Each basin is smaller than a comparable single bowl
- Large cookware may not fit easily
- Center divider can obstruct baking sheets and pans
- Requires more complex drain connections
- May reduce usable depth in compact cabinets
- Some homeowners use only one side
When to Choose Double Bowl Sink
Double Bowl Sink is commonly selected when the project involves:
- Households that separate washing and rinsing
- Homeowners who frequently hand-wash dishes
- Kitchens with a garbage disposal on one side
- Laundry or utility sinks
- Traditional kitchen layouts
- Users who prefer divided tasks
- Specialized food-preparation routines
- The final choice should be coordinated with the project drawings, site conditions, applicable codes, manufacturer instructions, and the needs of the people using the space.
Pristine Pro Tip 💡
Compare the sink’s interior dimensions with your largest cookware before selecting it. A low-divide model can provide separation for everyday tasks while allowing handles and oversized pans to extend across both basins.
Common Mistake ❌
A common mistake is choosing a double bowl based only on the overall sink width. The center divider and corner radius can make each basin much smaller than expected. Another is failing to coordinate disposal placement, drain alignment, and under-sink storage.
Designer Insight 🎨
Double-bowl sinks can look streamlined when undermounted beneath quartz or stone. Equal bowls feel balanced, while 60/40 or 70/30 layouts create a more practical primary basin. Apron-front versions can reinforce farmhouse or transitional design.
Florida Rating 🌴
⭐⭐⭐⭐⭐ Excellent
Double-bowl sinks perform well in Florida. Stainless steel and composite models are practical in humid environments, while fireclay and cast iron require sound cabinet support. Mineral deposits should be managed according to the sink finish and local water conditions.
Maintenance Level
⭐⭐ Easy
Rinse both basins after use, clean with non-abrasive products approved for the material, and keep strainers and disposal components clear. Inspect caulk, clips, drains, and disposal seals for leaks.
Related Terms
Single Bowl Sink
Low-Divide Sink
Undermount Sink
Drop-In Sink
Farmhouse Sink
Garbage Disposal
Sink Base Cabinet
Drain Assembly
Kitchen Work Triangle
Prep Sink
-
Double Island
Double Island
Definition
An double island is a kitchen layout containing two separate freestanding or peninsula-like cabinet islands, each assigned complementary functions within a large room. In residential and commercial remodeling, it is commonly associated with luxury kitchens, open-concept homes, multi-cook households, entertaining spaces, and large-scale new construction or remodeling.
Depending on the application, double island systems may involve cabinetry, countertops, appliances, plumbing fixtures, electrical devices, seating components, and structural supports. Product selection, dimensions, installation details, compatibility, and manufacturer requirements all influence how well the finished installation performs.
Although homeowners may encounter the term during design or construction, its importance extends beyond appearance. Proper planning and installation help protect surrounding materials, improve daily function, and reduce the likelihood of premature failure or costly corrective work.
Common Applications
Double Island is commonly used for:
- Large family kitchens
- Entertaining kitchens
- Multi-cook households
- Open great rooms
- Homes with frequent gatherings
- Cooking demonstration spaces
- Luxury new construction
- Kitchen and scullery transitions
- Accessible circulation planning
- Commercial-style residential kitchens
Common Types of Double Island
Common variations include:
- Parallel double islands
- Work island plus seating island
- Prep island plus cleanup island
- Perpendicular double islands
- Matching islands
- Contrasting statement islands
- Each type is intended for a particular combination of use, material, installation method, performance requirement, and design preference.
Advantages
- Creates separate work zones
- Adds substantial storage
- Provides extensive countertop space
- Supports multiple cooks
- Separates food preparation from seating
- Can house multiple appliances and sinks
- Improves entertaining capacity
- Allows one island to remain visually clean
- Creates a high-end architectural statement
Disadvantages
- Requires a very large footprint
- Can disrupt circulation if poorly spaced
- Significantly increases cabinetry and countertop cost
- May require extensive electrical and plumbing work
- Can make the room feel crowded
- More surfaces require cleaning
- Long walking distances may reduce efficiency
When to Choose Double Island
Double Island is commonly selected when the project involves:
- The kitchen has generous dimensions
- Multiple distinct functions must be accommodated
- A single oversized island would block circulation
- The household entertains frequently
- Separate work and social zones are desired
- The design includes multiple sinks or appliance stations
- The architecture can support balanced spacing
- The final choice should be coordinated with the project drawings, site conditions, applicable codes, manufacturer instructions, and the needs of the people using the space.
Pristine Pro Tip 💡
Begin with circulation, not island size. Clearances must account for open appliance doors, seated guests, opposing cabinets, and multiple people moving through the kitchen. Two well-proportioned islands are better than two oversized islands squeezed into the room.
Common Mistake ❌
A common mistake is using double islands simply because the room is large. Without clear functions, the second island becomes an obstacle. Another is creating narrow aisles that fail when the refrigerator, dishwasher, or oven is open.
Designer Insight 🎨
Double islands are most successful when each has a defined purpose but the pair still feels visually related. Coordinated countertops and cabinetry create calm continuity, while a controlled contrast can distinguish a working island from a furniture-like entertaining island.
Florida Rating 🌴
⭐⭐⭐⭐⭐ Excellent
Double islands suit many large Florida homes designed for open living and entertaining. Because they increase the number of floor penetrations, outlets, sinks, and appliances, slab conditions and routing for plumbing and electrical work must be evaluated early.
Maintenance Level
⭐⭐⭐ Moderate
Maintenance depends on the selected cabinets, counters, sinks, and appliances. More seating, outlets, and work surfaces mean more cleaning and more components to inspect, but durable finishes and organized storage can keep upkeep manageable.
Related Terms
Kitchen Island
Waterfall Countertop
Prep Sink
Butler Pantry
Scullery
Work Triangle
Cabinet Layout
Island Seating
Pendant Lighting
Open-Concept Kitchen
-
Double Vanity
Double Vanity
Definition
An double vanity is a bathroom vanity designed with two separate sink stations, usually supported by one continuous cabinet run and countertop. In residential and commercial remodeling, it is commonly associated with primary bathrooms, shared family bathrooms, guest suites, and high-use residential or hospitality spaces.
Depending on the application, double vanity systems may involve wood or engineered cabinetry, quartz, granite, porcelain, solid-surface or cultured-marble tops, sinks, faucets, mirrors, and lighting. Product selection, dimensions, installation details, compatibility, and manufacturer requirements all influence how well the finished installation performs.
Although homeowners may encounter the term during design or construction, its importance extends beyond appearance. Proper planning and installation help protect surrounding materials, improve daily function, and reduce the likelihood of premature failure or costly corrective work.
Common Applications
Double Vanity is commonly used for:
- Primary bathrooms
- Jack-and-Jill bathrooms
- Shared children’s bathrooms
- Guest suites
- Luxury bathrooms
- Multi-generational homes
- Vacation homes
- Hospitality bathrooms
- Accessible shared baths
- Large powder or dressing rooms
Common Types of Double Vanity
Common variations include:
- Two-sink cabinet vanity
- Floating double vanity
- Furniture-style double vanity
- Split double vanity
- Double vanity with tower cabinet
- Wall-to-wall custom double vanity
- Each type is intended for a particular combination of use, material, installation method, performance requirement, and design preference.
Advantages
- Allows two people to use the space simultaneously
- Provides separate personal storage
- Adds countertop area
- Can increase resale appeal
- Supports symmetrical design
- Allows individual mirrors and lighting
- Reduces morning congestion
- Available in stock, semi-custom, and custom configurations
Disadvantages
- Requires more wall space
- Reduces uninterrupted counter area between sinks
- Adds plumbing fixtures and cost
- Can feel cramped if sinks are placed too close together
- More faucets and drains require maintenance
- May sacrifice drawer storage around both sink bowls
When to Choose Double Vanity
Double Vanity is commonly selected when the project involves:
- Two people routinely share the bathroom
- The room has sufficient width and circulation
- Separate grooming stations are a priority
- A primary suite is being upgraded
- Storage can be organized around two sink bases
- The design benefits from symmetry
- Plumbing can be routed efficiently
- The final choice should be coordinated with the project drawings, site conditions, applicable codes, manufacturer instructions, and the needs of the people using the space.
Pristine Pro Tip 💡
Do not judge a double vanity only by its overall width. Confirm usable drawer space, sink spacing, faucet clearance, mirror dimensions, lighting placement, and open-door circulation. In many bathrooms, one sink with generous counter and drawer space may function better than two crowded sinks.
Common Mistake ❌
The most common mistake is forcing two sinks into a vanity that is too small. This creates narrow counter strips, limited drawer storage, and awkward mirror placement. Another is centering lights on the cabinet instead of aligning them with each user.
Designer Insight 🎨
A double vanity can be symmetrical and formal or intentionally asymmetrical with a center storage tower, makeup station, or open shelf. Floating vanities create a lighter contemporary appearance, while furniture-style feet and framed mirrors suit transitional interiors.
Florida Rating 🌴
⭐⭐⭐⭐⭐ Excellent
Double vanities perform well in Florida when cabinetry is protected from plumbing leaks and persistent humidity. Good exhaust ventilation, sealed countertop penetrations, and moisture-resistant finishes are particularly important in shared bathrooms that generate frequent steam.
Maintenance Level
⭐⭐ Easy
Clean counters and sinks routinely, inspect both drain and faucet connections, maintain caulk around splashes, and operate the exhaust fan during and after bathing. Address any cabinet swelling or musty odor promptly.
Related Terms
Vanity Cabinet
Floating Vanity
Vessel Sink
Undermount Sink
Vanity Tower
Bathroom Lighting
Quartz Vanity Top
Jack-and-Jill Bathroom
Plumbing Rough-In
Exhaust Fan
-
Down Draft Vent
Down Draft Vent
Definition
An down draft vent is a cooking ventilation system that captures smoke, steam, grease, and odors at or near the cooking surface and directs them downward instead of into an overhead hood. In residential and commercial remodeling, it is commonly associated with kitchen islands, cooktops beneath windows, open-concept kitchens, and layouts where a conventional hood is undesirable or impractical.
Depending on the application, down draft vent systems may involve metal intake grilles, filters, blowers, ductwork, motors, controls, and sometimes a retractable telescoping vent assembly. Product selection, dimensions, installation details, compatibility, and manufacturer requirements all influence how well the finished installation performs.
Although homeowners may encounter the term during design or construction, its importance extends beyond appearance. Proper planning and installation help protect surrounding materials, improve daily function, and reduce the likelihood of premature failure or costly corrective work.
Common Applications
Down Draft Vent is commonly used for:
Island cooktops
Cooktops beneath windows
Minimalist kitchens
Open sight-line designs
Renovations without overhead hood space
Contemporary kitchens
Electric or induction cooktops
Compact urban kitchens
Accessible cooking layouts
Luxury kitchens prioritizing unobstructed views
Common Types of Down Draft Vent
Common variations include:
Integrated cooktop downdraft
Retractable pop-up downdraft
Fixed rear downdraft
Recirculating downdraft
Externally vented downdraft
Each type is intended for a particular combination of use, material, installation method, performance requirement, and design preference.
Advantages
Preserves open sight lines
Eliminates an overhead hood
Useful beneath windows
Can integrate with the cooktop
Supports minimalist design
Retractable models disappear when not in use
May solve difficult architectural conditions
Keeps pendant and ceiling design unobstructed
Disadvantages
Generally captures rising contaminants less effectively than a well-designed overhead hood
Duct routing below the floor or through cabinets can be difficult
Reduces cabinet storage
May struggle with tall pots or front burners
Can be noisy at higher speeds
Installation and service costs can be significant
Recirculating versions do not remove heat or humidity outdoors
When to Choose Down Draft Vent
Down Draft Vent is commonly selected when the project involves:
An overhead hood would block a view
The cooktop is located in an island
A window occupies the wall above the cooktop
The cooking style produces moderate rather than heavy smoke and grease
Duct routing can be planned effectively
The appliance manufacturer supports the configuration
Design priorities justify the performance tradeoffs
The final choice should be coordinated with the project drawings, site conditions, applicable codes, manufacturer instructions, and the needs of the people using the space.
Pristine Pro Tip 💡
Ventilation should be selected with the cooktop, not after the cabinets are designed. Confirm capture area, blower capacity, duct size, allowable duct length, make-up air requirements, cabinet clearances, and whether the system is rated for the chosen gas, electric, or induction appliance.
Common Mistake ❌
A common mistake is assuming a downdraft will perform exactly like a properly sized overhead hood. Hot air naturally rises, so the system must pull contaminants across the cooking surface. Poor ducting, undersized blowers, and tall cookware further reduce performance.
Designer Insight 🎨
Downdraft ventilation is visually appealing because it allows the kitchen architecture, pendants, windows, and open views to remain dominant. Retractable units are especially discreet, though the required mechanism and ducting must be accommodated within the island.
Florida Rating 🌴
⭐⭐⭐⭐ Good
Downdraft systems can work in Florida, but effective exterior venting is valuable because cooking adds heat and humidity to already moisture-prone homes. Routing through a concrete slab can be difficult and should be evaluated before finalizing an island location.
Maintenance Level
⭐⭐⭐ Moderate
Clean or replace grease and charcoal filters as directed, wipe the intake surfaces, and inspect the blower and duct path. Retractable systems should be kept free of spills and debris so the mechanism operates smoothly.
Frequently Asked Questions
Is a downdraft vent as effective as a range hood?
Usually not for heavy cooking. A well-designed overhead hood captures rising heat, smoke, and grease more naturally. Downdraft can be an acceptable solution where architecture or sight lines prevent an overhead hood, especially with induction or electric cooking and careful duct design.
Related Terms
Range Hood
Cooktop
Induction Cooktop
Kitchen Island
Make-Up Air
Ductwork
Recirculating Vent
Grease Filter
CFM
Appliance Planning
-
Drain Assembly
Drain Assembly
Definition
A drain assembly is the connected set of components that allows water to leave a sink, tub, shower, or other fixture while providing sealing, straining, overflow, and connection functions. In residential and commercial remodeling, it is commonly associated with kitchen sinks, bathroom sinks, bathtubs, showers, bar sinks, laundry sinks, and floor drains.
Depending on the application, drain assembly systems may involve brass, stainless steel, plastic, rubber gaskets, silicone, plumber’s putty, strainers, stoppers, tailpieces, and threaded fittings. Product selection, dimensions, installation details, compatibility, and manufacturer requirements all influence how well the finished installation performs.
Although homeowners may encounter the term during design or construction, its importance extends beyond appearance. Proper planning and installation help protect surrounding materials, improve daily function, and reduce the likelihood of premature failure or costly corrective work.
Common Applications
Drain Assembly is commonly used for:
Kitchen sinks
Bathroom vanities
Bathtubs
Showers
Bar sinks
Prep sinks
Laundry sinks
Utility sinks
Commercial hand sinks
Floor drains
Common Types of Drain Assembly
Common variations include:
Sink basket-strainer assembly
Pop-up drain
Push-button drain
Grid drain
Tub waste-and-overflow assembly
Shower drain assembly
Linear drain assembly
Disposal flange assembly
Each type is intended for a particular combination of use, material, installation method, performance requirement, and design preference.
Advantages
Provides controlled drainage
Creates a watertight connection at the fixture
Allows debris to be captured
Can include a stopper or overflow function
Available in finishes matching the faucet
Serviceable components can be replaced
Supports many fixture types
Proper assemblies reduce leak risk
Disadvantages
Multiple seals can fail
Hair and debris can cause clogs
Decorative finishes may wear
Incorrect parts may not fit the fixture
Overtightening can crack fixtures or distort gaskets
Hidden leaks can damage cabinetry or framing
When to Choose Drain Assembly
Drain Assembly is commonly selected when the project involves:
Installing a new sink, tub, or shower
Replacing corroded or leaking drain parts
Changing faucet and hardware finishes
Adding a garbage disposal
Correcting slow drainage or poor sealing
Building a custom shower
Updating a tub waste-and-overflow system
The final choice should be coordinated with the project drawings, site conditions, applicable codes, manufacturer instructions, and the needs of the people using the space.
Pristine Pro Tip 💡
Purchase the drain assembly that matches the fixture material, opening size, overflow configuration, and finish. For vessel sinks, confirm whether an overflow is present; using the wrong drain type can cause leakage or prevent proper drainage.
Common Mistake ❌
A common mistake is using too much sealant or combining incompatible sealing methods. Another is overtightening the locknut, which can deform a rubber gasket or crack a porcelain sink. Drain parts should be assembled in the manufacturer’s specified order.
Designer Insight 🎨
Drain assemblies are small but visible details. Matching the drain finish to the faucet and overflow creates a cohesive look. In showers, linear drains can support large-format tile and a more architectural floor layout.
Florida Rating 🌴
⭐⭐⭐⭐⭐ Excellent
Drain assemblies perform reliably in Florida, but high humidity makes hidden leaks especially damaging because damp cabinets and wall cavities can support mold growth. Promptly addressing drips, loose connections, or slow drains is important.
Maintenance Level
⭐⭐ Easy
Remove hair and debris regularly, clean strainers and stoppers, avoid harsh drain chemicals unless approved, and inspect visible connections. Re-seal or replace gaskets when leaks appear rather than repeatedly tightening old components.
Frequently Asked Questions
Should plumber’s putty or silicone be used under a sink drain flange?
The correct material depends on the fixture and drain manufacturer. Plumber’s putty is common on many metal sink flanges, while silicone may be required for porous stone, certain composites, or products where putty could stain or damage the finish.
Related Terms
P-Trap
Tailpiece
Pop-Up Drain
Basket Strainer
Waste and Overflow
Linear Drain
Shower Drain
Garbage Disposal Flange
Plumber’s Putty
Vent Stack
-
Drain Pan
Drain Pan
Definition
An drain pan is a shallow waterproof tray installed beneath an appliance or water-producing component to capture leaks and direct or contain water before it damages surrounding finishes. In residential and commercial remodeling, it is commonly associated with washing machines, water heaters, HVAC equipment, refrigerators, dishwashers, and specialty plumbing installations.
Depending on the application, drain pan systems may involve plastic, galvanized steel, stainless steel, aluminum, fiberglass, composite materials, drain fittings, and waterproof membranes. Product selection, dimensions, installation details, compatibility, and manufacturer requirements all influence how well the finished installation performs.
Although homeowners may encounter the term during design or construction, its importance extends beyond appearance. Proper planning and installation help protect surrounding materials, improve daily function, and reduce the likelihood of premature failure or costly corrective work.
Common Applications
Drain Pan is commonly used for:
Second-floor laundry rooms
Water heaters in closets or attics
Air handlers
Refrigerators with water lines
Dishwashers in sensitive cabinetry
Condensate-producing equipment
Multi-family buildings
Vacation homes
Wood-floor installations
Remodeled utility rooms
Common Types of Drain Pan
Common variations include:
Washing-machine pan
Water-heater pan
HVAC condensate pan
Refrigerator pan
Custom waterproof pan
Drain-connected pan
Containment-only pan
Each type is intended for a particular combination of use, material, installation method, performance requirement, and design preference.
Advantages
Provides early leak containment
Protects floors and ceilings
Can route water to a safe drain location
Reduces damage from slow leaks
Useful beneath appliances on upper floors
Available in corrosion-resistant materials
May support code or manufacturer requirements
Provides visual evidence of leakage
Disadvantages
Cannot contain unlimited water
Drain connections can clog
Improperly sized pans are ineffective
May complicate appliance service
Plastic pans can crack
A pan does not replace shutoff valves or leak detection
Poor drainage can hide standing water
When to Choose Drain Pan
Drain Pan is commonly selected when the project involves:
Appliances are installed above finished spaces
Water damage would be costly
A water heater is located indoors
A washing machine is on an upper floor
Local requirements call for a pan
A refrigerator water line crosses finished areas
Additional layered protection is desired
The final choice should be coordinated with the project drawings, site conditions, applicable codes, manufacturer instructions, and the needs of the people using the space.
Pristine Pro Tip 💡
A drain pan is only one part of a leak-protection strategy. Combine it with accessible shutoff valves, braided or manufacturer-approved supply lines, leak sensors, and automatic shutoff devices where appropriate. Confirm the pan can be removed or serviced without dismantling the room.
Common Mistake ❌
The most common mistake is installing a pan that is too small or leaving its drain connection capped. Another is assuming the pan will protect against a burst hose; many pans are designed for slow leakage, not a high-volume failure.
Designer Insight 🎨
Drain pans are usually concealed, but their size affects cabinetry, appliance height, and trim details. Recessed or color-coordinated solutions can reduce visibility in finished laundry rooms and utility spaces.
Florida Rating 🌴
⭐⭐⭐⭐⭐ Excellent
Drain pans are especially valuable in Florida because moisture damage can quickly lead to swelling, staining, and microbial growth. They are useful in slab homes, multi-story houses, condos, and vacation properties that may sit unoccupied.
Maintenance Level
⭐⭐ Easy
Inspect the pan and drain opening periodically, remove debris, verify that no standing water is present, and test leak sensors. Replace cracked or corroded pans and correct the source of any water found.
Frequently Asked Questions
Does a washing-machine drain pan protect against a burst hose?
It may reduce damage but should not be relied on as the only protection. A burst hose can release water faster than many pan drains can carry it away. Quality hoses, shutoff valves, sensors, and automatic shutoff systems provide additional protection.
Related Terms
Leak Detector
Automatic Shutoff Valve
Washing Machine Box
Water Heater
Condensate Drain
Laundry Room
Waterproofing
Floor Drain
Supply Line
Moisture Damage
-
Drawer Box
Drawer Box
Definition
A drawer box is the structural container portion of a drawer, consisting of sides, front, back, and bottom, to which the decorative drawer front and slide hardware are attached. In residential and commercial remodeling, it is commonly associated with kitchen cabinets, bathroom vanities, closets, built-ins, furniture, pantries, and commercial casework.
Depending on the application, drawer box systems may involve solid wood, plywood, MDF, particleboard, metal, plastic, dovetailed hardwood, and engineered composite panels. Product selection, dimensions, installation details, compatibility, and manufacturer requirements all influence how well the finished installation performs.
Although homeowners may encounter the term during design or construction, its importance extends beyond appearance. Proper planning and installation help protect surrounding materials, improve daily function, and reduce the likelihood of premature failure or costly corrective work.
Common Applications
Drawer Box is commonly used for:
- Base cabinets
- Vanity cabinets
- Pantry pullouts
- Closet storage
- Built-in desks
- Entertainment centers
- Mudroom cabinetry
- Commercial casework
- Furniture
- Under-bed storage
Common Types of Drawer Box
Common variations include:
- Dovetail drawer box
- Dowel-joined drawer box
- Stapled drawer box
- Metal drawer system
- Plywood drawer box
- Solid-wood drawer box
- Melamine drawer box
- Each type is intended for a particular combination of use, material, installation method, performance requirement, and design preference.
Advantages
- Provides organized accessible storage
- Can be sized for specific contents
- Quality construction supports heavy loads
- Full-extension hardware improves access
- Dovetail and plywood options offer durability
- Replaceable independently of the cabinet box in many systems
- Can include dividers and inserts
- Available with soft-close slides
Disadvantages
- Low-quality bottoms may sag
- Stapled joints can loosen
- Moisture can swell engineered materials
- Usable width is reduced by slide hardware
- Deep boxes can become disorganized
- Replacement requires accurate sizing and hardware compatibility
When to Choose Drawer Box
Drawer Box is commonly selected when the project involves:
- New cabinetry
- Upgrading worn drawers
- Custom storage planning
- Heavy cookware storage
- Vanities requiring organized compartments
- Closet or pantry systems
- Projects prioritizing long-term cabinet quality
- The final choice should be coordinated with the project drawings, site conditions, applicable codes, manufacturer instructions, and the needs of the people using the space.
Pristine Pro Tip 💡
Evaluate the entire drawer system, not just the decorative front. Look at side thickness, bottom thickness, joinery, slide rating, extension, and interior finish. A beautiful cabinet door does not compensate for a weak drawer box.
Common Mistake ❌
A common mistake is overloading a drawer beyond the slide and box rating. Another is assuming all dovetail drawers are equal; poorly machined joints, thin bottoms, or low-grade wood can still result in weak performance.
Designer Insight 🎨
Drawer boxes influence function more than appearance, but interior finishes and accessories elevate the experience of custom cabinetry. Natural maple, walnut, metal-sided systems, and fitted inserts can make everyday storage feel refined and intentional.
Florida Rating 🌴
⭐⭐⭐⭐⭐ Very Good
Drawer boxes perform well in Florida when cabinetry is kept dry and conditioned. Plywood and solid-wood systems generally tolerate normal humidity better than low-density particleboard, but any material can swell after plumbing leaks or prolonged exposure.
Maintenance Level
⭐⭐ Easy
Keep drawer interiors clean and dry, avoid exceeding load ratings, tighten or adjust hardware if movement develops, and address leaks immediately. Wax or lubricate only when approved for the slide system.
Related Terms
Dovetail Drawer
Drawer Glide
Cabinet Box
Soft-Close
Full-Extension Slide
Plywood
Cabinet Hardware
Drawer Insert
Base Cabinet
Custom Cabinetry
-
Drawer Glide
Drawer Glide
Definition
A drawer glide is the mechanical slide hardware that supports a drawer and controls how it opens, closes, extends, and carries weight. In residential and commercial remodeling, it is commonly associated with kitchen cabinetry, bathroom vanities, closets, built-ins, furniture, pantries, and commercial casework.
Depending on the application, drawer glide systems may involve steel rails, ball bearings, nylon rollers, concealed runners, dampers, locking devices, and adjustment components. Product selection, dimensions, installation details, compatibility, and manufacturer requirements all influence how well the finished installation performs.
Although homeowners may encounter the term during design or construction, its importance extends beyond appearance. Proper planning and installation help protect surrounding materials, improve daily function, and reduce the likelihood of premature failure or costly corrective work.
Common Applications
Drawer Glide is commonly used for:
- Kitchen drawers
- Pot and pan drawers
- Vanity drawers
- Trash pullouts
- Pantry pullouts
- File drawers
- Closet drawers
- Appliance garages
- Commercial casework
- Custom furniture
Common Types of Drawer Glide
Common variations include:
- Side-mount ball-bearing slide
- Undermount concealed slide
- Center-mount slide
- Roller slide
- Soft-close slide
- Push-to-open slide
- Full-extension slide
- Heavy-duty slide
- Each type is intended for a particular combination of use, material, installation method, performance requirement, and design preference.
Advantages
- Allows smooth drawer movement
- Supports controlled extension
- Full-extension models improve access
- Soft-close reduces slamming
- Undermount slides remain concealed
- Heavy-duty options carry substantial loads
- Adjustable systems improve alignment
- Quality slides extend cabinet life
Disadvantages
- Cheap slides can loosen or bind
- Hardware reduces usable drawer width or depth
- Debris can interfere with movement
- Incorrect installation causes misalignment
- Soft-close devices can fail
- Replacement requires matching dimensions and mounting type
- Heavy loads may exceed rating
When to Choose Drawer Glide
Drawer Glide is commonly selected when the project involves:
- New cabinetry
- Upgrading old drawers
- Heavy cookware storage
- Accessible storage
- Custom pullouts
- Frameless or face-frame cabinets
- Projects where quiet operation matters
- Drawers requiring full access
- The final choice should be coordinated with the project drawings, site conditions, applicable codes, manufacturer instructions, and the needs of the people using the space.
Pristine Pro Tip 💡
Match the slide rating to the actual contents, not just the drawer size. Deep drawers intended for cookware, appliances, files, or trash systems need higher-capacity hardware and a strong cabinet attachment.
Common Mistake ❌
A common mistake is measuring only the drawer opening when ordering replacement slides. Slide length, cabinet depth, clearance, mounting type, drawer construction, and face-frame adapters all affect compatibility.
Designer Insight 🎨
Concealed undermount glides support a clean high-end look because hardware is hidden and drawer interiors remain visually uninterrupted. Push-to-open systems can eliminate knobs, while soft-close improves the tactile quality of cabinetry.
Florida Rating 🌴
⭐⭐⭐⭐⭐ Excellent
Drawer glides perform well in Florida’s conditioned interiors. In garages, outdoor kitchens, or coastal locations, corrosion-resistant hardware is important. Cabinet leaks should be corrected promptly to prevent rust and swelling around mounting points.
Maintenance Level
⭐⭐ Easy
Vacuum crumbs and debris from slide paths, keep hardware dry, and tighten loose screws. Adjust alignment according to the manufacturer’s system. Do not apply oil or grease unless specifically recommended because it can attract dust.
Related Terms
Drawer Box
Dovetail Drawer
Soft-Close
Full-Extension Slide
Undermount Slide
Cabinet Hardware
Trash Pullout
Pantry Pullout
Face-Frame Cabinet
Frameless Cabinet
-
Dry Pack
Dry Pack
Definition
An dry pack is a low-moisture mixture of sand and cement compacted into place to create a firm, shapeable mortar bed. In residential and commercial remodeling, it is commonly associated with shower floors, sloped pans, tile substrates, drain transitions, curbs, and selected repair or leveling applications.
Depending on the application, dry pack systems may involve clean sand, Portland cement or preblended deck mud, measured water, and sometimes approved additives. Product selection, dimensions, installation details, compatibility, and manufacturer requirements all influence how well the finished installation performs.
Although homeowners may encounter the term during design or construction, its importance extends beyond appearance. Proper planning and installation help protect surrounding materials, improve daily function, and reduce the likelihood of premature failure or costly corrective work.
Common Applications
Dry Pack is commonly used for:
Sloped shower floors
- Traditional shower pans
- Linear drain transitions
- Tile floors requiring slope
- Curbs and thresholds
- Patching depressions
- Setting certain tubs or shower bases when allowed
- Commercial tile installations
- Steam shower floors
- Custom drain layouts
Common Types of Dry Pack
Common variations include:
- Site-mixed deck mud
- Preblended dry-pack mortar
- Bonded mortar bed
- Unbonded reinforced mortar bed
- Traditional shower-pan mortar bed
- Each type is intended for a particular combination of use, material, installation method, performance requirement, and design preference.
Advantages
- Can be shaped to precise slope
- Provides a dense stable tile substrate
- Works around irregular drain locations
- Suitable for custom shower dimensions
- Low shrinkage when mixed correctly
- Supports many tile sizes
- Economical material
- Long history of successful use
Disadvantages
- Requires skilled mixing and compaction
- Too much water weakens the mix and increases shrinkage
- Poor bonding can cause hollow areas
- Not itself a waterproofing system
- Thickness and reinforcement requirements vary
- Improper slope causes drainage problems
- Curing conditions affect performance
When to Choose Dry Pack
Dry Pack is commonly selected when the project involves:
- Custom tile showers
- Floors needing a controlled slope
- Traditional clamping-drain systems
- Linear drains requiring shaped transitions
- Irregular shower footprints
- Tile work where prefabricated pans do not fit
- Experienced tile installers are available
- The final choice should be coordinated with the project drawings, site conditions, applicable codes, manufacturer instructions, and the needs of the people using the space.
Pristine Pro Tip 💡
Dry pack should feel like damp beach sand: moist enough to hold a compressed shape but not wet or soupy. It must be firmly compacted and accurately sloped before the surface begins to set. Waterproofing is a separate system and must be detailed correctly.
Common Mistake ❌
A common mistake is adding water until the mix resembles conventional concrete. A wet mix is harder to shape and more likely to shrink or crack. Another is assuming the mortar bed is waterproof; water management depends on the membrane and drain connection.
Designer Insight 🎨
Dry pack allows custom showers to achieve precise floor geometry, including centered drains, linear drains, benches, and unusual footprints. Proper planning can minimize small sliver cuts and create a more balanced tile layout.
Florida Rating 🌴
⭐⭐⭐⭐⭐ Excellent
Dry-pack mortar performs very well in Florida when installed over a stable substrate with a complete waterproofing system. Because slab moisture and high humidity are common, compatible membranes, drainage, and curing practices are essential.
Maintenance Level
⭐ None
The mortar bed requires no direct maintenance after tile installation. Maintain grout, sealant joints, drain flow, and waterproofed transitions. Cracking, loose tile, or persistent moisture should be evaluated as a system issue.
Related Terms
Deck Mud
Shower Pan
Pre-Slope
Waterproofing Membrane
Thinset Mortar
Linear Drain
Clamping Drain
Tile Substrate
Mortar Bed
Flood Test
-
Drywall
Drywall
Definition
An drywall is a panelized interior wall and ceiling material made from a gypsum core faced with paper or fiberglass mats. In residential and commercial remodeling, it is commonly associated with walls, ceilings, soffits, partitions, repairs, remodels, commercial interiors, and fire- or moisture-rated assemblies.
Depending on the application, drywall systems may involve gypsum, paper facers, fiberglass facers, additives, joint tape, compound, screws, corner bead, and finishing materials. Product selection, dimensions, installation details, compatibility, and manufacturer requirements all influence how well the finished installation performs.
Although homeowners may encounter the term during design or construction, its importance extends beyond appearance. Proper planning and installation help protect surrounding materials, improve daily function, and reduce the likelihood of premature failure or costly corrective work.
Common Applications
- Drywall is commonly used for:
Interior walls - Ceilings
- Kitchen walls
- Bathroom walls outside wet zones
- Closets
- Garages
- Commercial partitions
- Soffits
- Fire-rated assemblies
- Repair patches
Common Types of Drywall
Common variations include:
- Regular drywall
- Moisture-resistant drywall
- Mold-resistant drywall
- Type X fire-rated drywall
- Type C drywall
- Lightweight drywall
- Abuse-resistant drywall
- Sound-control drywall
- Fiberglass-faced gypsum board
- Each type is intended for a particular combination of use, material, installation method, performance requirement, and design preference.
Advantages
- Creates smooth paintable surfaces
- Fast to install
- Widely available
- Cost-effective
- Easy to cut and repair
- Supports fire-rated assemblies
- Available with moisture and mold resistance
- Can improve sound control
- Accepts many textures and finishes
- Conceals framing and building systems
Disadvantages
- Damaged by prolonged water exposure
- Standard paper-faced board can support mold growth when wet
- Requires finishing skill for invisible joints
- Impact can dent or puncture it
- Heavy sheets are difficult to handle
- Not a waterproof tile substrate
- Ceiling sag can occur with incorrect thickness or spacing
When to Choose Drywall
Drywall is commonly selected when the project involves:
- Interior partitions
- Ceilings
- Kitchen remodels
- Bathroom areas outside showers and tub surrounds
- Patching after plumbing or electrical work
- Commercial tenant improvements
- Fire-separation assemblies
- Smooth or textured painted finishes
- The final choice should be coordinated with the project drawings, site conditions, applicable codes, manufacturer instructions, and the needs of the people using the space.
Pristine Pro Tip 💡
Use the correct board for the location and assembly. Moisture-resistant drywall can be useful in humid rooms, but it is not a substitute for cement board or an approved waterproof tile system inside showers and other direct-wet areas.
Common Mistake ❌
A common mistake is installing ordinary drywall in a direct-wet shower zone. Another is fastening panels too deeply, breaking the paper face and reducing screw holding. Poor joint staggering and insufficient backing also lead to cracks.
Designer Insight 🎨
Drywall provides the quiet background for most interiors, but level of finish, corner details, reveals, niches, arches, and texture strongly affect the final appearance. Smooth walls require more preparation and show imperfections more readily than textured finishes.
Florida Rating 🌴
⭐⭐⭐⭐⭐ Very Good
Drywall performs well in conditioned Florida interiors when leaks and humidity are controlled. Mold-resistant or fiberglass-faced products are useful in selected moisture-prone areas, but ventilation and prompt drying remain essential. Flooded or chronically wet drywall often requires removal.
Maintenance Level
⭐⭐ Easy
Keep surfaces dry, repair small dents and fastener pops, maintain paint and caulk, and investigate staining or soft areas immediately. Water-damaged drywall should be evaluated for loss of strength and concealed mold.
Related Terms
Drywall Compound
Drywall Screw
Drywall Anchor
Cement Board
Gypsum Board
Type X Drywall
Corner Bead
Level 5 Finish
Wall Texture
Waterproofing Membrane
- Drywall is commonly used for:
-
Drywall Anchor
Drywall Anchor
Definition
An drywall anchor is a fastening device designed to spread or transfer load within hollow drywall when a screw cannot be secured directly into framing or solid backing. In residential and commercial remodeling, it is commonly associated with mirrors, shelves, towel bars, artwork, accessories, cabinets, televisions, and decorative installations.
Depending on the application, drywall anchor systems may involve plastic expansion anchors, metal sleeves, threaded zinc or nylon anchors, toggle bolts, molly bolts, and snap-toggle systems. Product selection, dimensions, installation details, compatibility, and manufacturer requirements all influence how well the finished installation performs.
Although homeowners may encounter the term during design or construction, its importance extends beyond appearance. Proper planning and installation help protect surrounding materials, improve daily function, and reduce the likelihood of premature failure or costly corrective work.
Common Applications
Drywall Anchor is commonly used for:
- Artwork
- Small mirrors
- Towel rings
- Toilet paper holders
- Lightweight shelves
- Decorative hooks
- Wall-mounted accessories
- Smoke alarms
- Small organizers
- Temporary fixtures
Common Types of Drywall Anchor
Common variations include:
- Plastic expansion anchor
- Self-drilling threaded anchor
- Molly bolt
- Toggle bolt
- Snap-toggle anchor
- Hollow-wall anchor
- Adhesive anchor for very light items
- Each type is intended for a particular combination of use, material, installation method, performance requirement, and design preference.
Advantages
- Allows fastening where studs are unavailable
- Many types install quickly
- Available for a range of load ratings
- Some can be removed or reused
- Toggle systems distribute load behind the wall
- Useful for retrofit installations
- Requires only small openings
- Widely available
Disadvantages
- Load capacity varies greatly
- Improper anchors can pull out
- Drywall condition affects strength
- Heavy or safety-critical items may require framing
- Removal can leave large holes
- Hidden wiring or plumbing can be damaged during drilling
- Repeated movement loosens some anchors
When to Choose Drywall Anchor
Drywall Anchor is commonly selected when the project involves:
- Light or moderate wall-mounted items
- Stud placement does not align with the accessory
- Manufacturer permits hollow-wall mounting
- The drywall is sound and dry
- Appropriate load-rated anchors are available
- The item is not subjected to major leverage or vibration
- A retrofit installation cannot easily add blocking
- The final choice should be coordinated with the project drawings, site conditions, applicable codes, manufacturer instructions, and the needs of the people using the space.
Pristine Pro Tip 💡
For cabinets, grab bars, large mirrors, floating vanities, televisions, and heavy shelving, locate studs or install structural blocking whenever possible. Anchor ratings are often based on ideal laboratory conditions and may not account for leverage, impact, moisture damage, or repeated use.
Common Mistake ❌
The most common mistake is choosing an anchor by screw size rather than actual load and wall condition. Another is using a light-duty plastic anchor for an item that is pulled, leaned on, or cantilevered away from the wall.
Designer Insight 🎨
Concealed fasteners help accessories and floating elements look clean, but safe support should never be sacrificed for appearance. During remodeling, adding blocking before drywall is installed gives designers more freedom to place mirrors, bars, shelves, and cabinetry precisely.
Florida Rating 🌴
⭐⭐⭐⭐ Good
Drywall anchors work in Florida’s conditioned interiors, but damp or previously water-damaged drywall has reduced holding strength. In bathrooms and laundry rooms, corrosion-resistant fasteners and moisture control are important.
Maintenance Level
⭐ Very Easy
Check mounted items for movement, loose screws, cracked drywall, or widening holes. Do not simply install a larger screw into a failing anchor; remove it, assess the wall, and use an appropriate repair or stronger support method.
Related Terms
Blocking
Stud
Toggle Bolt
Molly Bolt
Fastener
Grab Bar
Floating Shelf
Wall-Mounted Vanity
Drywall
Pilot Hole
-
Drywall Compound
Drywall Compound
Definition
An drywall compound is a paste-like finishing material used with tape and accessories to conceal drywall joints, fasteners, corners, patches, and surface imperfections. In residential and commercial remodeling, it is commonly associated with new drywall installation, wall repairs, ceiling repairs, texture work, skim coating, and level-five finishes.
Depending on the application, drywall compound systems may involve gypsum or limestone-based fillers, binders, water, additives, and lightweight compounds formulated for specific working and drying characteristics. Product selection, dimensions, installation details, compatibility, and manufacturer requirements all influence how well the finished installation performs.
Although homeowners may encounter the term during design or construction, its importance extends beyond appearance. Proper planning and installation help protect surrounding materials, improve daily function, and reduce the likelihood of premature failure or costly corrective work.
Common Applications
Drywall Compound is commonly used for:
- Taping joints
- Covering screw heads
- Finishing inside corners
- Embedding corner bead
- Patching holes
- Skim coating
- Matching wall texture
- Repairing cracks
- Level 5 finishes
- Ceiling repairs
Common Types of Drywall Compound
Common variations include:
- All-purpose compound
- Lightweight compound
- Topping compound
- Setting-type compound
- Premixed compound
- Quick-setting compound
- Dust-control compound
- Skim-coat compound
- Each type is intended for a particular combination of use, material, installation method, performance requirement, and design preference.
Advantages
- Creates a seamless surface
- Easy to sand in appropriate formulations
- Available with different set times
- Useful for both installation and repair
- Can be textured or smoothed
- Accepts primer and paint
- Setting compounds provide faster turnaround
- Lightweight products reduce sanding effort
Disadvantages
- Shrinks as it dries
- Multiple coats are usually required
- Poor technique leaves ridges and visible joints
- Dust from sanding can spread widely
- Premixed compound can dry slowly in humid conditions
- Over-thick applications may crack
- Not intended to repair active structural movement
When to Choose Drywall Compound
Drywall Compound is commonly selected when the project involves:
- Finishing new drywall
- Repairing patches
- Concealing fasteners
- Skim coating uneven walls
- Creating smooth painted surfaces
- Blending repaired texture
- Commercial and residential interior finishing
The final choice should be coordinated with the project drawings, site conditions, applicable codes, manufacturer instructions, and the needs of the people using the space.
Pristine Pro Tip 💡
Use the right compound for each coat. Setting-type compound is valuable for deep fills and quick repairs, while topping or lightweight compound sands more easily for final coats. Thin, controlled applications produce a flatter finish than one heavy coat.
Common Mistake ❌
A common mistake is sanding aggressively before the compound is fully dry, tearing the surface and exposing tape. Another is trying to hide a poorly aligned panel or moving crack with extra compound instead of correcting the underlying condition.
Designer Insight 🎨
Wall finish quality strongly affects how paint and lighting appear. Smooth dark walls, glossy paint, long hallways, and grazing light often justify a higher level of drywall finishing because even minor ridges become visible.
Florida Rating 🌴
⭐⭐⭐⭐⭐ Very Good
Drywall compound works well in Florida, but high humidity and limited air movement can extend drying time for premixed products. Conditioned air, ventilation, and measured application thickness help prevent soft joints and schedule delays.
Maintenance Level
⭐ None
Once primed and painted, the compound needs no separate maintenance. Repair cracks, dents, or water stains after addressing their cause. Use compatible primer over repairs to prevent flashing through the finish paint.
Related Terms
Joint Tape
Drywall
Skim Coat
Level 5 Finish
Corner Bead
Drywall Texture
Primer
Setting Compound
Sanding Sponge
Wall Repair
-
Drywall Screw
Drywall Screw
Definition
An drywall screw is a hardened fastener with a bugle-shaped head and sharp threads designed to secure gypsum panels to wood or metal framing without tearing the paper face when properly installed. In residential and commercial remodeling, it is commonly associated with interior walls, ceilings, soffits, fire-rated assemblies, repairs, and commercial partitions.
Depending on the application, drywall screw systems may involve hardened steel with phosphate, zinc, or specialty coatings and thread patterns suited to wood or light-gauge metal framing. Product selection, dimensions, installation details, compatibility, and manufacturer requirements all influence how well the finished installation performs.
Although homeowners may encounter the term during design or construction, its importance extends beyond appearance. Proper planning and installation help protect surrounding materials, improve daily function, and reduce the likelihood of premature failure or costly corrective work.
Common Applications
Drywall Screw is commonly used for:
- Attaching drywall to wood studs
- Attaching drywall to metal studs
- Ceiling installation
- Soffits
- Fire-rated assemblies
- Patches with added backing
- Commercial partitions
- Garage walls
- Moisture-resistant gypsum panels where approved
- Multi-layer drywall systems
Common Types of Drywall Screw
Common variations include:
- Coarse-thread drywall screw
- Fine-thread drywall screw
- Self-drilling drywall screw
- Collated drywall screw
- Corrosion-resistant specialty screw
- Type W screw
- Type S screw
Each type is intended for a particular combination of use, material, installation method, performance requirement, and design preference.
Advantages
- Installs quickly
- Bugle head seats cleanly
- Sharp point starts easily
- Thread types match common framing
- Compatible with screw guns and depth stops
- Provides reliable panel attachment
- Easy to conceal with compound
- Available in many lengths
Disadvantages
- Overdriving breaks the paper face
- Incorrect length can penetrate utilities
- Standard screws may corrode in wet environments
- Fine and coarse threads are not interchangeable for every framing type
- Brittle screws can snap if misused
- Not intended for structural framing connections
When to Choose Drywall Screw
Drywall Screw is commonly selected when the project involves:
- Standard drywall installation
- Ceilings requiring screw fastening
- Metal-stud partitions
- Multi-layer gypsum assemblies
- Repairs with proper backing
- Projects following a tested wall or ceiling assembly
Replacing loose nails in older drywall
The final choice should be coordinated with the project drawings, site conditions, applicable codes, manufacturer instructions, and the needs of the people using the space.
Pristine Pro Tip 💡
Use a drywall screw gun or depth-setting bit so the head dimples the paper slightly without breaking it. Screws with torn paper have reduced holding power and should be supplemented nearby rather than simply covered with compound.
Common Mistake ❌
The most common mistake is driving screws too deep. Another is using drywall screws for structural framing, cabinet installation, or exterior construction; they are hardened and brittle and are not substitutes for approved structural fasteners.
Designer Insight 🎨
Drywall screws disappear after finishing, but consistent fastening prevents pops and surface movement that become visible under smooth paint and directional lighting. Good fastening is part of achieving a refined final wall.
Florida Rating 🌴
⭐⭐⭐⭐⭐ Very Good
Drywall screws perform well in conditioned Florida interiors. Standard phosphate-coated screws are not intended for direct wet or exterior exposure. In moisture-prone assemblies, use the fasteners specified by the board and system manufacturer.
Maintenance Level
⭐ None
No maintenance is required once finished. A visible screw pop should be reset or replaced and then refinished, but recurring movement may indicate framing shrinkage, panel movement, or moisture that should be investigated.
Related Terms
Drywall
Stud
Metal Stud
Screw Gun
Fastener
Drywall Compound
Screw Pop
Gypsum Board
Blocking
Type X Drywall
-
Drywall Texture
Drywall Texture
Definition
An drywall texture is a decorative or functional surface pattern applied to finished drywall to create visual variation, conceal minor imperfections, or match an existing wall or ceiling finish. In residential and commercial remodeling, it is commonly associated with walls, ceilings, repairs, remodels, production homes, custom interiors, and commercial spaces.
Depending on the application, drywall texture systems may involve thinned joint compound, texture coatings, spray equipment, rollers, brushes, trowels, knives, and specialty additives. Product selection, dimensions, installation details, compatibility, and manufacturer requirements all influence how well the finished installation performs.
Although homeowners may encounter the term during design or construction, its importance extends beyond appearance.
Proper planning and installation help protect surrounding materials, improve daily function, and reduce the likelihood of premature failure or costly corrective work.
Common Applications
Drywall Texture is commonly used for:
- Living room walls
- Bedroom walls
- Ceilings
- Hallways
- Production homes
- Repair blending
- Commercial interiors
- Rental properties
- Accent walls
- Whole-home texture updates
Common Types of Drywall Texture
Common variations include:
- Orange peel
- Knockdown
- Skip trowel
- Popcorn ceiling
- Sand texture
- Santa Fe texture
- Slap brush
- Smooth finish
- Venetian or decorative plaster-like finishes
Each type is intended for a particular combination of use, material, installation method, performance requirement, and design preference.
Advantages
- Conceals minor surface variation
- Adds visual depth
- Can match regional or existing finishes
- Often faster than achieving perfectly smooth walls
- Available in subtle or pronounced patterns
- Helps disguise small future repairs
- Can reduce visibility of joints under certain lighting
- Offers stylistic variety
Disadvantages
- Collects dust when heavily textured
- Difficult to patch invisibly
- Can make rooms feel dated if overly aggressive
- Harder to clean than smooth walls
- Pattern consistency requires skill
- Removing texture creates labor and dust
- Strong texture competes with other finishes
When to Choose Drywall Texture
Drywall Texture is commonly selected when the project involves:
- Matching existing walls after remodeling
- Homes where a regional texture is desired
- Ceilings with minor visual irregularities
- Projects balancing cost and finish level
- Interiors seeking handcrafted movement
- Rental or high-traffic spaces
- Designs that do not require perfectly smooth modern walls
- The final choice should be coordinated with the project drawings, site conditions, applicable codes, manufacturer instructions, and the needs of the people using the space.
Pristine Pro Tip 💡
Approve a physical texture sample under the actual room lighting before applying it throughout the space. Texture names are subjective, and “light knockdown” or “orange peel” can vary significantly by installer, spray pressure, mix, and technique.
Common Mistake ❌
A common mistake is trying to match texture without feathering beyond the repair area. Another is painting before the texture is fully dry and properly primed, which can create sheen differences and visible patches.
Designer Insight 🎨
Smooth walls feel crisp and contemporary, while light orange peel or skip trowel can add softness and hide minor variation. Texture should complement cabinetry, tile, lighting, and architecture rather than becoming the strongest visual element by accident.
Florida Rating 🌴
⭐⭐⭐⭐⭐ Excellent
Textured drywall is common in Florida homes and performs well when the building is conditioned and dry. Humidity can slow drying during application, and heavily textured surfaces in bathrooms require good ventilation to prevent dust and moisture buildup.
Maintenance Level
⭐⭐ Easy
Dust with a soft brush or vacuum attachment, clean gently to avoid flattening raised texture, and repair water stains only after correcting the leak. Keep a record or sample of the texture method for future patching.
Related Terms
Orange Peel Texture
Knockdown Texture
Skip Trowel
Popcorn Ceiling
Skim Coat
Level 5 Finish
Drywall Compound
Primer
Wall Finish
Texture Match
-
Dovetail Drawer
Dovetail Drawer
Definition
An dovetail drawer is a drawer box assembled with interlocking wedge-shaped pins and tails at the corners, creating a strong mechanical joint that resists pulling apart. In residential and commercial remodeling, it is commonly associated with kitchen cabinets, bathroom vanities, custom closets, furniture, built-ins, and premium casework.
Depending on the application, dovetail drawer systems may involve solid maple, birch, beech, oak, walnut, plywood, and occasionally engineered wood components combined with solid dovetailed sides. Product selection, dimensions, installation details, compatibility, and manufacturer requirements all influence how well the finished installation performs.
Although homeowners may encounter the term during design or construction, its importance extends beyond appearance. Proper planning and installation help protect surrounding materials, improve daily function, and reduce the likelihood of premature failure or costly corrective work.
Common Applications
Dovetail Drawer is commonly used for:
- Kitchen base cabinets
- Pot and pan drawers
- Vanity drawers
- Custom closets
- Built-in storage
- Furniture
- Pantry cabinets
- Office cabinetry
- Mudroom storage
- Luxury casework
Common Types of Dovetail Drawer
Common variations include:
- Machine-cut dovetail
- Hand-cut dovetail
- Half-blind dovetail
- Through dovetail
- English dovetail drawer
- French dovetail drawer
- Each type is intended for a particular combination of use, material, installation method, performance requirement, and design preference.
Advantages
- Excellent resistance to joint separation
- Long service life
- Recognized indicator of quality cabinetry
- Large glue surface area
- Attractive craftsmanship
- Performs well under repeated opening
- Compatible with full-extension and soft-close slides
- Can be repaired or refinished in quality wood systems
Disadvantages
- Higher manufacturing cost
- Poorly cut joints may still be weak
- Solid wood can move with humidity
- Not necessary for every light-duty application
- Replacement boxes require accurate sizing
- Visible end grain may not suit every contemporary design
When to Choose Dovetail Drawer
Dovetail Drawer is commonly selected when the project involves:
- High-use kitchen cabinetry
- Heavy storage drawers
- Custom or semi-custom cabinets
- Furniture-quality interiors
- Homeowners prioritizing durability
- Drawers expected to remain in service for decades
Projects where interior craftsmanship matters
The final choice should be coordinated with the project drawings, site conditions, applicable codes, manufacturer instructions, and the needs of the people using the space.
Pristine Pro Tip 💡
Inspect more than the dovetail corners. A durable drawer also needs a substantial bottom, quality material, accurate machining, strong slide attachment, and hardware rated for the expected load. The joint is one part of the system.
Common Mistake ❌
A common mistake is assuming any visible dovetail automatically means premium construction. Loose joints, thin sides, lightweight bottoms, or low-grade slides can undermine the benefit. Another is overloading wide drawers without adequate slide capacity.
Designer Insight 🎨
Dovetail drawers add a subtle luxury detail that becomes visible each time the drawer is opened. Clear-finished maple creates a clean cabinet interior, while walnut or contrasting wood can make custom storage feel furniture-like.
Florida Rating 🌴
⭐⭐⭐⭐⭐ Very Good
Dovetail drawers perform very well in Florida’s conditioned interiors. Quality kiln-dried wood and stable cabinet humidity reduce movement. Plumbing leaks should be addressed immediately because swollen wood can bind the drawer and stress the joints.
Maintenance Level
⭐⭐ Easy
Keep drawers clean and dry, avoid exceeding the slide rating, and inspect for movement or loose hardware. Wood drawer boxes may be wiped with a lightly damp cloth and dried promptly.
Related Terms
Drawer Box
Drawer Glide
Soft-Close
Full-Extension Slide
Cabinet Box
Custom Cabinetry
Maple Cabinetry
Joinery
Plywood
Cabinet Hardware
-
Drop Ceiling
Drop Ceiling
Definition
An drop ceiling is a secondary ceiling suspended below the structural ceiling using a grid system that supports removable tiles or panels. In residential and commercial remodeling, it is commonly associated with commercial interiors, basements, utility rooms, offices, retail spaces, and areas requiring frequent access to overhead systems.
Depending on the application, drop ceiling systems may involve metal suspension grid, mineral-fiber tiles, fiberglass panels, PVC panels, metal panels, acoustic products, hanger wires, and perimeter molding. Product selection, dimensions, installation details, compatibility, and manufacturer requirements all influence how well the finished installation performs.
Although homeowners may encounter the term during design or construction, its importance extends beyond appearance. Proper planning and installation help protect surrounding materials, improve daily function, and reduce the likelihood of premature failure or costly corrective work.
Common Applications
Drop Ceiling is commonly used for:
- Commercial offices
- Retail spaces
- Restaurants
- Basements
- Utility rooms
- Mechanical rooms
- Medical offices
- Schools
- Conference rooms
- Tenant improvements
Common Types of Drop Ceiling
Common variations include:
- Exposed T-grid ceiling
- Concealed-grid ceiling
- Acoustic tile ceiling
- PVC drop ceiling
- Metal panel ceiling
- Decorative coffered grid ceiling
- Cloud or partial suspended ceiling
Each type is intended for a particular combination of use, material, installation method, performance requirement, and design preference.
Advantages
- Provides access to plumbing, wiring, and HVAC
- Can improve acoustics
- Conceals uneven structure and utilities
- Damaged tiles are individually replaceable
- Integrates lights and diffusers
- Installs below existing ceilings
- Available in moisture-resistant and washable panels
- Useful for commercial reconfiguration
Disadvantages
- Reduces ceiling height
- Standard tiles can look institutional
- Tiles may stain from leaks
- Grid alignment requires precision
- Some panels sag in humidity
- Not ideal for every residential design
- Above-ceiling space can collect dust
- Fire and seismic requirements may apply
When to Choose Drop Ceiling
Drop Ceiling is commonly selected when the project involves:
- Frequent overhead access is needed
- Commercial tenant improvements
- Basements with exposed utilities
- Acoustic control is important
- Existing ceilings are difficult to repair
- Mechanical systems require flexible access
- A decorative grid system suits the design
The final choice should be coordinated with the project drawings, site conditions, applicable codes, manufacturer instructions, and the needs of the people using the space.
Pristine Pro Tip 💡
Select panels for the actual environment. Standard mineral-fiber tiles may sag or stain in humid rooms, while moisture-resistant PVC, fiberglass, or specialized acoustic panels perform better. Coordinate the grid with lighting, sprinklers, diffusers, and partitions before installation.
Common Mistake ❌
A common mistake is setting the ceiling height without checking doors, windows, cabinets, equipment, and code-required clearances. Another is replacing stained tiles without finding the source of the leak above.
Designer Insight 🎨
Drop ceilings can move beyond basic office tile. Narrow grids, black suspension systems, wood-look panels, coffers, acoustic clouds, and integrated linear lighting can create an intentional architectural ceiling while preserving access.
Florida Rating 🌴
⭐⭐⭐⭐ Good
Drop ceilings are practical in Florida commercial spaces, but panel selection must account for humidity, roof leaks, and air-conditioning conditions. Moisture-resistant tiles and corrosion-resistant grid components are valuable in coastal or high-humidity settings.
Maintenance Level
⭐⭐ Easy
Vacuum or dust panels, replace stained or damaged tiles, keep the plenum dry, and inspect suspension wires and grid after work above the ceiling. Use only replacement panels compatible with the fire, acoustic, and moisture requirements of the system.
Related Terms
Acoustic Ceiling Tile
Suspension Grid
Ceiling Plenum
Recessed Lighting
HVAC Diffuser
Commercial Remodeling
Soffit
Ceiling Tile
Access Panel
Sound Control
-
Drop-In Sink
Drop-In Sink
Definition
An drop-in sink is a sink installed from above through a countertop opening, with a visible rim that rests on and overlaps the countertop surface. In residential and commercial remodeling, it is commonly associated with kitchens, bathrooms, laundry rooms, utility rooms, bars, rental properties, and replacement projects.
Depending on the application, drop-in sink systems may involve stainless steel, cast iron, porcelain, fireclay, composite granite, quartz composite, acrylic, and solid surface. Product selection, dimensions, installation details, compatibility, and manufacturer requirements all influence how well the finished installation performs.
Although homeowners may encounter the term during design or construction, its importance extends beyond appearance. Proper planning and installation help protect surrounding materials, improve daily function, and reduce the likelihood of premature failure or costly corrective work.
Common Applications
Drop-In Sink is commonly used for:
- Kitchen countertops
- Laminate countertops
- Bathroom vanities
- Laundry rooms
- Utility sinks
- Bar areas
- Rental units
- Budget-conscious remodels
- DIY-friendly replacements
- Commercial break rooms
Common Types of Drop-In Sink
Common variations include:
- Self-rimming sink
- Top-mount kitchen sink
- Drop-in vanity sink
- Drop-in bar sink
- Drop-in laundry sink
- Single-bowl drop-in sink
- Double-bowl drop-in sink
- Each type is intended for a particular combination of use, material, installation method, performance requirement, and design preference.
Advantages
- Installs from above
- Compatible with many countertop materials
- Visible rim supports the fixture
- Often easier and less expensive to replace
- Works well with laminate counters
- Wide range of sizes and materials
- Minor cutout imperfections are concealed
- Can be serviced without removing the countertop
Disadvantages
- Rim collects crumbs and residue
- Less seamless than an undermount sink
- Caulk can discolor or fail
- Countertop wiping is less convenient
- Visible rim may look more traditional or utilitarian
- Heavy sinks still require proper clips and support
When to Choose Drop-In Sink
Drop-In Sink is commonly selected when the project involves:
- Laminate countertops
- Budget-conscious remodels
- Replacement projects using an existing cutout
- Utility and laundry rooms
- Rental properties
- Homeowners prioritizing easy installation
- Countertops unsuitable for exposed undermount edges
The final choice should be coordinated with the project drawings, site conditions, applicable codes, manufacturer instructions, and the needs of the people using the space.
Pristine Pro Tip 💡
Dry-fit the sink and verify faucet, backsplash, clip, and cabinet clearances before applying sealant. The rim must be fully supported and sealed, but excess sealant should be removed carefully so the finished edge remains clean.
Common Mistake ❌
A common mistake is relying on caulk alone instead of installing all required clips or supports. Another is using harsh tools around the rim, damaging the countertop or scratching the sink finish.
Designer Insight 🎨
Drop-in sinks can look intentional in traditional, farmhouse, utility, and retro-inspired spaces. Selecting a thin-profile rim and coordinating the sink finish with the faucet and hardware creates a cleaner appearance.
Florida Rating 🌴
⭐⭐⭐⭐⭐ Excellent
Drop-in sinks perform well in Florida, but the perimeter seal should be maintained because water trapped beneath a failed rim can damage laminate, particleboard, wood, and cabinetry in humid conditions.
Maintenance Level
⭐⭐ Easy
Clean around the rim, keep the perimeter seal intact, avoid standing water, and inspect clips and drain connections. Replace deteriorated caulk before moisture reaches the countertop core.
Related Terms
Undermount Sink
Top-Mount Sink
Sink Cutout
Laminate Countertop
Double Bowl Sink
Single Bowl Sink
Sink Clips
Caulk
Drain Assembly
Sink Base Cabinet
-
Drop-In Tub
Drop-In Tub
Definition
An drop-in tub is a bathtub designed to be lowered into a framed platform or deck so the tub rim rests on the surrounding finished surface. In residential and commercial remodeling, it is commonly associated with primary bathrooms, luxury suites, tub decks, corner installations, and custom bathing areas.
Depending on the application, drop-in tub systems may involve acrylic, fiberglass-reinforced acrylic, cast iron, solid surface, composite materials, and occasionally stone or copper. Product selection, dimensions, installation details, compatibility, and manufacturer requirements all influence how well the finished installation performs.
Although homeowners may encounter the term during design or construction, its importance extends beyond appearance.
Proper planning and installation help protect surrounding materials, improve daily function, and reduce the likelihood of premature failure or costly corrective work.
Common Applications
Drop-In Tub is commonly used for:
- Primary bathrooms
- Tub decks
- Corner bathing areas
- Whirlpool installations
- Large bathroom suites
- Hotel-style bathrooms
- Custom tile surrounds
- Accessible bathing layouts with deck seating
- Traditional luxury bathrooms
- Replacement of older platform tubs
Common Types of Drop-In Tub
Common variations include:
- Rectangular drop-in tub
- Corner drop-in tub
- Oval drop-in tub
- Whirlpool drop-in tub
- Air bath
- Soaking tub
- Undermount-capable tub
- Each type is intended for a particular combination of use, material, installation method, performance requirement, and design preference.
Advantages
- Creates a built-in custom appearance
- Deck provides space for toiletries or seating
- Available with soaking, whirlpool, and air systems
- Can fit corner or rectangular layouts
- Allows coordinated tile or slab surround
- Plumbing can be concealed within the platform
- Wide variety of sizes and depths
- Deck can integrate steps or storage when safely designed
Disadvantages
- Requires substantial floor space
- Deck increases cleaning area
- Access panels are necessary for service
- Water can collect on the surrounding deck
- Installation is more complex than an alcove tub
- Can feel dated if the platform is oversized
- Difficult to replace without disturbing finishes
When to Choose Drop-In Tub
Drop-In Tub is commonly selected when the project involves:
- A built-in bathing feature is desired
- The room has ample space
- A whirlpool or air bath requires concealed equipment
- The deck can be designed with safe entry
- The aesthetic suits traditional or transitional interiors
- Service access can be incorporated
- The homeowner values soaking over open floor area
The final choice should be coordinated with the project drawings, site conditions, applicable codes, manufacturer instructions, and the needs of the people using the space.
Pristine Pro Tip 💡
Plan service access before closing the tub deck. Pumps, valves, supply connections, and waste assemblies must remain reachable. Also confirm how the user will enter and exit; wide tile decks can make a deep tub difficult or unsafe to access.
Common Mistake ❌
A common mistake is creating a platform that is too wide to step across comfortably. Another is omitting an access panel or placing it where cabinetry or fixtures later block it.
Designer Insight 🎨
Drop-in tubs can feel elegant when the deck is proportioned tightly and finished with slab material, large-format porcelain, or restrained tile. Oversized tiled platforms with many grout lines tend to feel heavier and more dated.
Florida Rating 🌴
⭐⭐⭐⭐⭐ Very Good
Drop-in tubs perform well in Florida when the surrounding deck is waterproofed and the bathroom is ventilated. Hidden plumbing leaks are a concern, so access and moisture-resistant materials are especially important.
Maintenance Level
⭐⭐⭐ Moderate
Clean the tub and deck, dry standing water, maintain sealant joints, and service jets according to the manufacturer. Periodically inspect the access area for leaks, corrosion, and pump operation.
Related Terms
Alcove Bathtub
Freestanding Tub
Undermount Tub
Tub Deck
Whirlpool Tub
Air Bath
Roman Tub Filler
Waste and Overflow
Bathroom Waterproofing
Access Panel
-
Dust Containment
Dust Containment
Definition
An dust containment is a coordinated system of barriers, air control, filtration, cleaning, and work practices used to prevent construction dust from spreading beyond a remodeling zone. In residential and commercial remodeling, it is commonly associated with demolition, drywall sanding, tile removal, concrete cutting, cabinet installation, flooring removal, and occupied-home remodeling.
Depending on the application, dust containment systems may involve polyethylene sheeting, zipper doors, rigid barriers, floor protection, HEPA air scrubbers, negative-air machines, vacuums, filters, mats, and sealed HVAC registers. Product selection, dimensions, installation details, compatibility, and manufacturer requirements all influence how well the finished installation performs.
Although homeowners may encounter the term during design or construction, its importance extends beyond appearance. Proper planning and installation help protect surrounding materials, improve daily function, and reduce the likelihood of premature failure or costly corrective work.
Common Applications
Dust Containment is commonly used for:
- Kitchen demolition
- Bathroom demolition
- Drywall sanding
- Tile removal
- Concrete grinding
- Flooring removal
- Cabinet cutting
- Occupied commercial remodeling
- Water-damage reconstruction
- Lead-safe renovation
Common Types of Dust Containment
Common variations include:
- Poly barrier containment
- Rigid temporary wall containment
- Negative-air containment
- HEPA filtration
- Localized tool extraction
- Dust-wall systems
- Occupied-space containment
- Lead-safe containment
Each type is intended for a particular combination of use, material, installation method, performance requirement, and design preference.
Advantages
- Protects occupied areas
- Reduces cleanup
- Improves indoor air quality
- Limits dust entering HVAC systems
- Protects furniture and electronics
- Creates a safer work environment
- Improves professionalism and customer comfort
- Helps control silica, gypsum, wood, and nuisance dust when matched with proper methods
Disadvantages
- Requires setup time and space
- Barriers need continuous inspection
- Negative air can affect doors and HVAC balance
- Filters and plastic must be replaced
- Not all dust hazards are controlled by simple plastic sheeting
- Poorly planned access can tear containment
- Equipment adds cost and noise
When to Choose Dust Containment
Dust Containment is commonly selected when the project involves:
- The home remains occupied
- Demolition or sanding will create significant dust
- Sensitive occupants or equipment are present
- Work occurs near finished rooms
- Silica-producing materials are cut or removed
- Commercial operations continue nearby
- Regulated material practices require containment
- The final choice should be coordinated with the project drawings, site conditions, applicable codes, manufacturer instructions, and the needs of the people using the space.
Pristine Pro Tip 💡
Containment works best when dust is captured at the source, the work zone is kept under appropriate negative pressure, and workers follow a clean entry and exit routine. A plastic doorway alone is not a complete dust-control plan.
Common Mistake ❌
A common mistake is placing barriers but leaving HVAC returns, ceiling openings, and floor gaps unsealed. Another is using a household vacuum without proper filtration, which can redistribute fine dust into the room.
Designer Insight 🎨
Temporary protection is not part of the finished design, but it strongly influences the remodeling experience. Clean, well-organized containment helps homeowners continue using unaffected areas and demonstrates care for the existing home.
Florida Rating 🌴
⭐⭐⭐⭐⭐ Excellent
Dust containment is especially valuable in Florida because air-conditioning systems operate much of the year and can rapidly distribute fine particles throughout a home. Humidity also causes dust to adhere to surfaces, making prevention easier than whole-house cleanup.
Maintenance Level
⭐⭐⭐ Daily During Construction
Inspect barriers, zippers, seals, floor protection, filters, and pressure conditions throughout the work. Clean the work zone regularly, replace loaded filters, and perform a final HEPA cleaning before dismantling containment.
Related Terms
Demolition
HEPA Vacuum
Air Scrubber
Negative Air
Silica Dust
Site Protection
Floor Protection
Lead-Safe Renovation
HVAC Protection
Construction Cleaning
-
Design-Build
Design-Build
Definition
An design-build is a project-delivery approach in which design and construction services are coordinated through one integrated team or primary contracting relationship. In residential and commercial remodeling, it is commonly associated with kitchen remodels, bathroom remodels, whole-home renovations, additions, commercial tenant improvements, and complex phased projects.
Depending on the application, design-build systems may involve not a physical material, but a coordinated process involving design documents, selections, estimates, schedules, trade planning, procurement, and construction management. Product selection, dimensions, installation details, compatibility, and manufacturer requirements all influence how well the finished installation performs.
Although homeowners may encounter the term during design or construction, its importance extends beyond appearance. Proper planning and installation help protect surrounding materials, improve daily function, and reduce the likelihood of premature failure or costly corrective work.
Common Applications
Design-Build is commonly used for:
- Kitchen remodeling
- Bathroom remodeling
- Whole-home renovation
- Commercial tenant improvements
- Complex custom cabinetry
- Projects with moved walls or utilities
- Material-intensive renovations
- Phased occupied-home work
- Accessibility remodeling
- Projects requiring early budget coordination
Common Types of Design-Build
Common variations include:
- Full-service design-build firm
- Contractor-led design-build
- Designer-led design-build partnership
- Architect-led design-build
- Integrated residential remodeling team
- Commercial design-build delivery
- Each type is intended for a particular combination of use, material, installation method, performance requirement, and design preference.
Advantages
- Single point of coordination
- Design decisions are informed by construction realities
- Budget feedback can occur earlier
- Selections and scope can be coordinated
- Fewer gaps between designer and contractor
- Schedule and procurement planning can begin sooner
- Changes can be evaluated collaboratively
- Accountability is more centralized
Disadvantages
- The quality depends heavily on the team’s internal process
- Homeowners may have fewer separately competing design and construction proposals
- Scope must be clearly documented
- Allowances and selections still require careful management
- Poor communication within the team can affect both design and construction
- Not every project or client prefers an integrated relationship
When to Choose Design-Build
Design-Build is commonly selected when the project involves:
- The homeowner wants one coordinated team
- Budget must guide design decisions early
- The remodel has many interdependent selections
- Constructability and lead times matter
- A complex project benefits from continuous collaboration
- The client values streamlined communication
- Design and construction schedules overlap
- The final choice should be coordinated with the project drawings, site conditions, applicable codes, manufacturer instructions, and the needs of the people using the space.
Pristine Pro Tip 💡
A strong design-build process should still provide clear drawings, scope, selections, pricing assumptions, change procedures, and decision deadlines. Integration does not eliminate documentation; it makes coordinated documentation even more important.
Common Mistake ❌
A common mistake is assuming design-build means every decision can be postponed until construction begins. Late selections create delays, substitutions, and change costs. Another is failing to define which design services, permits, engineering, and trade scopes are included.
Designer Insight 🎨
Design-build can produce a more cohesive result because layout, cabinetry, lighting, tile, plumbing, and construction details are developed together. The best teams balance creativity with installation requirements, budget, maintenance, and long-term function.
Florida Rating 🌴
⭐⭐⭐⭐⭐ Excellent
Design-build is especially useful in Florida remodeling, where concrete slabs, humidity, storm requirements, permitting variations, condominium rules, and long material lead times can affect design decisions. Early coordination helps identify these constraints before construction.
Maintenance Level
⭐ Not Applicable
The delivery method itself requires no physical maintenance. Homeowners should retain drawings, selections, warranties, care instructions, contracts, and final project records for future repairs, maintenance, and resale documentation.
Related Terms
Interior Designer
General Contractor
Project Manager
Construction Documents
Scope of Work
Preconstruction
Selections Schedule
Change Order
Value Engineering
Remodeling Consultation
Remodeling Glossary-D FAQs
Explore common questions related to remodeling terminology, construction vocabulary, and design language to better understand the terms featured in Letter D.
Does every remodeling project require demolition?
No. Some renovations focus on cosmetic improvements, while others involve removing existing materials to improve layouts, plumbing, or structural components.
Why is drywall finishing so important?
Even beautiful paint can't hide poor drywall work. Smooth finishing creates the foundation for high-quality walls, ceilings, and trim throughout the home.
What happens after demolition is complete?
Once demolition is finished, contractors inspect framing, plumbing, electrical, and other systems before rebuilding begins. This helps identify hidden issues before new finishes are installed.
Can changing a doorway improve the flow of a home?
Absolutely. Widening or relocating door openings can dramatically improve traffic flow, accessibility, and the overall feel of a space.
Is a dado joint stronger than simply screwing a shelf between two cabinet sides?
In many cabinet applications, yes. A dado supports the shelf along its edge, increases glue surface area, and helps prevent shifting. Screws or pins may still be added, but the joint itself provides alignment and load support that a basic butt joint does not.
Can a damp-rated light be installed inside a shower?
Only when the specific fixture is also listed for the exact shower or tub location and permitted by applicable electrical requirements. In most cases, direct spray or exposed shower zones require a wet-location-rated fixture.
Is Dekton the same as quartz?
No. Both are engineered slab products, but their composition and manufacturing processes differ. Dekton is an ultra-compact sintered surface with strong UV and heat resistance, while most quartz countertops use mineral aggregate bound with resin and are generally recommended for interior use.
Can homeowners stay in the house during demolition?
Sometimes, depending on the size of the project, access to essential rooms, dust containment, noise, safety, and utility interruptions. For large renovations or work involving hazardous materials, temporary relocation may be safer and more practical.
Is designer tile only appropriate for luxury projects?
No. Designer tile can be used selectively in a small niche, powder room, backsplash, or border to create impact without covering a large area. Thoughtful placement often matters more than the total quantity used.
Why do LED lights flicker when dimmed?
Flicker commonly results from an incompatible dimmer, incompatible LED driver, a load below the dimmer’s minimum, wiring problems, or a low-quality lamp. Using tested compatible components usually resolves the issue.
Is a dishwasher air gap the same as a high loop?
No. Both are intended to reduce backflow risk, but an air gap creates a true physical separation above the flood level of the sink. A high loop raises the drain hose beneath the counter. Whether a high loop is accepted depends on local requirements and the appliance installation instructions.
Does door casing have to match the baseboards?
It does not have to be identical, but the profiles should relate in scale, style, thickness, and finish. Many coordinated trim packages use casing that is slightly thicker than the baseboard so the intersection terminates cleanly.
Can a damaged door jamb be repaired without replacing the door?
Often, yes. Localized damage around a strike plate, hinge, or small area of rot may be repairable. Extensive twisting, water damage, or deterioration around an exterior threshold may justify replacing the frame or complete prehung unit.
Is a double bowl sink better than a single bowl sink?
It depends on how the kitchen is used. Double bowls are useful for separating tasks, while a large single bowl accommodates oversized cookware more easily. The best choice is based on workflow, cabinet size, and cleaning habits.
How much space is needed for a double-island kitchen?
There is no single minimum because the answer depends on island size, appliance locations, seating, traffic, and door swings. The room must provide comfortable working aisles around both islands without compromising adjacent circulation. A scaled plan is essential.
What is the difference between full-extension and three-quarter-extension drawer slides?
Full-extension slides allow nearly the entire drawer box to move beyond the cabinet face, providing access to items at the back. Three-quarter-extension slides leave part of the drawer inside the cabinet and are usually less convenient for deep storage.
Is dry pack the same as concrete?
No. Dry pack uses a sand-rich, low-water mix designed to be compacted and shaped. Conventional concrete normally contains coarse aggregate and more water and is not used the same way for forming a precise shower-floor slope.
Can moisture-resistant drywall be used inside a shower?
Not as the waterproof tile substrate unless the complete assembly is specifically approved for that use. Showers generally require an appropriate backer and waterproofing system detailed according to the selected manufacturer.
What is a comfortable width for a double vanity?
Comfort depends on sink size, storage configuration, and user needs. Many double vanities begin around 60 inches, but larger widths often provide better spacing and drawer storage. A scaled cabinet plan is more reliable than relying on one standard number.
How much weight can a drywall anchor hold?
Capacity depends on the anchor type, drywall thickness and condition, installation quality, load direction, and manufacturer rating. Light plastic anchors may hold only small accessories, while properly installed toggle systems can support substantially more. Heavy or safety-critical items should use framing or engineered support.
What is the difference between drying-type and setting-type drywall compound?
Drying-type compound hardens as water evaporates and may take longer in humid conditions. Setting-type compound hardens through a chemical reaction and is sold in timed formulations, making it useful for faster or deeper repairs.
Why do drywall screw heads sometimes pop through paint?
Screw pops may result from framing movement, improper depth, loose panels, moisture changes, or inadequate fastening. The repair usually includes securing the panel with a nearby screw, removing or resetting the loose fastener, and refinishing the area.
Can textured walls be changed to a smooth finish?
Yes. Depending on the existing texture, the surface may be skim coated, sanded, overlaid, or partially removed before refinishing. Achieving a high-quality smooth result can require multiple coats and careful lighting evaluation.
Are dovetail drawers stronger than stapled drawers?
Generally, yes. The interlocking joint mechanically resists pulling apart and provides substantial glue area. However, overall performance still depends on material quality, bottom construction, workmanship, and slide hardware.
Can a drop ceiling be used in a bathroom?
Yes, when the grid and panels are specifically rated for high humidity and the room has effective ventilation. Standard mineral-fiber tiles may sag, stain, or support microbial growth if repeatedly exposed to moisture.
Can a drop-in sink be replaced with an undermount sink?
Sometimes, but the countertop material, cutout shape, edge condition, cabinet space, and support method must be evaluated. Laminate counters generally require specialized sink systems or countertop replacement for a true undermount appearance.
What is the difference between a drop-in tub and an undermount tub?
A drop-in tub has a visible rim resting on the deck. An undermount installation conceals the rim beneath the deck material, producing a cleaner transition. Only tubs specifically approved for undermount installation should be used that way.
Does closing the door to the room provide enough dust containment?
Usually not. Dust travels through gaps, under doors, through HVAC pathways, and on clothing and tools. Effective containment typically includes sealed barriers, source capture, filtration, protected pathways, and planned cleaning procedures.
Is design-build the same as hiring a general contractor?
Not necessarily. A contractor may provide construction only, while a design-build team coordinates both design and construction under an integrated process. Licensing, scope, and contractual structure vary, so homeowners should review exactly which services and responsibilities are included.